 Let’s be real: a health journey is not always linear and not always easy. Sometimes it can be overwhelming and mucky. What do you do? Where do you start? What if you backslid and need to get back on track? There is so much to health, right? If you try to fix it all at once, you might become overwhelmed and at a greater risk of failure.
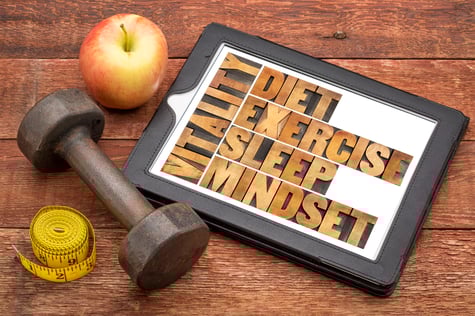
Small Actions That Will Have a Big Impact on Your Health
Start with the things that seem small but make the most impact on your health.In this blog I identify five areas that will give you the biggest results for your efforts. Spoiler alert: none require silly supplements, tummy wraps, or popular diets such as Keto or Paleo.
Get 7–8 hours of sleep each night.
Sleep is our body's cheat code for restoration, rebuilding, and recovery from all of the sources of stress. You can eat all the nutritious foods in the world and exercise for hours, but if you are not sleeping, hormone imbalance starts working against you and halts your physical goals.
Fun Fact: A study at UC San Francisco found that those who sleep less than 5 hours are 4.5 times more likely to develop the common cold compared to those who sleep 7 hours. So hit the hay and keep infection at bay! Your body will thank you later.
Manage stress and mental health.
We all have stress. It’s important to manage the stress instead of using negative coping mechanisms, such as overeating, sleeping all day, isolating ourselves, and falling into the “I can’t change this” trap.
YOU CAN CHANGE THIS. You can get through this, and you can manage the stress in your life. Coping has its place in the health cycle, but ultimately, we want to shift into the “stress management” part of the cycle sooner rather than later. Coping is when we put up with the stress, live with it, and accept that it’s just the way it is (nothing can “lessen” the stress). Managing stress is when we try to lessen the stress by adjusting our thoughts and actions; we find a way to make it better. Examples include music, therapy, exercise, time management, making lists, saying “no,” nature, yoga, meditation, stepping away from toxic relationships, and doing a hobby.
Start dialing in on your nutrition.
What we eat fuels our physical, mental, emotional, and social health. Because of this, nutrition can get a bit complicated sometimes. So, start with small but significant changes and build from there. My suggestion is to start by practicing the 80/20 rule and having a consistent meal pattern.
So what does 80/20 mean? We all know it’s important to eat nutritious, whole foods. But what about those foods we love that aren't necessarily the best for our physical health but are good for our mental and social health (such as sweets, chips, pizza, eating out with friends, holiday food, etc.)? It’s unrealistic to cut these foods and events out of our lives—let’s be real, we have all tried this and failed. It's time to find a balance, one that will still keep you on track for hitting your health and fitness goals.
Here are the #dEATS: 80% of your food intake should be from nutritious, whole foods such as fruits, vegetables, lean proteins, legumes, whole grains, and high-quality dairy (if you’re not lactose intolerant). The other 20% of intake (calorie intake) should be from the foods you love and can't live without, but maybe aren't the greatest for your physical health. Use this 20% when going out with friends once a week, enjoying a sweet treat every other day, or grabbing a small bag of chips to compliment your chicken sandwich.
If you have a calorie goal, track these calories and make them part of your regimen to meet your daily caloric goal. If you do not have a calorie goal, practice portion control. Regardless, be sure to have a consistent meal pattern (3 meals and 2 snacks daily). Remember, there is more to health than just our physical bodies. The two other realms of health are mental and social. Food plays a big role in all three realms that make up health. Therefore, you must have a food plan that meets the needs of all three.
Increase your daily steps or non-exercise activity.
Get up and moving. I know it’s hard to do this, especially for those with desk jobs. But take a 10–15-minute break to walk in place, stretch, and do some deskercise. If you can get out and take a walk with some coworkers during the day or your family at night, do that! This gets your body moving and your metabolism going. You may be surprised at what some extra movement does for your mental and physical health.
Exercise 150–300 minutes per week.
Aside from trying to move throughout your day, plan to exercise 150–300 minutes each week. This exercise should be moderate to high-intensity. Be sure to consult a personal trainer if you are unsure what is best for you. Find something you enjoy and start there.
Incorporate Changes to Your Routine and Then Build on It
These are some starting points. Pick a few and get started. Do not overcomplicate this. No, you do not need a fad diet. No, you do not need a ton of supplements. No, you do not need to overcomplicate the timing of meals or workouts. These BIG FIVE are some of the most important things you can do to improve your health. What you need is to find a routine with all five of these points and build consistency over time. Once these become a part of your everyday life, you can dig deeper into other things, such as supplements, meal timing, and specific exercise movements.
As always, NIFS professionals are here to help! Reach out if you need help implementing any of these big 5 health improvements.

This blog was written by Sabrina Goshen, NIFS Registered Dietitian. To learn more about the NIFS bloggers, click here.
 Let me ask you a question. Have you ever hit a plateau in the weight room when it comes to increasing strength? What about when it comes to increasing power output (vertical jump, short distance sprint)? Well if you have, you are not alone. I know I have hit plateaus in the past and it can definitely be frustrating when you are not able to get past it.
 If you are like most people who enjoy lifting weights, you probably have worn a
  I wish I had a dollar for every time a coach has said to me, “That athlete has stiff hips,” or “That athlete folds over at the waist,” etc. So how do I help an inefficient athlete with stiff hips? I use simple hurdle stretches that train my athletes to bend.
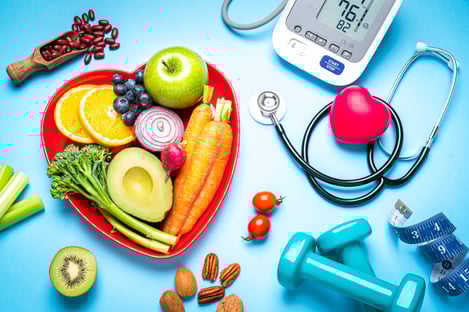 Did you know that cardiovascular disease is one of the leading causes of death?
  Love to workout and need a date idea for Valentine’s Day? We have just the workout for you!
 I am amazed at how many times I have heard and continue to hear people try to make a point by saying “they say,” as if just making that statement somehow makes whatever follows true. It would seem, based on how frequently people claim “they” say something, many of the advancements of human civilization somehow can be traced to the research done at the University of They. However, searching through
 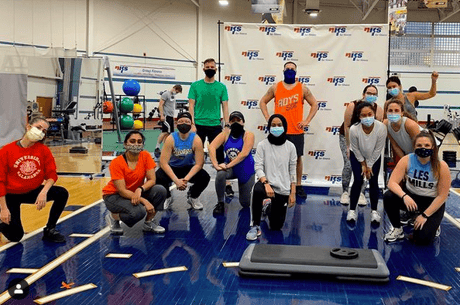 Group fitness
 The plank series needs no equipment, only a wall (if you make it that far). Attempt to complete the plank series in order. Complete the plank progressive series on the days you work out at the end of your workout. If you are x2 days in a row successful and have perfect technique with the exercise, move on to the next progressive variation. You will see that the traditional plank is repeated multiple times and we will add time as you progress along over break. You do not need to do more than what is asked of you. It will be easy at first, but trust me: it gets harder by the end.
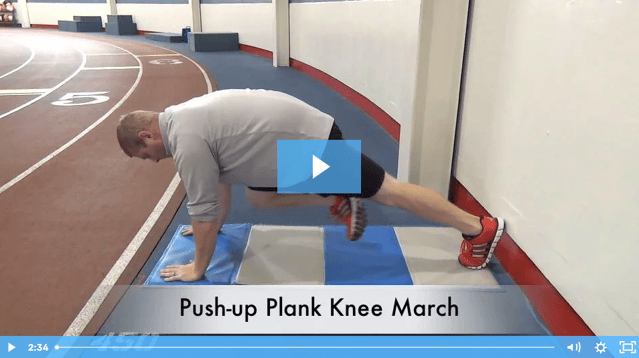
 Think about some top goals you have. Maybe your top goal is to