<img height="1" width="1" style="display:none" src="https://www.facebook.com/tr?id=424649934352787&amp;ev=PageView&amp;noscript=1">

NIFS Healthy Living Blog

The Battle to Keep the Right Fitness Attitude

GettyImages-471737815_low resDo you ever think about who you once were and how it compares to who you are now? What is different? Do you like the differences between the two? While you contemplate, think about how you became who you are today: the process, the trials, the ups and the downs, the victories and the losses, and maybe most importantly the way you now process thoughts and behavioral triggers.

My road hasn’t always been easy. This might be hard for you to believe, but I wasn’t always the happy-go-lucky guy I am today (wink, wink). I know, I can be a little intense, but I used to be far worse. I had to make a change! I have had some help along the way—mainly my beautiful wife, Teri. It has still been a battle, but one I am now happy to fight.

One passage I came across, a Cherokee legend, really spoke to me about my journey. Maybe it will speak to you as well.

The Two Wolves

One evening an old Cherokee told his grandson about a battle that was going on inside himself.

He said, “My son, it is between two wolves. One is evil: anger, envy, sorrow, regret, greed, arrogance, self-pity, guilt, resentment, inferiority, lies, false pride, superiority and ego. The other is good: joy, peace, love, hope, serenity, humility, kindness, benevolence, empathy, generosity, truth, compassion, and faith.”

The grandson thought about this for a minute and then asked his grandfather, “Which wolf wins?”

The old Cherokee simply replied, “The one I feed.”

I know the “evil wolf” remains as my former self, lying dormant until I feed it with old behaviors. I feel this is how I process challenges now, and I refuse to indulge the negative thoughts, actions, and attitude that will wake the wolf I have worked so hard to quiet.

Tony Maloney, Health Fitness Specialist.

Like what you've just read? Click here to subscribe to our blog!

Topics: fitness fitness center motivation attitude

Race Day Nutrition: Before, During, and After

You have trained for the marathon, half-marathon, triathlon or other race, and now it’s the big day! However, you need to make sure you are properly fueling your body with optimal nutrition to guarantee that you will cross the finish line feeling great! Here are some tips to ensure that will happen.

Before the Race154039075

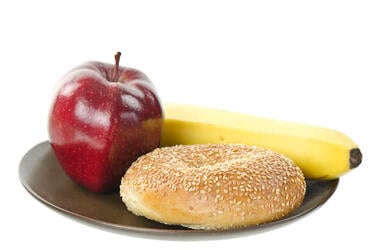
It is essential to have carbohydrates before racing. They provide the best source of energy for your body and give the most efficient fuel for working muscles. Examples of these are whole-wheat pasta, brown rice, whole-grain breads, cereals, bagels, oatmeal, and fruits and vegetables.

Protein helps with sustaining energy for longer periods of time. A small to moderate amount of protein-rich foods is essential before exercising. Examples include skim milk, 1% milk, or low-fat chocolate milk; low-fat cottage cheese or low-fat cheese; boiled eggs; peanut butter; yogurt; a small amount of nuts; lean meat, poultry, or fish; and soy products. Fat is stored in the body and is used as an important energy source. It is especially important for endurance athletes, such as runners.

Try to avoid high-fat foods because they may slow digestion. Examples of high-fat foods are crackers, chips, snack cakes, or muffins. Instead, opt for healthy sources of fat such as peanut butter, nuts, and olive oil.

Eating sugary foods before a race may cause side effects such as upset stomach, diarrhea, and hypoglycemia (low blood sugar). This can have a major effect on your race! You might think you get that burst of energy from the sugar, but the energy will peak quickly and will not last for a long time. Avoid pastries, donuts, and high-sugar cereals.

Drink 2 to 3 cups of fluids such as water, 100% juice, low-fat or skim milk, or a sports beverage two to three hours before the race, and then 1 more cup of fluid 10 to 20 minutes before the race. A small amount of coffee (6 to 8 oz.) may be an option, but be sure that it settles well in your stomach.

During the Race Gels

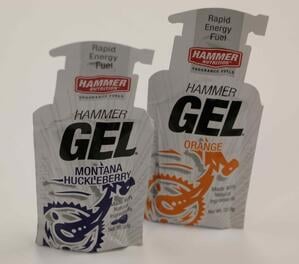
Drink at least 1 cup of fluid every 10 to 20 minutes during exercise (24 to 48 ounces per hour for most people). For every pound you lose during exercise, consume 2 to 3 cups of fluid. It is always good to calculate your sweat rate during training to know the proper amount of fluids you need to be taking in during the race. This can be done by weighing yourself before a workout and immediately afterward.

Water is always an excellent choice during the race, but for durations of longer than 60 to 90 minutes, it is important to take in some type of sports drink. Sports drinks provide a mix of water, carbohydrates, and electrolytes. Electrolytes are lost in sweat during the race, which is why sports drinks help replenish electrolytes in the body.

It is important to intake the proper amount of carbohydrates during the race. Consuming carbohydrates should be a goal during the race to help increase endurance; 60 to 70 grams per hour is recommended. Good options for getting in carbohydrates during the race are sports drinks, energy bars, GUs, gummy blocks, and Sport Beans. If you prefer consuming an energy bar during the race, it is important to consume a bar that is high in carbohydrates, but low in protein and fat. Make sure to take in 4 to 8 ounces of water with the gels or the energy bars to prevent an upset stomach. Consider how your body digests these different items. Go with the item that digests well for you and will help you stay at your optimum performance level. Always practice with these products during training and never try something new on race day.

After the Race

Here are some tips for recovering after the race:

  • Aim to consume a 200- to 300-calorie snack within 30 minutes of finishing the race.
  • Rehydrate with 16 to 24 ounces of fluid for every pound of body weight lost during the race.
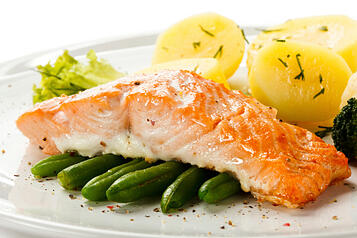
  • Eat a well-balanced meal that includes protein, fluids, carbohydrates, and electrolytes.455658863
  • Aim for 15 to 25 grams of protein to be consumed within 30 to 60 minutes after the race.
  • Take in at least half a gram of carbohydrate per pound of body weight within the first hour after the race.
  • Have salty snacks and sports drinks to help with replacing electrolytes, if it will be 3 to 4 hours until your next well-balanced meal.

Remember that training with certain foods is just as important as the physical training for the event! If you need help, consider a personal nutrition coaching session from NIFS.

If you are interested in having your questions answered during a personal nutrition consultation, please contact Lindsey Recker, lrecker@nifs.org or 317-274-3432, ext 239. Learn more about Nutrition and Wellness services at NIFS.

Like what you've just read? Click here to subscribe to our blog!

This blog was written by Angie Sheetz, Registered Dietitian. Read more about the NIFS bloggers.

Topics: nutrition running marathon training triathlon cycling half marathon hydration endurance

Training to Improve Barefoot Running Strength and Function

453099757Over the past decade, there has been an increase in the popularity of barefoot training or training in a minimalist shoe such as a Vibram Five Fingers, especially with running barefoot. Along with this has come a lot of controversy about whether barefoot training is detrimental or beneficial. No matter which stance you agree with or practice currently, I think anyone would agree that it is important to have functional and strong feet and ankles.

Going barefoot compared to wearing shoes will force your feet and ankle muscles to work harder initially, therefore making them stronger. It will also improve the mobility of the foot and ankle. Wearing a shoe takes a lot of the work away from the foot, which leads to dysfunction, imbalance, and weakness over time. This is all-important because your feet are what connect your body to the ground and ultimately play a contributing factor in your stability, posture, and balance.

For those who have not adopted a barefoot or minimalist shoe lifestyle, it is important to incorporate barefoot exercises into your workout routine to improve foot and ankle function and mobility for these reasons. Here are a few exercises to perform barefoot that you can incorporate into your exercise routine and see quick improvements!

Beginner: Work on single-leg balancing. Press your big toe, small toe, and heel into the ground equally and try to hold your balance on one foot for 20 to 30 seconds.

Intermediate: Once you are comfortable balancing on one foot,try catching and passing a ball to a partner or against a wall in the same position. This will further challenge your balance by adding in the element of movement in the upper body.

Advanced: Incorporate barefoot plyometric exercises. Be sure to reinforce activating the muscles in the foot by landing on the three points of your foot discussed in balancing. One example of a plyometric exercise is to jump over a cone on one foot and land on the same foot on the opposite side.

If you are ready to make exercise a priority in your life NIFS is here to help. Membership at NIFS includes a personal assessment and training programs designed for you by a Health Fitness Specialist. Try NIFS free for 7-days and see how we can help you make exercise a priority.

Try 7-Days Free!

This blog was written by Stephanie Kaiser, NIFS Fitness Center Manager and Health Fitness Specialist. To find out more about the NIFS bloggers, click here.

Topics: running injury prevention muscles exercises plyometric

“Caddy Smack”: Fitness Tips to Improve Your Golf Game

golfer
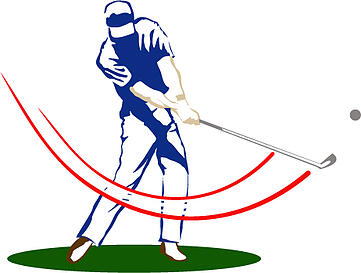
No, I’m not going to fix your slice or tell you how to hit out of a bunker (I still can’t fix that myself). What I’m going to do is give you a few fitness tips that could potentially help add some yards off the tee or with long iron shots.

Getting More Distance on Your Shots

One of the best ways to bolster the distance of your shots is to increase the club head speed during your swing. Now, you are probably thinking, “Okay, I’ll just swing harder than I normally do.” Those of us who have done that before already know the outcome is not favorable for scoring par or birdie. The ball probably ended up two fairways over or at the bottom of a lake and left you saying, “I almost crushed that.”

What if there was a way to increase that club head speed without altering the mechanics of your swing? The concept of rotational power may be the key to unlocking that extra 10 to 15 yards for that tee shot. Rotational power is something I focus very heavily on with any of my teams that involve a swinging aspect (such as golf, tennis, and softball). It involves moving your upper body/torso and hips in a circular path to generate a large amount of power while keeping under control. Increasing the ability to generate this force (getting more powerful) will allow you to feel like you are taking your normal swing but have a little more “oomph” behind it. Simply put, you are able to swing harder by increasing the ability of those muscles that are important to the swing.

Training to Increase Rotational Power

Now, how should you go about training to increase your rotational power? Luckily, the NIFS Fitness Center has a ton of tools that can provide opportunities to do so. I am going to focus on one piece of equipment for this specific goal, which are the Dynamax balls located at the south end of the fitness center floor. The following three exercises are designed to help you become more powerful and hopefully improve your game at the same time. Remember, your driver and irons do not weigh a bunch, so use one of the lighter Dynamax balls (I recommend the 10-pounder to start with). The golf swing is a fast event, so focus on the speed aspect rather than the weight during these drills.

  1. Dynamax Pocket Throws (3 sets of 15 per side)
  2. Half-Kneeling Rotational Throw (3 sets of 8 per side)
  3. Overhead Rotational Throw (3 sets of 6 per side with maximum effort)


I know there are many more parts to the golf swing than rotational power, however, this is a key factor. Hopefully in a few weeks you will be hearing a louder “smack” of the club and see some extra distance when the ball comes to a stop.

Hit them straight; hit them far!

If you are looking for more ways to improve the strength of your golf swing or have any other sports specific goals, contact me for a free fitness assessment. 

Free Fitness Assessment

This blog was written by Alex Soller, NIFS Athletic Performance Coach. To find out more about the NIFS bloggers click here.

Topics: exercise muscles training golf core strength rotation golf swing

10-Minute Desk Exercise Routines for the Office

GettyImages-1150345431_low resEven though I work at a gym, I can still relate to people who work in an office setting sitting at a desk for several hours out of the day. On a typical day, I try to get in my workout before or after the work day, but sometimes that just doesn’t happen and I need to squeeze some movement into the middle of my day.

Getting up and moving around at the office doesn’t have to be complicated, and it doesn’t take a long time to get in movement that will truly make a difference.


Here are two 10-minute workouts you can do at your desk (or anywhere!) when time, space, and equipment are limited. Also, notice the exercises are hyperlinked—click the link for a video demonstration of the specific exercise.

10-Minute Total Body Desk Exercise Routine

Complete each exercise for 1 minute, resting when needed. Repeat the circuit of exercises twice through. Make sure to do some light stretching at your desk when you are finished!

10-Minute Cardio Blast Desk Exercises

Complete each exercise for 1 minute, resting when needed. Repeat the circuit of exercises twice through. Make sure to do some light stretching at your desk when you are finished!

Bring NIFS to work with you! Contact us about our Corporate Wellness Programs and bring fitness to your workplace. Contact Don Galante for more information at 317-274-3432 ext 234 or by email.

This blog was written by Tara Deal Rochford, Registered Dietitian. Meet our other NIFS bloggers.

Topics: staying active workouts exercise at work desk exercise workplace fitness videos workplace wellness

Eat Better, Work Better? Nutrition and Productivity

grains
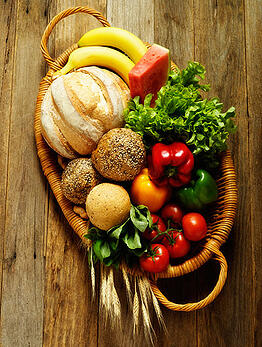
We have all heard the phrase that an apple a day keeps the doctor away, but who knew that eating a balanced diet would also make you more productive at work? A study conducted by Brigham Young University and published in Population Health Management Journal, found that 19,000 employees from three large companies with unhealthy diets, were 66 percent less productive than those who ate whole grains, fruits, and vegetables.

So, how can you be a more productive employee? Try these three simple ways to eat a more balanced diet. Then get ready to impress your boss!

Whole-Grain Goodness

Swap out your old rice, pasta, bread, and cereal for grains that are higher in fiber and are less processed. Brown and wild rice are excellent alternatives to white rice. Whole-wheat pasta, couscous, quinoa, millet, and oats are more whole-grain options to incorporate into your diet. When it comes to breads and cereal, check the label. Choose options that have at least 3 grams of fiber per serving. Check out the Whole Grains Council website for more information.

Fabulous Fruits

Most people need three pieces of fruit per day to meet their individual requirements. This can easily be done by incorporating a fruit into your morning cereal or oatmeal, grabbing a piece of fruit for a quick and portable snack, or having a bowl of sweet fruit after dinner for dessert. The vitamins, minerals, antioxidants, and fiber in fruit are all great reasons to include them in your diet.

Vary Your Veggiesveggies

One of the most challenging food groups to get into your diet, but also one of the best ones for you, is vegetables. It can be difficult to meet that 4 to 5 recommended servings per day, so how can you get these in to help balance your diet? One thing is to make sure that you are spreading them out throughout the day by including a vegetable serving at lunch and snack time. At lunch, grab portable veggies such as baby carrots, cherry tomatoes, mini bell peppers, and sugar-snap peas to add some variety and crunch along with your typical sandwich. Or nibble on veggies with a hummus dip for an afternoon snack. Make it a goal to try one new and different vegetable each week!

Kale has become a popular vegetable choice these days, primarily because of its health benefits. It is an excellent source of antioxidant vitamins A, C, and K -- and sulphur-containing phytonutrients. Here are some recipes for enjoying it.

If you are interested in having your questions answered during a personal nutrition consultation, please contact Melanie Roberts at mroberts@nifs.org or (317) 274-3432, ext 217. Learn more about Nutrition and Wellness services at NIFS.

This blog was written by Angie Sheetz, Registered Dietitian. Read more about the NIFS bloggers.

Like what you've just read? Click here to subscribe to our blog!

Topics: nutrition healthy eating employee health workplace wellness productivity

Shave Time Off Your Tri by Training for Triathlon Transitions

Transitioning has been called the fourth discipline in Kris-new-1
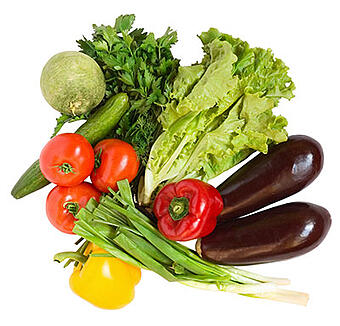
triathlon. When you finished your first race and looked at the breakdown of the times for each event, you probably noticed the T1 and T2 times. T1 is the time it took you to go from swimming to the bike, and T2 is the time it took you to go from the bike to the run. Like the swimming, biking, and running training, the transitions should be trained as well. But don’t think you need to spend hours perfecting getting from one event to the next. A good transition can simply be added to the other brick training sessions.
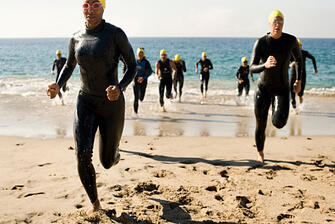
Before the race you need to check where you will be exiting the water and follow this to your bike. You can mark your transition spot with chalk on the ground, with a balloon, or with a bright towel. The transition area looks different when everyone is out on the course. Many athletes have wandered transition areas looking for their gear. Also look at the course from where you will be headed at the end of the bike to your transition spot. You will rack your bike and put your gear down on the side of the bike you will mount from.

Practicing the Swim-to-Bike Transition (T1)

The swim-to-bike transition is often the most difficult transition to practice because of the logistic of getting to the water (pool or lake) and then keeping your bike close to make this practice possible. Instead, you could just practice getting your bike gear on after stepping your feet in water. Putting on socks is often the toughest part of this as you deal with balancing while tired and getting the sock on without getting sand on the sock. Many people will sit on the ground or bring a big bucket to sit on.78810088

During a race I try to dry my feet with the end of my transition towel (placed before the race) or have a small towel to dry the tops of my feet while standing on my transition towel. You do want to make sure not to have any rocks, sand, etc. on your feet as those may cause a blister.

You must have your helmet on and buckled before you get out of transition, so do this first or directly after getting your shoes on. This is also a good time to get a drink of water and have a gel or other nutrition so you don’t have to try to ride and eat.

Once you get off your bike, you will run your bike back into your transition area. Rack your bike as close to where you took it off as possible. This is a rule, but it also helps you be courteous to your fellow triathletes who are racking after you.

If you change your shoes, have the laces open and ready to slip your feet into quickly (baby power can help with this).

Grab hats, sunglasses, and race belts and put those on as you run out of transition. Again, you could get a drink or nutrition if you need it. The gels or chews can be pinned on your race belt to have along the course.

Practicing the Bike-to-Run Transition (T2)179659833

The bike-to-run transition is easy to set up and a nice way to do some race preps the day or two before a race. Follow these steps:

  1. Set your bike against a wall or car, WITH THE SIDE YOU WANT TO GET ON YOUR BIKE FACING OUT.
  2. Place your shoes, helmet, hat, race belts, sunglasses, etc. near the bike.
  3. Figure out in what order you will put on your bike gear and practice it. Put on your helmet, socks, shoes, etc.
  4. Grab your bike and RUN, HOLDING THE BIKE WITH THE OUTSIDE HAND (no need to run with two hands on the stem) to your marked start point
  5. Get on your bike.
  6. Ride a short distance (less than a mile).
  7. Get off your bike at your marked spot and run your bike back to your setup spot.
  8. Take off your helmet, change shoes (if necessary), grab anything you want for the run, and run a short distance, getting into a nice rhythm.
  9. Repeat as many times as you need to feel confident.

Putting in a little transition practice time during your regular workouts will help you cut your total time in your triathlon. As you are trying to beat your time from before, this will help more than you realize.

NIFS’ Tri-Training for Women triathlon training program has recently begun. Find the details here.

This blog was written by Kris Simpson BS, ACSM-PT, HFS, personal trainer at NIFS. To read more about Kris and NIFS bloggers click here.

Like what you've just read? Click here to subscribe to our blog!

Topics: running group training swimming triathlon cycling training

Do You Even Lift, Bro? Weightlifting for Beginners (Part 2 of 2)

Episode #2: Have a plan, ink the plan, and work the plan.

Tony-weightsIn the first episode of “Do You Even Lift, Bro?” I concluded with the notion of absolute strength as the foundation to fitness. The stronger you are, the more things you will be capable of across the fitness continuum. World-renowned coach Dan John explains this best for me with a bucket analogy: The bigger your bucket is (your absolute strength), the more room you have to put in things like mobility, power, speed, and endurance, among other things. To get stronger, you have to lift heavy things--bottom line.

So now I hope you all understand how important strength is, and the weight room is where you can really develop your strength. The key is having the proper progression in the program that will overload the system, causing adaption and ultimately strength in the major movement patterns that we live in. Now, I can talk about programming for 8 hours straight and still barely scratch the surface. My hope in this post is to give you a few super-important facets that should be a part of your weightlifting program. I’m going to work fast here, so try to keep up!

Master These Movements

Human movement can be broken down into six major movements. When planning your assault in the weight room, be sure to include these movements in your attack:

  • Squat: Bending at the knees and hips as if sitting down and standing up
  • Hinge: Bending at the hips to pick something up from the floor, like a Dead Lift
  • Push: Pushing weight away from your body either vertically or horizontally, like a push-up
  • Pull: Pulling weight toward the body, like a pull-up
  • Lunge: Lifting legs in a split stance
  • Rotary/Core: Spine stabilization and rotating

Pairing movements is one of the best ways to get the most out of your time in the weight room. To reduce residual fatigue, I recommend pairing movements that complement each other, such as a Squat with a Pulling movement. The Squat is an anterior (front) lower-body movement, while the Pulling exercise is a posterior (back) upper-body movement. Simply put, one can rest while the other is in motion, maximizing effort and making recovery time more efficient.

Plan in Four-Week Blocksweights

Again, I could spend hours discussing the different parameters of the “block system” of programming, but I’m not going to. All I want you to keep in mind when planning is to keep it to a month-long (four-week) cycle. After you have completed a workout four times, it’s time to reevaluate and progress. We can define progression as increasing the weight used in an exercise, increasing the number of reps, or adding something to the exercise that makes it more demanding. Changing all these things at once is not the best idea, but making some changes is key to providing the overload principle necessary in strength gain. You have to change it up!

Reps, Sets, and Weight Selection

I know I sound like a broken record, but there is so much that has be taken into account when discussing these three key aspects of your program. Goals, fitness level, and timeline just to name a few, are all things that need to be considered when designing your plan, and I can’t cover all these details in one small blog post. As a safe and beneficial rule of thumb, 2 to 3 sets at 6 to 8 reps of each movement will do the trick. The weight should be challenging enough to complete all reps, but not sacrifice the form of the movement. If you know your predicted 1RM (hyperlink to fitness assessment) of each movement (which you can find in a free assessment with an HFS here at NIFS), you can use percentages of that weight in your sets and reps. Use the “first and last” rule: the last rep should look like the first rep. I would also recommend starting at a lower weight for your first set, and increasing weight every subsequent set. Again, this is the overload concept that is the cornerstone of building strength.

I can’t stress enough the importance of having a plan and working that plan. Having a sound plan of attack will keep you on track, provide accountability, and show you where you were and where you are now. I urge you to seek out the advice of a qualified fitness professional when beginning or tweaking your strength-training program. I’m talking to the veteran lifter, too; you can always improve on something you are doing. Implementing the preceding strategies is a great first step.

If you are interested in setting up a personal fitness program with Tony click the button below:

Free Fitness Assessment

Tony Maloney is the Fitness Center Manager and leads group training Sunday through Thursday.

Topics: fitness center workouts weight lifting weightlifting strength

Do You Even Lift, Bro? Weightlifting for Beginners (Part 1 of 2)

Episode #1: 5 Game-Changing Tips for the Weight RoomTony-1

I spent a great deal of time in a weight room growing up, and still do. The “Iron Church,” “The Metal Shop,” and “House of Pain” were all names I used to reference a place where I saw so much growth in myself, both physically and mentally. I remember watching one of my brothers train to power lift with the U.S. team when I was pretty young, and couldn’t wait to get my hands on all the stuff. Flash forward a few years and I was the one on the training side preparing for high school athletics. Man, there was nothing like the weight room! The feel of it, the smells (not always pleasant, but part of the charm), and the clanking of metal on metal were all rushed to the senses, signifying that a lot of hard work was about to go down!

I learned so much during that period of my life when I was in the gym every day; I definitely thought I had everything figured out on how to get strong and stay injury free. As I got older and wiser (okay, older and after many mistakes), I needed to find a way to lift so that I could lift another day. As fitness evolves, we learn bigger and better ways to get the most out of every workout.

5 Game-Changing Tips for the Weight Room

In the first installment of this beginner’s guide, I would like to share with you 5 game-changing tips to rock the weight room like you never have before. In future episodes, I will dig a little deeper into each of these tips (along with a few extras) and outline a guide that will allow you to get the most out of it.

1. Have a plan, ink the plan, and work the plan.free

Going into a place full of things to do without a plan will usually result in meandering around and wasting time, extinguishing the metabolic fire. Get a workout log and write down your plan of attack for the week. This will keep you focused as well as give you a means to track your progress. I highly recommend consulting a fitness professional to help you set up your first program. 

2. Get a super friend.

The benefits of working out with one or more partners are substantial, emotionally, mentally, and physiologically. Find a likeminded individual and link up your training times to provide support for each other and accountability. And if you are using the room for what it is intended (to GET STRONGER), you will eventually need a spotter.

3. Pair exercises.

If you want to get the most out of your time, not only from the clock, but from your ability to get stronger and lose fat, you must pair exercises. You may know this as “super setting.” No matter what it is called, DO IT! I prefer to pair exercises in this fashion: Push/Pull/Upper/Lower. We will spend more time on this in later posts, but here is a basic example:

  • 1a. Front Squat
  • 1b. Chin-ups
  • 2a. Dead Lift
  • 2b. DB Bench Press

4. Work unilaterally.

There are many fitness pros, me being one of them, who believe you are stronger unilaterally than you are bilaterally. I jokingly say that you have nothing to hang onto when you are working one side at a time. The core stability necessary to work unilaterally is also a huge benefit of working one side at a time. So next time you are planning to do a squat, try it on a single leg. You will love the feel and the results.

5. Utilize many different modes.

Many of us can get stuck using the same tools to perform the same exercises, and wonder why you continue to get the same results. Packing your workout with many different pieces of equipment and varying the movements themselves is similar to why your salads should have a bunch of color in them. It’s because different ingredients provide different nutrients, nutrients that we need. Lifting weights is the same thing; your body needs the different benefits that come from different movements using different pieces of equipment. Some refer to this as “muscle confusion”; I think that’s an industry term made up by those who like to dance around the living room and sell DVDs. I don’t really care what you call it; you just have to do it! Change up the movements and modes of training from time to time so you can taste all that a weight room has to offer and your body can enjoy the benefits of the different ingredients.

This is just the start of what will be a pretty handy guide to getting the most out of your weight room as you begin to lift weights. Keep your eyes open for the next episode, where I show you how to put together a program. Until then, I leave you with one more piece of advice to get you going. Absolute strength is the foundation to your fitness. The stronger you are, the more things you will be capable of across the fitness continuum. Bottom line: to get stronger, you have to lift heavy things. Do it right.

Tony Maloney is the Fitness Center Manager at NIFS in Indianapolis and leads group training on Sunday through Thursday.

Topics: fitness center injury prevention muscles training weight lifting strength core dumbbell personal training

Summer Health Tips and Fitness Ideas

Summer is finally finding its way back to Indiana! If you haven’t already, it is time to get outside and get moving! Indianapolis provides an abundance of outdoor activities that work well for promoting healthy lifestyles.

Indianapolis Attractions for Active Fun

Here are five ways for people to be active in Indianapolis this summer:

  1. ThinkstockPhotos-185469754web.jpg Indiana Pacers Bikeshare. With 250 bikes around the downtown area at your disposal, enjoy a day of physical activity and sightseeing in downtown Indianapolis by renting a bike and taking it for a spin on one of the local trails. I personally enjoy riding the Cultural Trail down to Fountain Square, among the many trail options available right downtown.
  2. Rent a kayak and enjoy some time out on the water while earning some physical activity points! Kayaking is an excellent form of exercise that can be learned easily at any age and enjoyed at varying levels of fitness. If you have never been kayaking before, do not be intimidated. Kayaks are available to rent around the city, including in Eagle Creek Park.
  3. Try a triathlon! Any age is a good age to try a triathlon for the first time. Here at NIFS we host a training program geared toward completing the Eagle Creek Sprint Triathlon for women both new and veteran to the sport. One of our participants was 68 years old when she completed her first triathlon with success!
  4. Take your kids or grandkids to the park and play. Being active with young children is great for everyone and is an excellent way for you to sneak in some physical activity. Consider that you may not be able to keep up with all of the moves that the kids are doing and stay within your capabilities while participating in the activities that they are doing.
  5. Consider training for a road race! You don’t have to be a top-notch runner to go out and try to run or walk your first 5K or marathon. NIFS is hosting a marathon training program geared toward completing the monumental marathon for those of you who have ever considered running a marathon. It is never too late to check that goal off your bucket list!

Health Tips to Keep in Mind

Being active in the outdoors during the summer adds another level of concern that you should keep in mind when selecting and preparing for your outdoor fitness activities.

  1. Drink plenty of water before, during, and after your time spent outdoors. With the heat and humidity that come along with the Indiana summer, your body will lose the water that it needs at a rapid pace. Drink-waterDehydration can lead to heat illnesses, so it is important to stay hydrated and drink water even if you do not feel like you are thirsty. Read more about this in our 5 Tips to Staying Hydrated While you Exercise this Summer blog.
  2. Be cautious of extreme temperatures and avoid being outside for extended periods of time during these times. Hot temperatures can be dangerous, even if you are not exercising, so save your outdoor physical activities for later in the evening or earlier in the morning when the temperature is cooler and the sun is not beating down on your back.
  3. Wearing clothing that is lightweight, light in color, loose fitting, and moisture wicking will help you to stay cooler in warmer conditions.
  4. Apply sunscreen when you know that you will be outside. Whether you are working in the yard, walking the dog, or playing a round of golf, the sun has the same impact, so apply sunscreen to prevent damage to your skin.

This blog was written by Stephanie Kaiser, Fitness Center Manager and Health Fitness Specialist. To find out more about the NIFS bloggers click here.

NIFS Fall Marathon Training Program is August 15th-November 3rd. Get Registered Today!


Topics: NIFS staying active fitness center triathlon NIFS programs summer hydration Indianapolis