<img height="1" width="1" style="display:none" src="https://www.facebook.com/tr?id=424649934352787&amp;ev=PageView&amp;noscript=1">

NIFS Healthy Living Blog

King of the Gym, Part 4: Bodyweight Squat Exercises on the Go

In part 4 of this series on squats, I focus on body weight again, setting up lower-body conditioning routines you can do at home, outside in the park, or in the hotel when you’re on the road. These are some of my favorite go-to workouts when I’m on the road or don’t have time to get in a quick leg workout. As I have reiterated throughout this blog series (part 1, part 2, and part 3), regardless of your fitness goals, you can and should add some form or fashion of squats to your fitness routines.

A Quick Workout: AMRAP Challenge

This video is a 6-minute lower-body AMRAP challenge. Your goal is to follow the routine and complete the series for as many rounds as possible (AMRAP) in the 6 minutes. Keep in mind, if you’re a beginner, start with less time (start with 4 minutes) or fewer reps of the combination. I love doing this quick workout when time is limited and I need to get in a quick lower-body workout.


Follow order:

  • Reverse Lunge
  • BW Squat
  • Reverse Lunge
  • BW Squat
  • Box Jump
  • BW Squat (on Box)
  • Step-down
  • BW Squat

A Tougher Lower-body Workout

When I’m on the road but do have time to get a tough lower-body workout completed, I like completing the following six series combined for a workout. Start with the first video and work your way through all six challenges. This has a variety of work to be completed, from EMOMs (Every Minute on the Minute) to Ladders (x1–10 Reps). Again, keep in mind, if you’re a beginner, start with less time, fewer reps, or a combination of the six challenges. As you advance, add more time or complete more than one challenge together if time allows. Also, if time is short, just like the 6-minute lower body challenge, complete one of the challenges instead of all six.

CHALLENGE 1: 10 minutes EMOM (Every Minute on the Minute) x15 Bodyweight Squats

CHALLENGE 2: 3 rounds x15 R/L—Rear Foot Elevated Split Squats

CHALLENGE 3: 5 rounds x5 Reps—Squat Jumps w/Floor Taps

CHALLENGE 4: x10min EMOM (Every Minute on the Minute) x10 Single-leg Bridges (R/L)

CHALLENGE 5: Burpee Ladder x1–10 x1 Rep x2 Reps x3 Reps... x8 Reps x9 Reps x10 Reps—Finished


CHALLENGE 6: Alternating Split Squat Lunge Jumps—Ladder x1–10 x1 Rep x2 Reps x3 Reps... x8 Reps x9 Reps x10 Reps—Finished


Get “King of the Gym” Results Outside the Gym

Whether you’re taking a break from heavy back squats or just need variety, or possibly you’re on the road traveling, you have ways to focus on your lower-body strength without a barbell and rack. Throughout the four posts in this series, Instead of adding more weight to your back squats, you’re changing up the exercises to make it more difficult and challenging. Your squats can progress in a similar way if you’re not barbell back squatting: You can start by doing air squats with both legs, then progress to split squats, and eventually one-legged pistol squats, which are a lot more challenging. On the road, focus on body weight again and set-up lower-body conditioning routines.

As I have reiterated in each of the preceding posts, regardless of your fitness goals, some form or fashion of squats can and should be added to your fitness routines. The end result for your lower body is similar to what you can get from working out with “king of the gym” back squats.

Like what you've just read? Click here to subscribe to our blog!

This blog was written by Michael Blume, MS, SCCC; Athletic Performance Coach. To learn more about the NIFS bloggers, click here.

Topics: fitness center workouts videos body weight bodyweight lower body outdoor exercise squat

Flight School: Training to Improve Your Vertical Jump for Sports

GettyImages-1291852744When watching elite athletes during competition, there are many athletic traits and features that we novices or amateurs marvel at. We think to ourselves, “If I did something like that, I wouldn’t walk for a week!” Seeing an NFL running back or wide receiver make a cut at full speed, a baseball player hitting a 400-foot home run, or a powerlifter deadlifting the weight of a Volkswagen Beetle are feats that just leave you in awe.

One of my favorites is to watch the jumping ability that is on display in countless basketball, football, and many other sporting events. Nothing seems to get fans and folks like myself more fired up than to watch an NBA player effortlessly float in the air and dunk on an opponent, or an NFL receiver jump up over two or three defensive players and come down with the football. No doubt, the combination of high-level athletic ability and hard work has paid off for many of these professional athletes with what seems like superhuman abilities. There is a reason that we see these men and women on TV and pay to see them during competition. The capabilities of the human body are crazy!

Improve Your Jump to Improve Your Sport

So, many of you reading this are probably not professional athletes. You might be former high school or college student athletes who have since “retired” from your respective sport. Like many of us, the “athlete” in us never really goes away. We find other sports or competition to feed that drive that we had as we grew up by playing recreational-league sports like basketball, flag football, or soccer, or have picked up new sports such as golf (like this guy) or tennis. And if you’re anything like me, you want to try and continue to improve in your new sport as much as possible.

Regardless of where you are in the timeline of your athletic journey, the vertical jump and vertical power will always play an integral role in your performance. Basketball and volleyball are the most obvious sports that are reliant on these abilities, but golfers, tennis players, and athletes in any other sport that utilizes rotational aspects would benefit highly by increasing their vertical jump. I mean, who wouldn’t want to hit the golf ball farther or add a few more miles per hour on their tennis serve?

When it all comes down to it, the amount of force we can put into the ground will dictate a lot of the athletic actions that happen with our bodies.

Three Jump Training Styles

Below I break down three different types of jump training styles that will put you on your way to soaring above the competition.

Body Weight

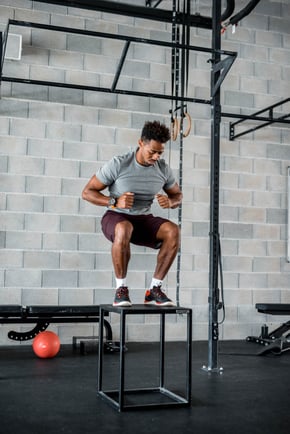
This is the most common type of jump training that you will see. Utilizing only the weight of your body, you perform these plyometric jump movements with little or no equipment. In the video below, you will see three movements starting from easiest to most advanced. These include the following:

  • Wall Touches
  • Box Jumps
  • Depth Jumps


Resisted Jumps

Now we get into some of the less common vertical jump training options. Resisted jumps add some type of downward-pulling resistance that will make your jump seem more difficult and hopefully help you generate more effort into the movement. The movements in the video below include the following:

  • Medball Powerball
  • DB Resisted Jumps
  • Band Resisted Jumps


Assisted Jumps

The third variation is assisted jumps. In my opinion, these are the most enjoyable. The goal here is to feel like there is a trampoline-effect going on where you just seem to spring up into the air. Most (if not all) variations will utilize a band. The three movements I have chosen for you are the following:

  • Banded “Belt” Jumps
  • Band Rack Pogos
  • Band Rack Squat Jump


All in all, the vertical jump is a very important skill to improve and master with regard to overall athletic ability. When it all boils down, the amount of effort you put into the training will dictate the results you get. Doing the majority of your jumps at 50 percent effort will yield an improvement in just that: jumping at 50 percent. Try to maximize your effort with each set and repetition where you are working at or above 90 percent effort, whether that be because of doing lower repetition ranges (1–5 reps) and/or making sure that you are fully recovered between sets (about 1–3 minutes’ rest).

Give great effort, get great results!

Like what you've just read? Click here to subscribe to our blog!

This blog was written by Alex Soller, Athletic Performance Coach and NIFS trainer. To find out more about the NIFS bloggers, click here.
Topics: resistance videos sports body weight athletes athletic performance lifetime sports exercise bands vertical jump vertical power jumping jump training

Get a Handle on Fitness with TRX at NIFS

GettyImages-501890636Have you tried TRX class at NIFS? For starters, you may be asking yourself, “What is a trx?” TRX is a body-weight suspension training system designed to give you a total-body workout, while playing to your skill set and allowing for nearly limitless body-weight–oriented exercise. TRX can provide a fitness beginner with an opportunity to learn movement patterns properly as well as challenge the most seasoned veterans in the gym with more advanced progressions.
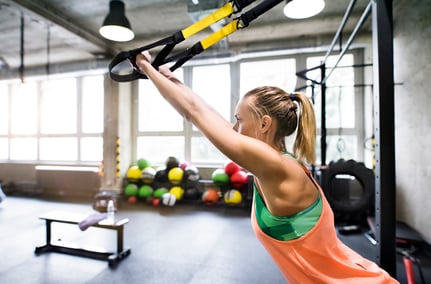
The TRX concept is fairly simple: it’s basically two handles and straps that attach at an anchor point. Some exercises require various strap heights, but really, you can do most basic movement patterns (squat, row, and press) with one of three lengths. Intensity of exercise is determined by angles of your body as opposed to the anchor point, stability and balances, and progressions. The TRX was designed in the mid ’90s by Randy Hetrick, a former Navy Seal, as a way to develop total-body strength through body-weight–resisted exercise.

Getting Started

The first thing you notice when you see a TRX on the fitness center floor is that there are not many instructions on how to use it, although there are actually quite a few. A great way to become acclimated to some of the exercises is to take a TRX class, which is complimentary with your membership. A typical class consists of a warm-up or acclimation to TRX. We spend time every session practicing strap adjustment and proper form. Then we get down to business. Every exercise has a progression and a regression to ensure you are getting a workout appropriate to your abilities.

It is not uncommon to see a college student working out side-by-side with a grandmother. Although the variation changes slightly, the overall goal is to work to get better each and every time we train. At the end of each session there is time to stretch. Stretches are many people’s favorite, not only because you know you are finished, but also because it really feels good and works.

Exercises You Can Do on Your Own

As you await your next TRX class opportunity, here are some exercises that you can add to your own workout in the meantime.

  1. GettyImages-651469910TRX Row: With two handles set to the short length (one tick mark), start with arms long and body in a plank position, being mindful that you do not let your hips sag. While under control, pull yourself up to your hands. Lower back down under control. PRO TIP: You can pull with your hands parallel to the floor to engage the lats more, whereas pulling with your hands horizontal to the floor works the rear deltoids and trapezius. (See video here.)
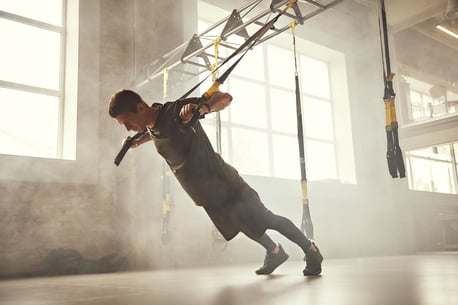
  2. TRX Superman: With two handles set to the longest length, start facing away from the TRX. Your arms will start out by being fully straightened. By simply leaning forward and moving your hands toward the ceiling, the core control will be emphasized. PRO TIP: Being under control is always key, but you also what to start from a position in which the exercise is doable. Try moving your feet farther away from the TRX to make this exercise harder, or closer to the anchor point to decrease the difficulty. (See video here.)
  3. TRX Assisted Pull-ups: Start with two handles set to the shortest position (if you need assistance with adjustments, please see staff at the track desk) and body positioned directly below the anchor point and sitting in a cross-legged position. Use the TRX handles to slowly pull your body upward, not unlike a real pull-up motion. The assistance comes from the lower body and the resistance and difficulty can be determined by tempo and number of repetitions. (See video here.)

Try This Workout

5 Minutes AMRAP (as many reps as possible)

  • 12 TRX Rows
  • 12 TRX Superman Extensions
  • 6 TRX Assisted Pull-ups
  • Repeat

TRX at NIFS

Although class space is limited to eight individuals, there are no sign-ups. Just show up and enjoy a great, challenging workout. If you are having reservations about joining the class, but still want to try TRX, one of our certified fitness professionals can prescribe exercises. Classes meet Monday at 6am, Thursday at 5:30pm, and Friday at 6 and 11am. Check out the NIFS Group Fitness page to see up-to-date times and days for your favorite classes. Get a handle on fitness with TRX today!

Like what you've just read? Click here to subscribe to our blog!

This blog was written by Thomas Livengood, NIFS Health Fitness Instructor and Personal Trainer. To read more about the other NIFS bloggers, click here.

Topics: NIFS fitness center Thomas' Corner group fitness TRX body weight total-body workouts

How Does TRX Help Your Workout? Try It at NIFS!

GettyImages-1162483613Starting from the ground up might sound like a daunting task, but with TRX it is possible. The TRX, which can be done as a group or individual, allows its user to perform various movement patterns with varying degrees of difficulty, all while using only body weight as resistance and a routine of exercises assigned to help you reach your goals.
The Equipment

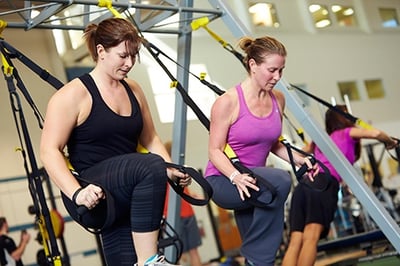
The setup, designed by former US Navy Seal Randy Hetrick in 1995, is comprised of two straps, two handles, two cam buckles for adjustments, and a locking loop for safety. The equipment can be set up nearly anywhere, including but not limited to a TRX frame, a tree branch, or a sturdy piece of furniture. The unit is rather transportable and easy to set up. With that being said, it would seem to be the most ideal piece of equipment for home exercise and gym use. Although this is true, there still is a small learning curve, which you can easily overcome with some practice.

Adjusting Intensity and Difficulty Level

When you examine the exercises, you discover that the majority of them utilize angles to both increase and decrease intensity and level of difficulty. Furthermore, relying on the handles more and more can make things much easier. When it’s time to up the workload, you can grip the handles less (which requires you to utilize more body strength to get through the exercise).

When we program a TRX exercise into your routine or in a class, we would expect that at any time someone might need a regression or a progression, so there isn’t really a reason to stop or quit—just readjustments to help you keep moving!

How to Get the Most from this Equipment

Like all equipment, there are ways to best utilize this tool to get the most out of your time. When you understand that the difficulty level is determined by balance, stability, and angles, making just a few adjustments can really help you get a better workout.

Here are some tips that may also enhance your workout.

  • Do not allow any slack in the straps. The constant tension will force you to be in control while working through your movements.
  • Practice good form by having the straps as an aid. If you are having trouble with proper form at the bottom end of your squats due to ankle mobility or posterior chain flexibility, use it to help you move into and out of precarious instances where typically you would be uncomfortable. Once you are able to do the movements proficiently, try them again without the TRX and then eventually with a weight load.
  • Add an exercise to a workout circuit. To mix it up and give you a great workout, the versatility and multitude of exercises allows you to change exercises, sets, reps, and intensity at a moment’s notice.

Most floor exercises with a TRX are more challenging due to the idea that you are using more energy to keep good form (including core muscles).

Try It in Group Fitness Classes at NIFS

What exercises have you tried? The group fitness classes offered at NIFS are for everybody. Your Fitness Specialist can modify an exercise if you aren’t ready for it or if you need a little more of a challenge. The classes also offer variety to help enhance your own “exercise library,” which will ultimately lead to more confidence. Remember that your exercises can vary from person to person, but as long as you can continue to challenge yourself, your body will continue to develop and become stronger.

Whether you are trying to improve form or get a total-body, no-nonsense workout, the TRX is an adaptable and highly useful tool you can use along the way. NIFS offers free classes weekly to help guide your workouts. If you still aren’t convinced, contact a NIFS Fitness Specialist to discuss ways we can help you reach your goals.

Like what you've just read? Click here to subscribe to our blog!

This blog was written by Thomas Livengood, Health Fitness Instructor and Personal Trainer. To read more about the NIFS bloggers, click here.

Topics: NIFS Thomas' Corner equipment group fitness resistance workout TRX body weight

The Benefits of Using TRX Suspension Training

TRXYou may have been around the gym environment when TRX training came about and wondered what the benefit of using those straps could be. I remember hitting the weight room in college and thinking, “What on earth are those? And how could I possibly get as good of a workout with them as I do with lifting?” After spending only about 20 minutes on them, I quickly learned how suspension training using body weight could really build strength and challenge the entire body, no matter the movement!

The TRX was invented by Randy Hetrick, a Navy SEAL. His idea was sparked while on a SEAL mission, with a question arising of, “How can we stay mission-fit while on deployment?” With limited materials, Randy used parts of a parachute and a jiu-jitsu belt to create his first model, and soon he was off doing several exercises that we are familiar with today.

Benefits of Suspension Training

There are several benefits to using TRX in your workout. Science proves that it is effective in increasing muscular strength! Here are a few that really stick out:

  • Incorporates nearly every muscle of the human body. If you have ever taken a class or done some of even the most basic exercises, you quickly see that core activation is one of the most important aspects.

  • The workouts are simple yet very challenging, and you can easily complete a total-body workout only using one piece of equipment in 20 minutes.

  • The straps are also very mobile, and you can take them outside or on the road. You can even attach them to the back of a hotel room door to get a workout! 

  • With an easy adjustment of your body, TRX training is safe.

A Quick Workout

I challenge you to take a TRX class at NIFS, give it a try on your own, or ask an instructor to teach you a few things. Here is a quick workout that can be done in 20 minutes or less. Give it a try and let us know what you think!

  • 10 Rows
  • 10 Jump Squats
  • 10 Knee Tuck/Pike Combos
  • 10 Hamstring Curls
  • 10 Pushups
  • 10 “Y” Pulls

Like what you've just read? Click here to subscribe to our blog!

This blog was written by Amanda Bireline, Fitness Center Manager. To find out more about the NIFS bloggers, click here.

Topics: fitness center group fitness workouts core TRX suspension training body weight