<img height="1" width="1" style="display:none" src="https://www.facebook.com/tr?id=424649934352787&amp;ev=PageView&amp;noscript=1">

NIFS Healthy Living Blog

Exploring the Versatile Landmine Attachment for Powerlifting

“How can I better utilize the landmine attachment?” This is a question we hear regularly, but are sometimes limited by our own fitness exercise library. The landmine is actually quite versatile and functional in nature. Here I explore the Landmine and some of the many exercises that link several facets of fitness into one unique experience. From functional movements to powerlifting accompaniment, the Landmine is sure to boost your workout with new approaches to old exercises.

What Is a Landmine Attachment? 

According to opexfit.com, “The landmine attachment is a piece of gym equipment invented by Bert Sorin of Sorinex. It’s an adapter that attaches to a weightlifting rack that holds a barbell in one end, leaving the other end free for loading and moving.”

Upper-body Exercises with the Landmine Attachment

For these exercises, you will need a 45lb Olympic bar, a Landmine attachment, and any additional weights to add (for increased difficulty). I suggest beginning with just a bar (remember, it does weigh 45lb!).

  1. Two-handed Shoulder Press: With two hands, press the bar overhead.
  2. One handed Bent-Over Row: With one hand, hinging at the waist, grab the bar and row upward.

Lower-body Exercises with the Landmine Attachment

  1. Sumo Squat: With a wider than normal foot placement, hold the bar in two hands with arms extended. Do a squat pattern.
  2. Single-leg RDL: While standing on one foot, bar in one hand, hinge at the waist, and then return to standing

Core Exercises with the Landmine Attachment

  1. Trunk Twist: Standing in athletic position, make a “windshield wiper” while holding the bar overhead.
  2. Half-kneeling Trunk Twist: This is the same as the trunk twist, except now you are in a half-kneeling position.
  3. Half-kneeling Press: From the half-kneeling position, press upward (not unlike a shoulder press), press the weight up and slightly past the top position, achieving anti-rotational stability.

As you can see, the Landmine is a great, multifaceted tool for us to enjoy not only functional fitness, but also massive muscle “gainz”. All kidding aside, please explore the Landmine and its numerous features. Be creative and try new exercises. If you are getting stumped and need a fresh routine, look no further than a NIFS Health Fitness Instructor. We can help with all of your fitness needs including setting goals, benchmark fitness testing, exercise programming, and more! See you at NIFS!

Like what you've just read? Click here to subscribe to our blog!

This blog was written by Thomas Livengood, NIFS Health Fitness Instructor and Personal Trainer. To learn more about the NIFS bloggers, click here.

Topics: Thomas' Corner equipment weightlifting exercises powerlifting fitness equipment

King of the Gym, Part 2: Lower-Body Training with Simple Equipment

If we had learned anything during our time during COVID, we’ve found creative ways we can train to get fit and stay strong in our living rooms, garages, basements, and backyards with our favorite squat racks. In part 2 of my blog series, you’ll learn how to use something simple like a dumbbell, kettlebell, med-ball, or light equipment like resistance bands to functionally train your lower body in place of the “king of the gym” back squats. 


Videos: No-barbell Exercises

If you don’t have a squat rack and barbell at the ready, there are a variety of different worthy alternatives to back squats—with no barbell required. Here are seven “king of the gym” alternatives that can use a kettlebell, dumbbell, med-ball, or bands.

The exercises in the preceding videos are great alternatives for anyone, especially if you can’t make it into the gym but you do have some light equipment at your disposal.

Functional Training for the Lower Body

Even if you are in the gym, but you don’t quite like the idea of doing a heavy-loaded barbell lift, you can still create resistance for your lower body. Resistance doesn’t mean loaded barbells; instead, these alternative exercises are loaded differently to functionally train the lower body. 

In part 3 of the series, I focus on body weight only, and in part 4 I set up some different routines you can do in a hotel when you’re on the road. Regardless of your fitness goals, you can and should add some form or fashion of squats to your fitness routines. 

Like what you've just read? Click here to subscribe to our blog!

This blog was written by Michael Blume, MS, SCCC; Athletic Performance Coach. To learn more about the NIFS bloggers, click here.

Topics: exercise at home equipment videos lower body squat pandemic

King of the Gym, Part 1: Squat Alternatives

I enjoy all forms of exercise, but like many, I want the most bang for my buck when I’m exercising. Sure, I am always on the lookout for the new and best exercises that would not only kick my behind, but also have benefits all around. However, I always trend back to the “king of the gym”: an exercise that I do without fail—SQUAT

The Squat Reigns Supreme

Squats are often referred to as the “king of the gym” exercise, and for a good reason. When done correctly, squats utilize essentially every muscle in the body. If you want to get stronger, get bigger, or lose weight, squats will help. Although they aren’t a must in order to build your lower body, they are probably the most efficient exercise. Whether it’s building a stronger core, back, and legs; increasing bone density; or burning fat, squats are the best bang for your buck due to the engagement of many muscle groups activated at once.


But this post isn’t about just about squatting. In fact, in this four-part series, I want to show you that there are plenty of different alternatives to the “king of the gym.” We don’t always have the luxury of a barbell and rack or endless equipment resources from the gym. Perhaps you train from home or are on the road at a hotel. Either way, No worries!

Squat Alternatives Using Other Gym Equipment

First up are five effective squat alternatives you can do with access to gym equipment other than the traditional barbell back squat. Are there more than five? Yes, but these are my favorites. When I have an injury, or I’m bored, or all the racks in the gym are being used, I like to substitute these five exercises in place of squats. These five moves show alternatives to squatting that you can do efficiently in the gym when a barbell and rack aren’t available and still achieve similar or better gains.

As you can see, an effective squatting workout doesn’t have to be limited to the “king of the gym.” If you don’t have a squat rack available, there are a variety of different squatting alternatives you can use instead.

More in the Series

In part 2 of this series, learn how to use bodyweight and light equipment like resistance bands to functionally train your lower body. In part 3 of the series, I focus on body weight only, and in part 4 I set up some different routines you can do in a hotel when you’re on the road. Regardless of your fitness goals, some form or fashion of squats can and should be added to your fitness routines.

Like what you've just read? Click here to subscribe to our blog!

This blog was written by Michael Blume, MS, SCCC; Athletic Performance Coach. To learn more about the NIFS bloggers, click here.

Topics: fitness center equipment weight loss strength core videos squat

Is Your Weight Belt Really Helping You?

GettyImages-993462726If you are like most people who enjoy lifting weights, you probably have worn a weight belt or own a cool one that helped you get that new squat max deadlift PR, But did you really NEED it? Most of the time we follow what we see others do, which is fine, but remember: everyone is different, and you could be slowing down your own progress by cinching that belt on extra tight every time you feel the need to go heavy.

What Exactly Is That Weight Belt for, Anyway?

A weightlifting belt serves to assist in creating more intra-abdominal pressure. The belt provides the lifter reinforcement when they breathe-brace or create pressure in the torso by exhaling and contracting the abdominal wall before externally loading the spine (picking up the weight). However, if the lifter does not breathe-brace, and instead tries to create pressure by tightening the belt too much and or bulges the abdominal wall out to touch the inner ring of the belt to feel secure, the abdominal pressure is significantly less, stability of the truck and spine is decreased, and now that weight belt is more of corset (a fashion statement) than a lifting tool.

Am I Saying You Should Stop Using a Weight Belt?

No. If you do not have trouble bracing and lifting without a belt up to 80 percent of your 1-rep max, you can stop reading. However, try testing your ability to breathe-brace first, before you determine your need for a weight belt. You can even put this breathe-brace activity into your warm-up to make sure everything is good to go.

The Breathe-Brace Test

Supine

  1. Lay flat on your back with legs bent and feet flat on the floor. Place one hand on your belly, and the other on your chest. Take about four deep breaths. The air can be inhaled through the nose and exhaled through the nose, or in through the nose and out the mouth through pursed lips. On each inhale, use your belly to make the hand on it rise as high as you can (hopefully higher than the hand on your chest). When you exhale, blow out as much air as you can while pulling your belly in tight (the belly hand should sink toward the floor).
  2. Once you have done four deep breaths, take one more, and this time when you exhale, as you blow the air out and the belly hand sinks toward the floor, contract your abdominals (you may even notice a tilting of your rib cage down toward your belly button) as you use your belly to push the air out. If you can stiffen your abs without bulging your belly out, you’ve got it!

Prone

  1. Lay flat on your belly with legs straight. You will need something soft to place under your belly (an ABMAT or folded towel) because it will replace your hand in this method.
  2. You can place your hands down at your sides, long above your head, or use them as a rest for your forehead.
  3. Similar to the supine method, take about four deep breaths. While inhaling, push your belly out to feel the mat underneath you. When you exhale, blow as much air out as you can by pulling your belly in tight away from the floor.
  4. Finally, take one more breath in. This time, as you blow out and pull your belly away from the mat, contract your abs. You may again notice your rib cage tilting down slightly toward your belly button.

This breathing method is encouraged by yoga enthusiasts, but is very effective in the weightlifting realm as well.

Once you have mastered the method on the ground, try doing it while standing. Then take it to the lifting platform or rack. You will notice over time you have more stability, and less spinal flexion and extension throughout heavy lifting, and you are now strengthening the muscles you need to brace and stabilize your spine before using a weight belt. Mastering your breathing and core control will make it easier to find the correct tightness on your weight belt when the time comes.

Don’t Use a Belt to Work Around a Problem

Lastly, we all should have the goal to move without assistance from any sort of crutch or brace, and a weight belt should not be used to work around a problem simply to lift heavy. Work on your breathe-brace skill, and you may only need your weight belt for those big-time lifts, and of course to show off occasionally!

Like what you've just read? Click here to subscribe to our blog!

This blog was written by Keith Hopkins, MS, MA, CSCS, USAW. To read more about the NIFS bloggers, click here.

Topics: equipment weight lifting weightlifting breathing heavy lifting

The Stay-at-Home Athlete: Build Your Home-Based Athletic Performance Program

GettyImages-868064764nIn a world where situations are ever-changing and a new “normal” is developing, athletes around the world are scrambling to adapt to their new training environments. For most, this new environment is where you are probably reading this now, your home. For the time being and for many people, traditional training methods of using barbells, dumbbells, kettlebells, etc. have morphed into substitutions of paint cans, backpacks, gallon jugs, or just about anything that can act as the “resistance” that your body has become accustomed to using.

Am I Going to Lose Everything I Gained in the Gym?

The first thought you probably had when this situation came about was, “I’m going to lose everything I’ve worked so hard to gain in the gym.” I guess that because it was one of the first things that passed through my mind, and now I believe that a well-equipped gym is one of the most taken-for-granted things I had in my life. It was always there. I could do just about anything I wanted or needed to do there. If the work I needed to do didn’t get done, it wasn’t the gym’s fault; it was my own.

If the work I needed to do didn’t get done, it wasn’t the gym’s fault; it was my own.

So now what? You are at home, you have a minuscule amount of equipment compared to what you had before (here’s another blog with some basics to consider), and your motivation may be low. The easiest thing to do would be the bare minimum and hope for the best when you can get back to the gym. The right thing would be to figure out a way to adapt your program to your environment and change the “maintain” mindset to the “gain” mindset. And I’m here to help you do that. The following are the essentials I believe can help you construct your home-based workout and continue to build on the progress you have made in the gym.

The Four Home-Training Building Blocks

As a coach, there are four main training blocks that can be completed at a very high level from home: mobility, power, strength, and conditioning. Follow along as I break them down!

Mobility

For many athletes (yes, me included), mobility is an area where we can always improve. This part of training is often overlooked or not taken as seriously as it should be. I’m here to tell you, being at home gives you the perfect reason to make this a focal point of your training. I say this because for many mobility exercises (shoulder/t-spine, hip, and ankle exercises), a big array of equipment is not needed. A couch or chair can serve as a perfect platform for you to improve mobility with very little time or effort setting up.

Power

No matter what sport you participate in, power development surely plays an integral part in your performance. In the gym we use medballs, boxes, and barbells to help foster this development. But at home, you can simply use an open space in your home/garage/outside to do this as well. Many “ground-based” plyometrics can be performed with minimal, if any, equipment. You can use vertical and broad jumps (both one- and two-legged) and various plyometric push-up variations, which should provide your body that same “explosive” feeling you have learned to produce. For the jumping exercises, this is a great time to work on the most important part of the movement, the landing.

Strength

This section might pose the biggest challenge to you simply because the heavy weights you are used to using are no longer accessible. I’m here to tell you that with a little creativity, you can still make improvements. One of the easiest ways to make simple bodyweight exercises more challenging is to elevate one of your points of contact, i.e. elevating your feet for push-ups or putting your back leg up on a couch or chair during split squats. Using a backpack full of books can serve as the extra resistance during these exercises, so dust off your old heavy college books and repurpose them.

Remember this as well: it’s not always about using heavy weight with low reps. If you are used to training in this fashion, doing more repetitions will help with your strength-endurance.

Conditioning

I believe that cardiovascular or conditioning work should be the easiest for you to adapt to while at home. With the exception of some of the specialized equipment you use in the gym (sleds, bikes, etc.), a lot of the training you do during this block requires only bodyweight resistance. Circuits (wall sits, mountain climbers, burpees), running (long-slow distance, interval training), and core work (plank and side plank variations, glute bridge variations) can all be performed with minimal equipment.

Take into account your “work-to-rest” ratio, which is how long you work versus how long you rest. Depending on what intensity you are working at, how long you are working for, or what activity you are doing, these numbers can be adjusted to fit your current fitness level. Generally, the longer your rest periods are compared to your work periods, the easier it will be. If you are unsure, start with 1-minute work to 1-minute rest and adjust for each subsequent workout as the days pass.

Which Will You Choose: Continued Progress or a Downhill Slide?

I leave you with this: the duration of the new normal can go one of two ways, the continuation of progress and improvements of athletic areas you need to work on OR a downhill slide of progress that leaves you fighting to get back to your current athletic state for the following months or years. Which one will you choose? If the work you need to do doesn’t get done, it wasn’t the home gym’s fault.

If the work you need to do doesn’t get done, it wasn’t the home gym’s fault.

This is a new challenge that you should accept and meet head-on with the attitude that nothing can derail your progress and a drive to continue to improve. In a few months, let’s look back on these days with pride knowing that you did everything in your power to get better.

Like what you've just read? Click here to subscribe to our blog!

This blog was written by Alex Soller, Athletic Performance Coach and NIFS trainer. To find out more about the NIFS bloggers, click here.

Topics: exercise at home equipment endurance strength quarantine

What’s in Your Bunker?: Fitness Survival Gear

GettyImages-1210720125The saying often goes, “success breeds success,” but I’m a big believer that failure leads to just as much and even more success. Being reactive in nature to a situation (as most of our population is) can delay a successful outcome, but often does lead to one. Obviously being proactive, anticipating and avoiding rather than catching and correcting, is a more successful model of living; but we find ourselves in situation we really couldn’t anticipate. There are some lessons to be learned and success that can come from this desperate situation we are all in.

How Can You Exercise When You Can’t Leave Home?

When the lockdown was put in place, many diehard exercisers and movers of all kinds were left clambering for ways to stay fit and active while under quarantine. Then came the barrage of social media posts from people like me offering up super-helpful fitness solutions to not having your favorite gym to go to and the ample equipment to use. The information and help that fitness pros around the world have offered has been inspiring, and I encourage you to continue to implement the strategies and techniques you are learning from real fitness pros (but be a smart consumer of content).

But a great lesson we can learn from this situation is that it is a good thing to have some fitness gear available to you in your home. After the pandemic, there will be many more reasons you might not be able make it to your gym or studio. Just life may alter your ability to get to where all your favorite equipment lies. What is your plan then?

Equipment for Exercising at Home

There are many cost- and space-efficient pieces of fitness survival gear you can have in your home that can keep the momentum going if you are unable to meet with your favorite people at your favorite gym. I’ve created a fitness survival list that you can use immediately or accumulate over time so that you will always have strategies in place to keep moving in a small space.

Cheap and Effective

Here’s some equipment that you can get now.

  • Foam rollers: You can do recovery and mobility work anywhere, and you can do it well with the proper tools. But did you know that you can use the foam roller for more than myofascial release? See this video!
  • Mini-bands: These are 2 to 3 bucks a pop—easy to use and very effective. And here’s a NIFS video showing you how to use them for a big sweat.
  • Super bands: There is so much you can do with these bigger bands, and they are still very inexpensive. Here’s a NIFS video using super bands for resistance.
  • Sliders: There are many things you can use for sliders, such as furniture movers, towels, and paper plates. Sliders can used for lunges, hinging, and core work. Here’s a NIFS video of slider exercises.
  • Tubing: Continuing with the band resistance, tubing with handles is a great tool to perform countless exercises.
  • Stability ball: This ball can be used for core work, and upper and lower body strength work, and you can sit on it while you work from home! Here’s a video using the stability ball.

Equipment for Leveling Up

The following equipment items cost a little more, but they have a lot more capabilities.

  • TRX Suspension Trainer: Fitness anywhere is their name for a reason. You can use the TRX anywhere and can perform thousands of movements in a small space. Enhance strength, stability, cardio, core strength—TRX can do it all. Here’s our video using the TRX outside.
  • Sandbag: Providing a dynamic load in a multitude of movements makes the sandbag a nice addition to your fitness survival gear. Here’s a video using the sandbag in a squat and press.
  • Kettlebell: Add some load to your movements. You can perform so many movements with just one kettlebell. Here’s a video of the kettlebell triplet.
  • Weighted vest: Add load to bodyweight movements and go for a nice long walk, or Ruck!

As another saying goes, success favors the prepared. There are some quick, easy, and relatively inexpensive means to keep moving at home—right now and in the future, no matter the reason you are not able to get out of the house.

We will be getting back to the gym really soon, and I can’t wait for that day to come to see you all getting after it in the place you call your fitness home. Until then, make your home a place for fitness!

Like what you've just read? Click here to subscribe to our blog!

This blog was written by Tony Maloney, ACSM Certified Exercise Physiologist and Fitness Center Manager. To find out more about the NIFS bloggers, click here.
Topics: exercise at home equipment kettlebell TRX videos core exercises core stability exercise bands

Fitness Equipment Tools to Try in 2020: ViPR

It’s 2020, a new year filled with new ambitions for health, wellness, and performance. This is the time of year when we make deals with ourselves to try something new, get back to something we’ve stopped, and declare that this year is the year!

If you have followed my posts from the beginning, I feel a certain way about resolutions and waiting for a new year to make positive changes. For a review on my feelings toward a practice that typically results in failure, read Resolutions Redefined, one of my first pieces on the topic. But I want to help you try something new in the new year to help further your fitness quest. Let’s take a look at a tool that you might not have used or even seen before.

Vitality Performance Reconditioning (ViPR)

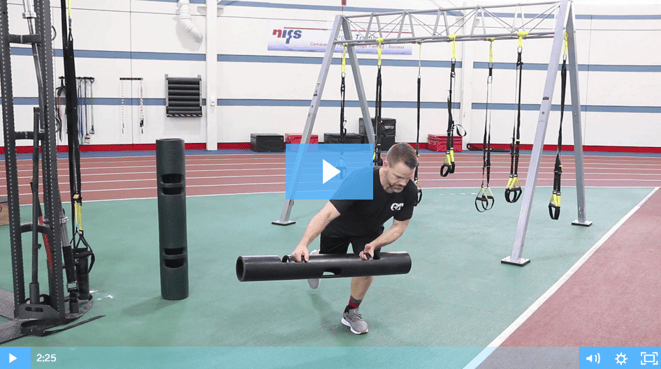
First on the list is the ViPR. Besides having a pretty cool name, the ViPR is a do-it-all piece of equipment that will make you what folks over at ViPR refer to as “farm boy” strong. Inspired by those farm kids who move with loads in their daily life, the ViPR combines task-specific movements and resistance training to add a multitude of dimensions to a fitness program. Living with energy and vigor (Vitality) to help build Performance and regain function for life, sport, and recreation is what the name ViPR stands for and pushes to achieve. Life is an athletic event, so it only makes sense that one should train for the event, train like an athlete, or in the case of the ViPR, like a farm boy.

Screen Shot 2020-02-17 at 4.09.57 PM
Movements with the ViPR Fitness Equipment

Ready to add the ViPR to your toolbox of fitness awesomeness? Here are a few of my favorite movements to help get you started:

  • Rocket Squats
  • Single Hinge with reach
  • Lunge to uppercut
  • Shovel
  • Rot. Fwd./Rev Lunge Combo
  • Lat Lunge to C&P w. Lat Step
  • Ice Skater with push
  • Lateral Shuffle Flip
  • Flip Squat

These movements barely scratch the surface of all the dimensions and patterns that can be challenged using the ViPR. You now know enough to give the ViPR a try, but for more information on how to add it to your program, schedule a session with one of our talented and highly trained NIFS instructors and take those first crucial steps in trying something new the right way!

Like what you've just read? Click here to subscribe to our blog!

This blog was written by Tony Maloney, ACSM Certified Exercise Physiologist and Fitness Center Manager. To find out more about the NIFS bloggers, click here.

Topics: equipment resolutions resistance exercises videos fitness equipment

Dynamite in a Small Package: Mini-band Exercises You Should Be Doing

GettyImages-1160240139In a world where in many cases bigger is better, just because something is small doesn’t mean it’s less important or can’t have big impact. Being short in stature my entire life, it has always been my motto that “dynamite comes in small packages,” and I have strived to create as much BANG as I can in all facets of life. Small in stature can provide big results when you light the proper fuse and utilize its power maximally.
The Little Resistance Band with a Big Impact

In health and fitness, using the proper tools to yield the outcomes you are working toward is a staple goal, no matter the size of that tool. The mini-band could be the best example of creating big effect from a rather tiny tool. This popular, small resistance band has been used for many years in fitness and even sports performance. The mini-band is versatile and can be used for strength and stability over the entire body.

One of the biggest advantages of this ready-to-use, do-it-all tool is that it can go anywhere and be used in any environment. From the basics to the advanced, the mini-band is built to challenge all fitness levels and body types. It truly is a small package that packs a dynamite punch!

My Favorite Mini-Band Exercises

Here are some of my favorite exercises that you may not be currently doing but should:

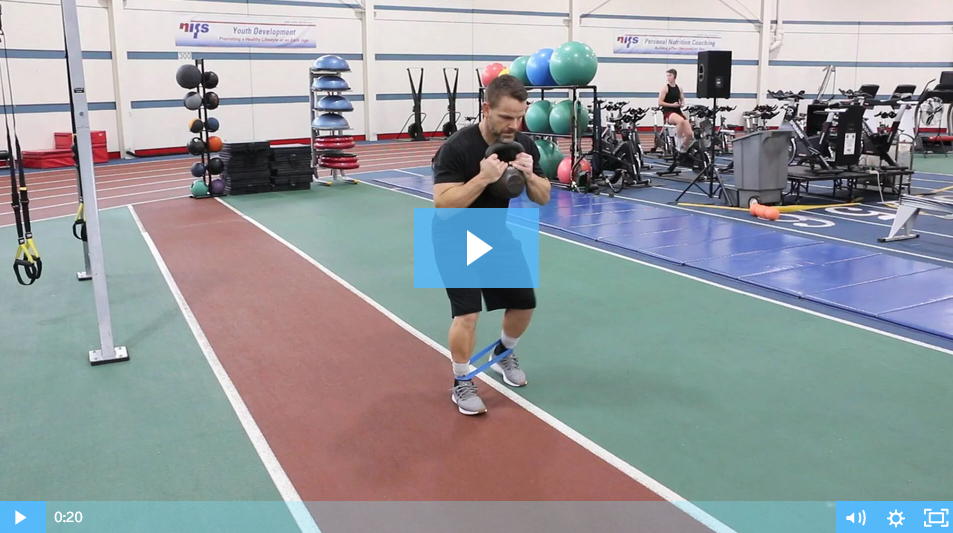
  • Single-Leg Squats
  • Goblet Carry
  • Single-Leg, Straight-Leg Dead Lift
  • Shoulder Drivers
  • Wall Sprinters
  • Renegade Rows
  • BONUS: Friday Finisher Featuring the Mini-band

Screen Shot 2020-01-06 at 2.53.49 PM

Schedule a Session with a NIFS Trainer

These are just a few of the many exercises that can be done using the mini-band. There are so many great ways to utilize this mighty-mouse of a fitness tool. Want more exercises and direction? Schedule a workout program with one of our highly trained Health Fitness Instructors and get on a path to reaching your health and fitness goals and have fun doing it!

Like what you've just read? Click here to subscribe to our blog!

This blog was written by Tony Maloney, ACSM Certified Exercise Physiologist. To find out more about the NIFS bloggers, click here.

Topics: equipment resistance exercises videos personal trainer fitness equipment mini-bands exercise bands

Using Battling Ropes for Training

_68R5895When you begin your fitness quest and are getting started on a new program, finding exercises that are appropriate for you is key to your success. Your fitness staff at NIFS has your back! Training methods and training tools developed from years of research and practice have shown that sometimes a simple exercise done well can be quite effective.
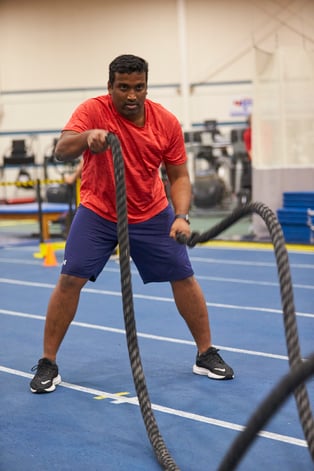
In this case, we will be looking at training with battling ropes (also known as battle ropes). I was lucky to have been in attendance at one of the top fitness summits recently and was humbled by the overall amount of work that can be accomplished with the ropes. (Taking some learning cues from renowned fitness professionals has given me the opportunity to deliver some great, purposeful workouts to NIFS members and clients.)

You may have seen the battle ropes in your gym, but did not know exactly what exercises could be done with them. For the most part, the movement patterns are simple, yet effective. Slamming the ropes utilizes multiple muscle groups and also gets your heart rate to rise. Taking the training one step further, your rope slams can be broken down into many movement patterns including small movement patterns, large movement patterns, and several other fun, specialized movement patterns (which we will look at in this blog).

What Are Battle Ropes?

Before we get started on the exercises, it would be helpful to have a better anatomical understanding of these ropes. For starters, ropes come in many lengths and thicknesses. The longer the rope or the thicker the rope, the more challenging the exercises become. Also, using a poly rope with shrinkwrapped endcaps has advantages over the less-expensive manila gym ropes traditionally used for climbing. The poly rope material tends to be softer on the hands and more durable than the manila rope. The manila rope, however, can work fine and be more cost-effective.

Small-Movement Pattern

The first movement pattern we will discuss is called the small-movement pattern. This pattern is the easiest to learn and progress from. Once you have selected your rope and have attached it to its anchor point, simply get your body into an athletic position (not unlike getting ready to hit a volleyball or pick up a groundball in softball). You will slam the rope quickly, yet rhythmically in cadence so that the small slams create a ripple that flows all the way down to the anchor point. This pattern can also have several small variations including single-arm slams. Typically, this exercise can be done for time (i.e., 20 seconds per set) or with your interval training (i.e., :20 on, :20 off for 3 minutes).

Large-Movement Pattern

The second movement pattern is the large-movement pattern. With this movement pattern, the goal is to create big slams with the rope. This movement is similar to the one seen with medicine ball slams, where you take your body from a small movement position to a fully extended position with the ropes overhead and on your toes, and then end by slamming the rope with maximum force into the ground. This movement can be rhythmic, but sometimes seems a little more aggressive in nature than the small-movement pattern. The benefits here, though, are definitely more athletic in nature, as many sports require movement patterning based on this exact exercise. Because this exercise makes it easier to count reps, being able to do sets such as 4 x 10–12 reps, makes sense (but do not limit yourself; intervals here are also appropriate).

Other Ways to Use Rope Training

Outside of these two movements, you can explore rope training in many ways. Thinking back to grade-school times, we used the rope often during physical education class as the true tests of strength with tug-of-war and the rope climb, but we can make ropes fun and challenging when we put them back into our workout plans and add a little competition. With tug-of-war, you need several people to compete, but other exercises can replicate this movement solo. The Marpo Rope Trainer machine can convert to a standing tug-of-war rope pull, just you versus the machine! The rope climb, which is a daunting challenge for most, can be replicated on the rope machine as well. But if you don’t have the rope machine, starting with rope descends is an excellent way to get more comfortable and definitely stronger.

BONUS: Here is a great Friday Finisher series using the Ropes!


***

These rope challenges are great additions to most workouts because they are simple and they can be done with individual maximum efforts or in groups where a cardiovascular challenge is needed. If you are interested in adding ropes to your workouts and want more information, NIFS staffers are more than happy to help you begin your new rope training workout. As always, muscleheads evolve and rejoice!

Like what you've just read? Click here to subscribe to our blog!

This blog was written by Thomas Livengood, NIFS Health Fitness Instructor and Personal Trainer. To read more about the other NIFS bloggers, click here.

Topics: NIFS exercise fitness center Thomas' Corner equipment workouts strength sports movement

Summer Sledding: Using Sleds for Fitness

Training with a drive sled, or what we lovingly refer to as the “Prowler,” is probably one of the most popular modes of training with the coolest toy. I can remember my first experience with a sled a long time ago during football practice. There was nothing that made me want to see my last meal more than pushing a heavy sled as fast and hard as I could.

What the Sled Can Do for You

That feeling hasn’t changed much for me after a hard sled session, and I think it remains the draw for many who love the feeling of being “maxed out.” But the sled has so many more uses than “push till you puke,” such as:

  • Power development
  • Upper-body strength development
  • Trunk stability work

Exercises You Can Do with the Sled

Screen Shot 2019-08-27 at 11.31.01 AM

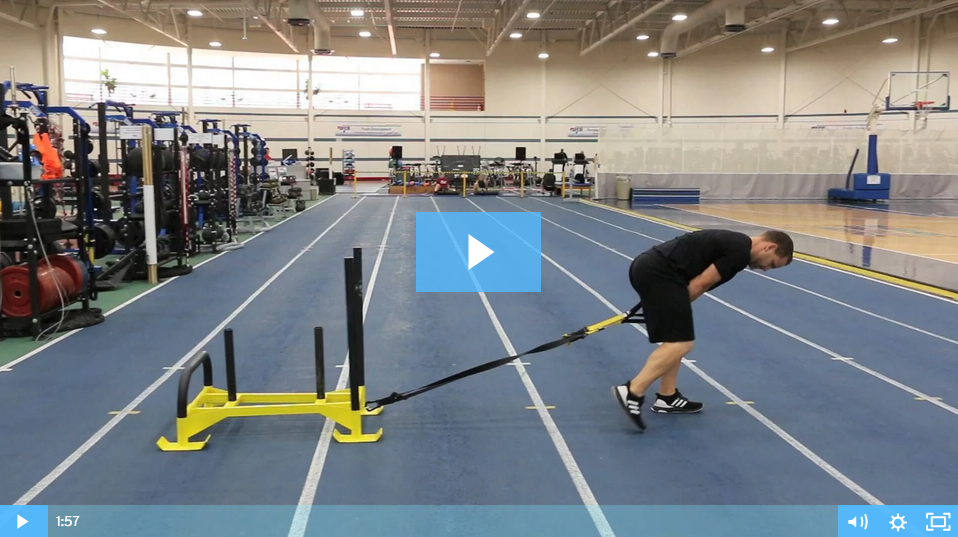
Here are some of my favorite ways to train with the sled that are not just pushing it fast down a straight line. This piece of equipment can challenge the body in so many different and fun ways:

  • Double-arm rows
  • Single-arm rows
  • Rips
  • Press
  • Walking dead
  • Walking AR press
  • Lateral cross-steps
  • Power push
  • OH walk
  • Lunges

The sled is easily one of the most versatile fitness tools out there, and can be such a fun and exciting way to train so many aspects of fitness. This is just a short list of the possible movements you can complete with a sled. Add a few different movements using the sled during your next training session and reap the benefits! Remember to practice proper REST protocols and make it a part of your training schedule.

Like what you've just read? Click here to subscribe to our blog!

This blog was written by Tony Maloney, ACSM Certified Exercise Physiologist.
To find out more about the NIFS bloggers, click here
.

Topics: fitness center equipment core exercises power strength training upper body fitness equipment sled