<img height="1" width="1" style="display:none" src="https://www.facebook.com/tr?id=424649934352787&amp;ev=PageView&amp;noscript=1">

NIFS Healthy Living Blog

All About Plyometrics

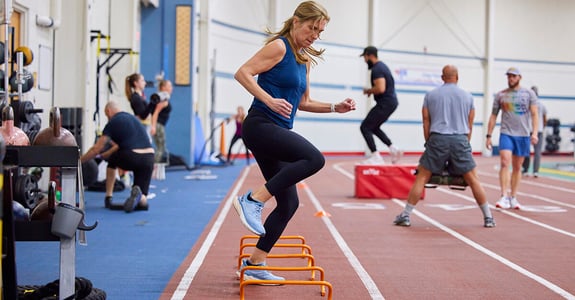
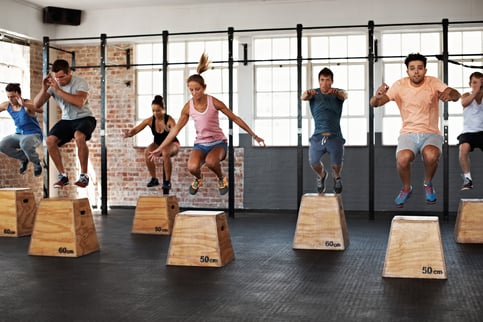
GettyImages-512889187In the most basic definition, plyometrics refers to jump training. Known to be a key component of many sports, such as basketball, soccer, gymnastics, and football, plyometric training can enhance athleticism, strengthen the most powerful muscles in your body, and much more.

Here are some of the benefits of plyometric exercises, and how to safely add plyometrics to your workout routine.

The Benefits of Plyometrics

For you to propel your body off the ground and land safely, many things have to happen in your muscles, tendons, ligaments, and joints. Studies show that plyometrics can help you build muscle as effectively as conventional weightlifting, and if you combine the two, it can help you reach your goals faster than focusing on either one alone. Also, the impact your body absorbs from landing has benefits for your bones: they become stronger.

If you are an athlete, plyometrics can improve your agility and explosiveness when it comes to fast-response moves, such as sprinting, quick direction changes on the field or court, and jumping (such as going for a header in soccer).

How to Get Started with Plyometrics

If plyometrics is new to your workout, as with anything you should start small. This is especially important for plyometric exercises. Correct form is crucial, as you need to both lift your body off the ground and control the landing. This dual action makes plyometric exercises more difficult and complex than most exercises. If you have a movement deficiency, it will be magnified when the speed and power of a jump are applied to it.

When learning a new plyometric move, you should first perform the move without the jump to perfect the form, strength, and stability that is required to do it correctly. Once you have all of that, you can then add the jumping movement. Another way to start small is to choose lower-impact plyometric exercises, such as jumping jacks, jumps in place, and line hops (side to side, forward, and back).

Do not ignore the upper body: plyometric pushups and medicine ball throws are great for building explosive power above the waist. Always be aware of your form. When you become tired, your form tends to suffer, and the risk of injury increases.

Is there anyone who shouldn’t do plyometric exercises? The short answer is no, as long as your doctor has not identified a reason why you should not (such as deteriorating joints or bad knees). If you are significantly overweight, gradually adding plyometrics is the key—and stay away from high-impact moves altogether. Remember that doing too much too soon—or doing advanced exercises before you are ready for them—can stress your joints, increasing your risk of injury.

New call-to-action

This blog was written by David Behrmann, NIFS Health Fitness Instructor.To learn more about the NIFS bloggers, click here


Topics: muscles plyometric athletic performance jumping jump training athleticism

The Why and How of Training Your Hip Adductors

GettyImages-1308568450Everyone needs strong hips. Athletes need them to perform a wide variety of movements within a given sport. Aging adults need them to help reduce the risk of falls. When we think about the hip, most people think about the glutes and abductors. You can look in any gym and see a handful of people with a band around their knees performing a plethora of movements working the glutes and abductors. However, the most neglected muscle is the one on the inside of the thigh: the adductor.

Anatomy and Function of the Adductor

The adductor muscle is situated in both the medial and posterior compartments of the upper leg. It attaches to the hip bone and to the linea aspera of the femur. The primary role of the adductor is to adduct and internally rotate the thigh at the hip joint. It also plays an important role in hip extension and stabilizing the pelvis along with the glutes and hamstrings.

Why You Should Be Training the Adductors

The adductors are a secondary muscle group that assists the larger muscle groups during compound exercises such as squats and deadlifts. However, there are important benefits to focusing accessory movements on the adductors. As I mentioned, the adductor plays a role in hip extension and stabilization of the pelvis. Hip extension is one of, if not the most powerful movements of the body. It is how we jump, stand, walk, run, and sprint. If we neglect the adductor muscles, we are missing out on added stabilization of the pelvis during all these movements.

Groin strains are the most common among athletes who are sprinting, cutting, and changing directions. Throughout these movements, the adductors take on a large load of eccentric forces. This means that just like the hamstrings during a heel strike, these muscles are force absorbers. A muscle is more likely to tear or strain if it is not strong enough to absorb an increasing amount of force. Strengthening the adductors can reduce the likelihood of a groin strain.

The adductors not only stabilize the pelvis, but they also control pelvic rotation. This is highly important for sports such as baseball, softball, golf, hockey, or tennis. All of these sports rely highly on the rotational power of your hips for swinging and throwing. Weak adductors will not help you hit farther or throw harder.

Movements for the Adductors

  • Adductor Machine: Not all gyms or facilities have one of these machines. However, if you do have access to one, it’s the simplest way to directly train the adductors.
  • Adductor Foam Roller Hold: Although you do not get the same overloading stimulus as the adductor machine, the foam roll hold could be a substitute for the machine. For this variation, all you need is a foam roller, or an object similar in width and it needs to be solid. In a seated or lying position, bend your knees to 90* and place the foam roller between your knees and squeeze. This is an isometric movement that you can make harder by holding for a longer duration. 
  • Banded Adduction: For this you will need a super band and a place to anchor the band close to the ground. To perform this movement, you will be in a standing position with your side to the band. Wrap the band around the inner foot and step out until you feel tension on the band. From your starting point, let the band pull your foot away. Stand tall and bring your foot back to the center.
  • Lateral Lunge: This is a great movement for any skill level because it can be progressed and regressed. To perform a body-weight lateral lunge, start with both legs together. Step one foot out and begin to bend that knee and start to sit your hips back. Push off that leg and bring both feet together. To progress this movement, simply add weight.
  • Copenhagen Plank: For this movement you will need a bench or a box. You will start in a side plank position with your top foot on the bench and your bottom leg either straight or bent. From this position, you will pick your hip up and hold.
  • Medicine Ball Scoop Pass: For the rotational action of the adductors, we will perform a rotational throw. With a medicine ball in both hands, shift your weight to the outside foot. From this position, push off the outside foot and rotate the hips, and then the shoulders, and throw the ball at the wall.

New call-to-action

This blog was written by Evan James, NIFS Exercise Physiologist EP-C, Health Fitness Instructor, and Personal Trainer. To learn more about the NIFS bloggers, click here.

Topics: injury prevention muscles senior fitness training exercises athletes hips hip mobility fall prevention

The Case for Adding Stretching to Your Exercise Routine

GettyImages-1062457690Chances are if you are like me, you have been told your whole life, “Make sure you’re stretching, it’s important!” But to many, the first thought that pops into their head when they think about stretching is, “Why?” And that is a very understandable response because stretching can involve a lot of discomfort (in the beginning) and to some, it might even cause a bit of pain. But there certainly is a method to the madness, and a reason why stretching is a vital component of your fitness program and, ultimately, your lifestyle.

What Is Stretching?

For starters, I’ll briefly describe what stretching is. Stretching can be somewhat of an umbrella term in that a lot of day-to-day activities do in fact involve some sort of stretching to some degree. In fact, every time your muscles contract there is a stretching and a shortening occurring inside the muscle to produce force. But the type of stretching I am talking about today is more deliberate and the kind of stretching most people think of when they hear the word “stretching”; think bending over and touching your toes, for example.

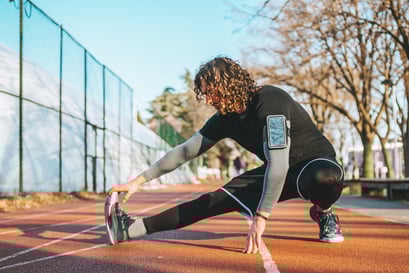
Stretching is important because it is all about increasing your range of motion and flexibility in the hope that doing this can lower your risk for muscle and joint injury or strains. The better our bodies are able to move, the lower the chance is for a muscle strain or getting injured when caught in an awkward position. Stretching both statically and dynamically is known to reduce injury risk.

Types of Stretching

The main types of stretching are active, passive, dynamic, and proprioceptive neuromuscular facilitation (PNF) stretching.

  • Active stretching is the main one people think of when they are told to stretch, and this type of stretching can be really good for isolating certain muscle groups. A big part of active stretching is the fact that you yourself are the one stretching out your muscles; there is no outside intervention. 
  • Passive stretching is similar to active stretching in that it can be isolated to certain muscle groups, but this type normally has a partner assisting in the stretch to perhaps reach a little bit more range of motion. For example, as you can see in this picture, the person on the ground is relaxed and her partner is the one actively applying stretching force to her leg, ideally achieving more range of motion.
  • Dynamic stretching is the next variation. In this type you have more of a momentum-based approach. What I mean by that is that a big part of it is using body movement and motion of the limbs themselves to achieve a change in range of motion. For example a foundational dynamic movement is high knees. This explosive movement of having knees come up as high as they can go will create range of motion throughout the legs. The foundational piece of this type of stretching is an idea of the stretch shortening cycle, which is a concept that as muscles contract and lengthen, they then shorten, and as a result are ready for activity.
  • Proprioceptive neuromuscular facilitation, or PNF for short, is last but not least. PNF stretching is essentially the technique of contracting and relaxing the muscle in order to increase range of motion. The rationale behind it is that after contracting a specific muscle, the signals that lead to a muscle resisting stretching are used up, and by following up the contraction immediately with a stretch, the muscle is more likely to achieve a higher range of motion. 

Incorporate Stretching into Your Workout

After seeing these different types of stretching in more detail, the last thing to consider is, “Is this something I should incorporate into my exercise routine?” The answer is a resounding YES! Stretching has been researched and studied and has been shown to decrease the chance of injury and increase performance. So the next time you throw on your running shoes and get ready to hit the ground running (literally), take a second to do a light stretching warmup. Your body will thank you down the road (also literally)!

New call-to-action

This blog was written by Ricky Rocha, Health Fitness Specialist. To learn more about the NIFS bloggers, click here.
 

Topics: injury prevention muscles stretching warmup dynamic stretching proprioception

Why High-intensity Interval Training Could Be For You

HITMore and more in today’s society, people have one resource that seems like it is only getting stretched out thinner and thinner: time. Too many of us seem to be cramming more and more things into our lives, whether that be work-related events, personal interests, or family events. With this ever-growing list of things we have taking time out of our day, many have to choose between stuff they need to get done and things they want to get done. One thing we all know we should do but sometimes choose to skip because of time constraints is exercising.

Now, we all know exercising is something everybody should do. The Centers for Disease Control recommends that every adult who is able to, exercise at least 150 minutes per week, and for many it can be more. But a good amount of people fall out of this group because they simply do not have enough time to exercise.

What is a way someone can get the most efficient exercise output in as little time as possible? The possible solution could be high-intensity interval training, or HIIT (aka HIT)! HIIT is a training technique that is all about intense bursts of exercise, followed by short recovery periods. The idea behind this type of training is that with these short bursts of exercise, the heart rate can remain elevated much higher in shorter time than traditional training.

Incorporating HIIT into Your Workouts

With the definitions out of the way, we can look at just some of the ways you can incorporate HIIT training into your daily fitness lifestyle. Many people opt for the route of either aerobic or resistance-style HIIT. Aerobic is more focused on cardio and increasing cardiac output, whereas resistance has a bit more to do with working the muscles of the body with varying degrees of weight.

Now which style is the best? That depends on what your goals are. But either will be a great route to choose to try and spike that heart rate and get in a great workout without too much time commitment.

The best thing about this type of training is that it can be anything you want it to be. For example, you can elect to do a sprinting-focused workout, or biking, rowing, swimming, etc. The idea is not behind what exercise you do, but rather how you’re doing the workout.

15-minute Bodyweight HIIT Workout

Here is a simple example of an introductory HIIT workout.

3 Rounds: 45 seconds each exercise with 15 seconds of rest

  1. High Knees in Place
  2. Squats
  3. Push-ups
  4. Dips
  5. Crunches

Don’t Skip Your Workout!

So the next time you are a little low on time and debating whether or not to skip a workout, high-intensity interval training could very well be the answer you’ve been looking for in order to keep up that consistency!

New call-to-action

The blog was written by Ricky Rocha, NIFS Health Fitness Specialist. To read more about the NIFS bloggers, click here.
Topics: workouts muscles resistance HIT high intensity aerobic HIIT efficiency cardio workout

How to Overtrain (DON’T Do It!)

Overtraining is a simple concept: just go hard for many days in a row without proper rest and recovery. I don’t recommend it. The effects of overtraining are:

  • Lack of sleep (although you should be exhausted)
  • Brain fog (can’t remember a thing)
  • Body soreness (little aches and pains)
  • Short of breath with everything (but I was gaining endurance)
  • Hungry and thirsty (but you don’t want to eat or drink)
  • Grouchy (everything and everyone will make you mad)

thumbnail_20230106_074106-1How I Did It

I needed a challenge: get in better shape, lose a bit of weight, just complete something. “It’s the end of the year,” I thought. “Why start January 1?” I went looking and found the Rapha 500K bike challenge. This was it for me, with a tweak. The challenge consists of 500K on your bike (inside or out) from Christmas to New Year’s Day. That is over 40 miles per day. I knew that would be too much (since I have not been on my bike in months), so I picked the 12 days of Christmas (one of my favorite Christmas songs!). That equates to just under 26 miles per day. I started a day early, on Christmas Day, so I gave myself another day to complete my task.

It was a quiet Christmas, so I got on my bike two times that day to get in over 25 miles. I did fear the pain of sitting the next day, but it was okay. I rode daily (or twice) as if it were my job. The fourth day my early leg soreness was gone, and I could actually sit on my saddle for 45 minutes to an hour every morning—though by that fourth day I was noticing being tired and not being able to sleep. As a fitness professional I know the importance of sleep, and I tried to get in naps. (I have perfected the 10-minute power nap). At night I could not fall asleep or stay asleep for more that a few hours at a time. I do have to get up early many days a week and keep my schedule as normal as possible.

I was thinking if I averaged 20mph it would only be a little over an hour to get in the amount needed for the day. Every morning I would sing that day’s part of the 12 days of Christmas over and over!

I knew my brain was foggy when during rides I would try to do the math and it always seemed like I was behind in numbers (yes, it took me a long time to figure out also that just like a 5K run is 3.1 miles, it would take 310 miles to get 500K).

I also couldn’t remember what my client’s workout was, although I just looked at their workout sheet. I often couldn’t remember who I was training next, or where my pen was (it’s in your hand, idiot). Focusing on anything for more than a few minutes WAS NOT GOING TO HAPPEN. Coffee only gets you so far.

I did try to hydrate before, during, and after workouts, but I always seemed thirsty in the evenings). As for the hydration, I drank a lot, so I had to go to the bathroom a lot. This made staying asleep a challenge as well.

I figured I could eat anything since I was burning calories by the hundreds (at least that’s what my hunger was telling me). Christmas goodies were not the best replenisher. (I had the idea I would eat super clean and see what it did for my body fat, but that idea went out the window with the cookies calling my name with every trip through the kitchen.)

I was short of breath in everything I did, but my endurance in other workouts was there. Oh yes, I kept up my HIT and strength sessions those 13 days as well. No rest for the weary, as they say.

The last two days were easy (ha!) in mileage terms. I went 15 miles at NIFS on the 11th day, which was almost interrupted by a fire alarm. “Unless I see smoke and flames, I’m not getting off this bike,” I said to no one in particular.

The 12th day (13th technically), I had an “easy” 10 miles, just like the Tour de France heading into Paris. UGH, nothing could be further from the truth. My legs ached and it seemed to take forever to finish. But with a sense of relief and sadness, I had finished what I started.

I still was not sleeping well for a few weeks after, and I was still hungry, because your body doesn’t know if you’re getting back on that bike again or not. It’s going to tell you to EAT!

I miss my bike, and it misses me I’m sure, but I got a new level of endurance, and my brain has come back to remembering (thank goodness). I do feel like this led to me catching a cold later. I just didn’t feel like total recovery was possible without more days off, better eating, and quality sleep.

Take on Your Own Challenge

Do push yourself, but also make sure you recover. That means REALLY LISTENING to your body. It is a magnificent machine it you take care of it.

New call-to-action

This blog was written by Kris Simpson, BS, ACSM-PT, HFS, personal trainer, and USTA at NIFS. To read more about the NIFS bloggers, click here.

Topics: muscles challenge overtraining biking christmas personal trainer brain soreness new year new you

Ultimate Glute Blog (Part 1of 2): Glute Anatomy and Function

In the age of social media, it’s easy to get overwhelmed by the amount of information that is thrown at you each day. Put aside what you know about glute training for the time being and let's focus on two major keys to making progress in a specific area of the body:

  • The function of the muscles.
  • The exercises that target the muscle the best.

In part 1 of this blog, you will learn the anatomy and function of the glutes. In part 2 I will discuss proper programming to achieve the best results.

GettyImages-1367369306The Gluteal Muscles

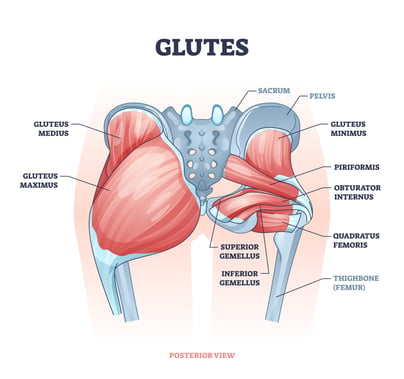
The gluteal muscles are a group of four muscles: the glute maximus, the glute medius, the glute minimus, and the tensor fasciae latae. Although all animals have glute muscles, large, developed glute muscles are a characteristic of humans that has adapted from a two-legged locomotion. The primary function of the glute muscles is to abduct (to move away from the midline) and extend (kick back) the thigh at the hip joint. This group of muscles also assists in adduction (to move toward the midline), and external and internal rotation.

Glute Minimus

Starting with the smallest of the muscles, the glute minimus is the deepest of the four muscles. It acts in synergy with the glute medius to abduct and internally rotate the thigh at the hip joint. The glute minimus also helps stabilize the pelvis.

Glute Medius

The glute medius is deep to the glute maximus, but superficial to the glute minimus. The glute medius can be seen as a superficial muscle. Therefore, it is important to work the muscle actions of the medius to build well-rounded glute muscles. The glute medius abducts and internally rotates the thigh at the hip joint. It also stabilizes the pelvis and trunk during gait.

Glute Maximus

The glute max is the largest and most superficial of the glute muscles. This is the main muscle that provides the majority of the shape. Its function is to extend and abduct the thigh at the hip joint. The glute max also assists external rotation and adduction.

Tensor Fasciae Latae

The tensor fasciae latae is a fusiform muscle and is located on the anterolateral aspect of the thigh. It has a similar function to the glute medius, in that it abducts the thigh at the hip. It also plays a role in externally rotating the lower leg at the knee. Because it connects to the knee and hip joint, it assists in stabilizing the knee and hip.

Looking Ahead

Now that we have looked at what muscles we will be training, and what their functions are, we can choose exercises that specifically target those specific muscle actions. Our movements will primarily be ones that extend and abduct the thigh at the hip. In part 2 I will list the NIFS trainers’ favorite glute exercises, as well as how to organize them in your training for the best results.

New call-to-action

This blog was written by Evan James, NIFS Exercise Physiologist EP-C, Health Fitness Instructor, and Personal Trainer. To learn more about the NIFS bloggers, click here.


Topics: muscles strength training glutes anatomy

Movement Pattern Variations: The Pull

GettyImages-1339637365In this blog series, I have discussed four movement patterns that training should fit into. I then went on to talk about scheduling a training plan using the four movement patterns, as well as going over the pushing movement pattern. In this blog I will discuss the next upper-body movement pattern on the list, the pulling movement pattern.

Pulling Movement Pattern

This movement pattern works the muscles of the latissimus dorsi, trapezius, posterior deltoid, and biceps. These muscles are all responsible for pulling objects toward our upper body. These muscle groups are essential for those of you who sit at a desk for the majority of your day job. Strengthening the muscles of your back will aid in maintaining an upright posture. 

Similar to the push pattern, the pulling movement pattern can be broken up further into a horizontal and vertical pull. A horizontal pull is one in which you are pulling the weight toward your torso (for example, rows); whereas a vertical pull is one in which you are pulling the weight down from overhead (for example, pulldowns).

Pulling Movements

Lats—Horizontal

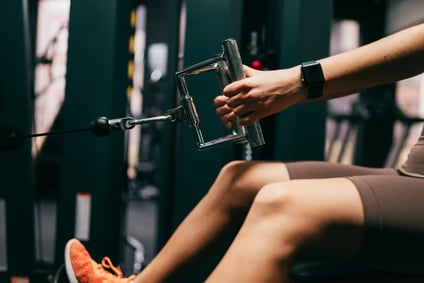
  • Seated Cable Row
  • One-arm Cable Row
  • Bent-over Barbell Row
  • One-arm DB Bent-over Row
  • Chest-supported Row
  • TRX or Ring Rows
  • Upright Rows

Lats—Vertical

  • Pullup
  • Chin-up
  • Lat Pulldown
  • One-arm Kneeling Lat Pulldown

Trap/Posterior Deltoid

  • Facepulls
  • Pullaparts
  • Rear Deltoid Flys

Biceps

  • Barbell Curl
  • DB Curl
  • Cable Curl
  • Preacher Curl
  • Overhand Curl

Structure Your Training Program

For more information on how to properly progress and structure a training program, visit our staff at the track desk to schedule a private session. We are more than happy to help at any time, and as part of your membership here at NIFS, you receive complimentary workout programs. Our health fitness professionals tailor all programs to your fitness goals.

New call-to-action

This blog was written by Evan James, NIFS Exercise Physiologist EP-C, Health Fitness Instructor, and Personal Trainer. To learn more about the NIFS bloggers, click here.

Topics: workouts muscles upper body movement movement patterns pull training program pulling

The Difference Between Compound and Isolation Exercises When Lifting

GettyImages-1368579391In a previous blog I discussed the importance of training within the movement categories. Those categories are upper body push and pull, squat, and hinge. To break it down even further within the categories, there are exercises that give you more bang for the buck than others. In this blog I differentiate between compound and isolation exercises. For those of you who are on a time crunch when you are in the gym, these exercises are crucial to get the most out of your training.

What Is the Difference?

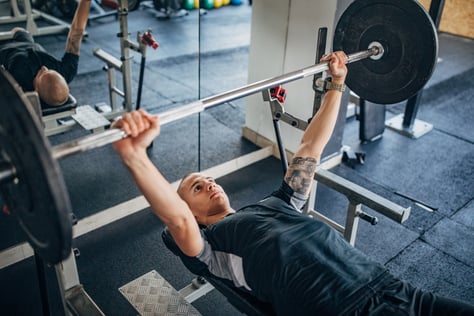
A compound exercise is also known as a multi-joint exercise. This is an exercise in which more than one joint is required to move through the exercise. An example of a compound exercise would be a squat. To complete the squat pattern, three joints must move: the ankle, knee, and hip. Examples of compound exercises for the upper body are the bench press and overhead press. Both movements require the function of the shoulder and elbow. The reason that compound lifts have more payoff is that they work multiple muscle groups as well. A bench press uses the pectoralis muscles, deltoids, and triceps. This requires more energy to be expended than if you used only one of those muscle groups on a single joint exercise. Exercises that isolate a single muscle group are called isolation exercises. Examples of an isolation movement would be a bicep curl, triceps extension, leg extension, or a leg curl. The difference between a compound exercise and an isolation exercise is the number of joints that move.

Which Type of Exercise Should You Do?

Compound lifts are more challenging but less time consuming than performing multiple different isolation exercises. If you short on time while in the gym, a full-body workout full of compound movements will give you the most from your workout. I have written blogs about how to structure those types of workouts. If you want to sculpt your body in a particular way, and are focused on correcting muscle imbalances or injury rehabilitation, each may require the use of specific isolation movements to build up specific muscle groups. So, the question is, what are your goals? Once you define your goals, you can design your workout program.

Structuring a Workout

The most efficient way to structure a workout utilizing both methods is to perform a compound movement first in your workout followed by isolation movements to complement the muscles used in the compound movement. A quick example using the bench press would be bench pressing first, followed by isolation movements to isolate the chest and triceps. You want to save the most amount of energy for your compound exercises, which is why you should perform this one first. Fatiguing the triceps before a heavy bench workout will not yield the best results for bench press. This is why isolation exercises are best performed at the end of your workout.

For more information or guidance on how to structure your workouts, visit our training staff at the track desk in the fitness center. For nonmembers looking for help on your fitness journey, feel free to give us a call to set up a guest fitness assessment.

New call-to-action

This blog was written by Evan James, NIFS Exercise Physiologist EP-C, Health Fitness Instructor, and Personal Trainer. To learn more about the NIFS bloggers, click here.

Topics: fitness center muscles weight lifting weightlifting muscle building joints gym isolation exercises compound exercises structuring workouts

How to Get a Start in Olympic Weightlifting

GettyImages-1320177931Olympic weightlifting is one of the oldest sports that is still around to this day in the Olympics. Over time the sport has evolved to what it is today, and there are more participants at the national-level events here in the US than ever before. With the help of CrossFit, the weightlifting community has grown substantially in the last decade. Still, however, not many people know of Olympic weightlifting and how to get started in the sport.
Who Should Olympic Lift?

Everyone! Olympic weightlifting is for everyone. In a previous blog post, I wrote about the benefits of learning and practicing the Olympic lifts. To sum it up, the benefits are learning a new skill, strengthening the muscles, having goals to work toward, and competing in a fun and welcoming environment. If you are a former athlete and have been missing that competition feeling, weightlifting might be for you. In America, you have the opportunity to lift in small local meets, state meets, larger national meets, and even international competitions if you have what it takes to qualify. The weightlifting community is full of fun, positive, and energetic people who are all there for the same reason. Once you commit to learning the lifts, the next step is to find a coach.

Why You Need a Coach

One of the most important things you can do when starting to learn the Olympic lifts is to find an educated and certified weightlifting coach. Weightlifting has one of the lowest injury rates of all the Olympic sports. However, if you don’t learn proper technique early on, you are more likely to injure yourself. Looking into the future, after proper technique teachings, a coach will give proper programming. A well-thought-out and structured weightlifting program will increase the length of your weightlifting career and ensure proper progressions.

If your goal is to compete in Olympic weightlifting, finding a coach will be crucial to your success not only as you prepare for the competition, but also at the competition. Competitions are fast paced and require more thought than just lifting the weight when it is your turn. There is a lot of planning that happens for competitions, from timing your warmups to counting the number of attempts until you must be on the platform. Having a coach makes the whole experience less stressful for the athlete and makes it go a lot more smoothly. A coach who knows their athletes will be able to motivate and push you to levels you did not know you could reach.

How to Find a Coach

Weightlifting gyms and coaches can be found on USA Weightlifting’s website. You can also do a quick Google search for barbell clubs in your area. You will most likely come across some CrossFit boxes as well. Make sure you find a coach that is certified through USA Weightlifting to ensure you that your coach has gone through the necessary trainings for technique and safety. Just like any other sport, you can be a self-taught lifter. However, learning proper techniques from the beginning will extend your career in the sport.

What Now?

After you have found a certified and experienced weightlifting coach that you trust, it is time to put in the work. Olympic weightlifting is not a sport that you will pick up overnight. It takes hours and hours of intentional practice to master this sport. The athletes at the very top have been training since they were young kids. You should set your goals accordingly and never compare yourself to the athletes that are competing at the highest level. If you trust the process and work hard, you will see progress and become the best version of yourself.

New call-to-action

This blog was written by Evan James, NIFS Exercise Physiologist EP-C, Health Fitness Instructor, and Personal Trainer. To learn more about the NIFS bloggers, click here.

Topics: muscles weightlifting goals competition weight training coach olympic weightlifting

High-Intensity Circuit Training: Time-Efficient Results

Triple Threat with Jessie_poster newWith the world now instantly accessible through technology, it’s easy to understand why a growing number of people expect things to be done in a shorter amount of time. Like many others, I’m a big fan of things that are fast and effective, and that includes my workouts. High-intensity circuit training does just that by providing an effective and convenient way to increase exercise results in less time.

Whether you’re a career-driven adult or hardworking student, you’re probably a time-conscious person, so it may not be realistic to devote half of your week to aerobic and strength training separately. To really hammer this home, let’s do the math:

ACSM’s standard guidelines for aerobic training recommend 75–150 minutes a week of exercise, depending on the intensity. Let’s say you do 30 minutes of moderately intense cardio 4 days per week. That’s 120 minutes. Now let’s add strength training. Typically done 2–3 days each week, strength training should hit each major muscle group in 2–4 sets with 8–12 repetitions per set. Depending on the muscle group, this could take you 45–90 minutes. Average that out to about 60 minutes, 3 days a week. That’s 180 minutes. 180 + 120 = 300 minutes of time spent in the gym. 300! That’s as impractical as it is exhausting. Honestly, I’m tired just from doing the math on that.

With HICT, you’re combining both traditional training methods into one complete, high-energy workout that you’ll leave with a muscle and endorphin pump. Plus, you’ll be in and out of the door in less than an hour. What more could you ask for?

Benefits of High-Intensity Circuit Training

The concept of high-intensity circuit training is simple. By increasing the intensity of exercises that elevate the heart rate and limiting rest time, HICT can prompt greater gains in a shorter amount of time. In several studies, it’s been proven that the benefits of this type of training surpass those of the traditional protocols of aerobic and strength training. Let’s start with fat loss.

If you’re looking to lose excess body fat, tone up, or lean out, this type of training is the ticket. The strength training component accelerates the amount of fat burned during the workout. When this is paired with little rest between sets, the aerobic and metabolic benefits skyrocket, with results lasting up to 72 hours after the session. Even more interesting, the combination of high-intensity aerobic activity and resistance training may have a greater impact on subcutaneous fat loss. This is the type of fat that is troublesome for some people around their waistline, hips, and other areas.

Another significant benefit is the fact that HICT elicits the same if not greater gains in VO2 max, or peak oxygen uptake, when compared to traditional steady-state cardiovascular exercise. With the exercise volume substantially lower, high-intensity circuit training easily stands up to its traditional counterpart in improving cardiopulmonary health.

Other benefits of HICT include

  • Improved strength across all major muscle groups
  • Increased stability and movement efficiency
  • Lowered stress levels
  • Improved mental health
  • Increased adaptability to regressions and progressions of exercises
  • Saving time during the week that would have otherwise been spent on traditional programs

Sample HICT Program

Strength exercises for this type of program should be in an order of opposing muscle groups. For example, an upper-body station would be followed by a lower-body station. This allows the individual to have alternating rest and work throughout the circuit. On the same note, a highly intense aerobic exercise should be followed by an exercise with a low to moderate intensity. An example of this would be burpees followed by a stationary plank. If this is executed correctly, you should successfully complete these exercises at fast and intense pace with minimal rest. A typical format for a HICT session is as follows:

  • 9–12 exercise stations
  • 15–20 repetitions or 30 seconds of work
  • 30 seconds or less of rest time
  • 2–3 sets/rounds

What’s Next?

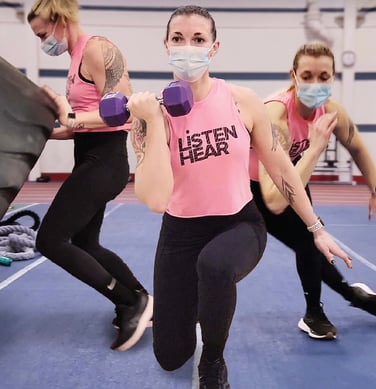
Not all programs are created equal, and traditional workouts are still the most effective methods if you want to specifically improve your strength and power or aerobic endurance. However, if you are looking for a new and exciting type of workout that helps you burn fat and build muscle in a short amount of time, HICT is worth a try! Our newest class at NIFS, Triple Threat, uses this type of format across three different areas of fitness: cardio, strength, and power. Join in on the class and start your journey to better health!

New call-to-action

This blog was written by Jessica Phelps, BS, ACE CPT, Health Coach. To learn more about the NIFS bloggers, click here.

Sources: https://www.acsm.org/docs/default-source/files-for-resource-library/high-intensity-interval-training.pdf
https://journals.lww.com/acsm-healthfitness/fulltext/2013/05000/high_intensity_circuit_training_using_body_weight_.5.aspx

Topics: cardio group fitness workouts muscles strength power high intensity circuit training high-intensity circuit training