<img height="1" width="1" style="display:none" src="https://www.facebook.com/tr?id=424649934352787&amp;ev=PageView&amp;noscript=1">

NIFS Healthy Living Blog

What Is VO2 Max Testing?

GettyImages-915799224VO2 max testing, or graded exercise testing, is a treadmill run or cycle to volitional fatigue—or pretty much going until you must stop. The test will tell us how many liters of oxygen you are able to take in and use for cellular respiration.

Physiologically, people use oxygen for a variety of things. The main purpose is for the oxygen to get into the cells’ mitochondria so that it can be used to generate adenosine triphosphate (ATP), which is the main energy source in the body. People use ATP to do pretty much everything: move our muscles, think, and even digest food. So the more oxygen you can take in and convert to energy, the longer and faster you can run due to this surplus of energy you are making at the cellular level.

What the Test Is Like

The test starts at a low speed and no incline on the treadmill. Then every so often the treadmill gets a little faster and a little higher. The increases are almost unnoticed and most start out walking. On the other hand, on the cycle, the resistance gets a little harder occasionally and the participant is expected to maintain the same rotations per minute (RPM). With both tests, the person is expected to go until they feel they must stop, when their workload is too great to maintain or their legs become too fatigued to continue.

What the Test Measures

While exercising, you will be hooked up to different devices to monitor your vitals such as a heart rate monitor and a ventilator of sorts. Some tests will also measure blood pressure and rate of perceived exertion. Trainers can use the information from these devices to generate a customized endurance program for you to push you to increase your VO2 max, and in turn, your overall endurance. VO2 max testing is a great way to know where you are currently at in your endurance training. It is comparable to doing repetition max testing on weights in strength training.

How the Results Can Shape Your Training

Trainers can utilize the data from a VO2 max test to make a program customized to your physiology. From a VO2 max test we can see what your heart rate maximum is exactly, and using these numbers we can get more accurate training zones for you. The ventilator gives a variety of useful data such as your aerobic threshold, or the point when you really start to breathe hard. This is the point where a person really starts to hate running, so knowing this point can help us stay below that more often, making the training more enjoyable while still receiving the benefits. Knowing different heart rate zones can help prevent overtraining and help push you to your fullest capacity, causing your body to adapt and consume more oxygen.

The measurements of blood pressure and perceived exertion are more common in a clinical setting to ensure normal responses to exercise, so they are not always necessary in healthy populations. The trainer can use rate of perceived exertion, however, to know how a person feels at certain running speeds. If someone feels that they are working very hard at a faster speed, the trainer may stay below that speed more often to make the runner more comfortable; and if a certain speed feels very easy, the trainer may ramp up the pace.

VO2 Max Testing at NIFS

Korr CardioCoach metabolic system VO2 max testing is offered here at the National Institute for Fitness and Sport. Connect with a trainer at the track desk if you have any interest or questions. VO2 max testing is a great way to gauge your endurance level going into marathon training, and a great way to pace yourself in a race by knowing where you are at physiologically at different workloads. Knowing your VO2 max as a runner is like how a powerlifter knows what the maximum amount of weight they can bench is. If you don’t have a benchmark going into a competition, you run the risk of over- or under-shooting and not performing as well. You don’t necessarily have to partake in a full VO2 max test if you are concerned about going to volitional fatigue. There are submaximal tests and estimation equations that can be utilized to get a rough estimate of your VO2 max. See a NIFS staff member with any questions you have pertaining to a VO2 max test or to schedule your test today.

New call-to-action

This blog was written by Grant Lamkin, NIFS Health Fitness Specialist. To learn more about the NIFS bloggers, click here.

Topics: personal training heart rate energy programs vo2 max oxygen fitness assessment testing

“Be My Valentine” HIIT Workout

_68R1966-1Love to workout and need a date idea for Valentine’s Day? We have just the workout for you!

  • AMRAP in 30 seconds followed by a 1-minute rest after each exercise
  • Equipment: 2 “heavy” dumbbells, 2 “light” dumbbells, and a yoga mat
  • Total Time: ~ 20 min

Circuit #1

  • Dumbbell Thruster (squat with an overhead press)
  • Glute Bridge (option for dumbbell on hips)
  • Russian Twist (option to add dumbbell)
  • Alternating Side Lunge with Forward Shoulder Raise

Repeat circuit twice

 Circuit #2

  • Renegade Row (push-up on dumbbells with alternating single-arm row)
  • Dumbbell Floor Press
  • Burpee
  • Forward Lunge (option to add dumbbell)

Repeat circuit twice

Spread the love and share this workout with your Valentine!

Like what you've just read? Click here to subscribe to our blog!

This blog was written by Payton Gross, Group Fitness Coordinator and Barre Above Instructor. Learn more about the NIFS bloggers here.

Topics: workouts holidays circuit workout HIT exercises programs HIIT workout buddy circuit training valentine's day

Bar Crawl: Specialty Bar Training for Powerlifting at NIFS

Screen Shot 2018-07-12 at 10.42.59 AMAs a fitness professional I approach training and helping people from the direction that principles guide methods. The reason for this is that methods and fads will always change, but principles never do. It’s beneficial that the methods and variations of movements change from time to time, as long as the decision to change them is based on solid principles and reasoning. Variations are great, such as a change in foot position in a squat, adding load to a plank position, or varying the implement you are using during the exercise. One implement change that can pay heavy dividends (pun very much intended) is using a specialty lifting bar.

Specialty bars are not new by any means, but due to new waves of “strongman” training and the resurgence of powerlifting, the popularity of the specialty bar is constantly growing. Each different bar is designed to elicit a specific stimulus that will result in an increase in strength, stability, or performance. In fact, many bars were originally designed for the specificity of training certain sports. And although most are still widely used specifically for generating a particular training response for sports, the everyday fitness enthusiast can enjoy the benefits without having to be a pro athlete.

Bars with Benefits

Come with me as we journey through NIFS’s Bar Crawl and check out all the specialty bars that are at your disposal and some or our favorite exercises associated with each. Before we do, here’s a reminder that you need to master the basics with basic equipment before moving on to an advanced movement or piece of equipment.

Fat bar: A barbell that is thicker than a general-use bar. The typical bar has a thickness of approximately one inch, whereas a thick bar can be twice that or even more.

Benefits:

  • More muscle activation in the hands, forearms, and upper arms.
  • Harder contraction (experiment: flex your bicep without making a fist, then flex with a fist; notice the difference).
  • Grip training no matter what.
  • Greater focus on the lift/exercise.


  • Bench Press
  • Overhead Press
  • Deadlift

Safety bar: Also referred to as a “yoke” bar, it looks like what they put on oxen back in the day. There is a three-way pad that rests on your shoulders with handles, with a curved bar shape at both ends.

Benefits:

  • Great for lower-body and low-back strength and transfers nicely to the straight-bar variations.
  • Loads the anterior core.
  • Minimizes stress on the wrists and elbows.
  • Helps in maintaining proper spinal alignment.


  • Front Squat
  • Back Squat
  • Lunges

Log bar: Straight from the strongmen themselves, this bar simulates using a log for different movements. It looks like a log with bars on the end to add plate weight load.

Benefits:

  • Cumbersome and unusual shape increases the stability need in the trunk and entire body.
  • Neutral grip is safer on the wrists and shoulders and allows for a more natural movement.
  • Abbreviated range of motion due to its size is safer for the joints and allows for greater load.


  • Clean and Press
  • Overhead Press
  • Bent-over Row

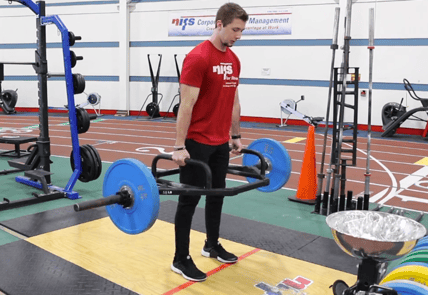
Trap bar: Hexagonal in shape, this is a bar you stand in, and it is used mainly for deadlifts or floor-loaded squat motions. Top coaches like Mike Robertson and Mike Boyle almost exclusively use the trap bar for athletes for these benefits.

Benefits:

  • Combines the benefits of the deadlift and the squat.
  • Loaded closer to your center of gravity, making it great for beginners as well as seasoned athletes.
  • More natural body position for the deadlift.
  • High handles decrease the range of motion, minimizing the chance for lumbar flexion typically seen in the traditional deadlift due to the weight being out in front of the body.


  • Deadlift
  • Bent-over Rows
  • Farmer Carry

Swiss bar: A multi-grip bar ranging from neutral to wide-grip and mixed-grip options.

Benefits:

  • Lighter than a typical bar; great for beginners.
  • Easy on the shoulders.
  • Specific training for sports such as football.
  • Range of motion similar to using dumbbells but with more load capabilities.


  • Bench Press
  • Overhead Press
  • Bicep Curls
  • Makeshift pull-up bar

Get Help from NIFS

Be sure to stop by the track desk and ask one of your highly trained instructors how a specialty bar can be used in your programming. Train smart, and train safe!

Like what you've just read? Click here to subscribe to our blog!

This blog was written by Tony Maloney, ACSM Certified Exercise Physiologist and Fitness Center Manager. To find out more about the NIFS bloggers, click here.
Topics: NIFS equipment training powerlifting programs

Out with the Old: Change Your Workout to Improve Wellness

GettyImages-529079056.jpgTake yourself back to the 1970s when Arnold Schwarzenegger was preparing for the Mr. Olympia contest. Everybody wanted to try his incredibly intense workouts. It has been rumored that Arnold’s workouts were so intense that at least three different trainers would have to give him separate workouts in order to keep up with him.

Following in the king’s footsteps, anyone who wanted to be a bodybuilder or get into shape undeniably thought that working out six days a week, two times a day, was the way to make this happen. Luckily for us and all of America, workouts have evolved from the old-school mindset to the new school.

Varying Your Workout

Old School: Sticking to the same workout for months.

Although this was the go-to, this pattern isn’t always going to work. When you do the same sets and reps for every workout, you miss out on allowing your body to change.

New School: Implementing the SAID principle.

The SAID principle is an acronym for Specific Adaptation to Imposed Demand. When the body is put under different stress, it starts to adapt. In other words, the body is trying to get better. By providing your body with different types of sets, reps, and loads, you are able to tap into more of your muscle fibers, increase strength, and avoid plateaus.

Targeting Training

Old school: Focusing only on the trouble spots.

This type of focus won’t work for the majority of people who are coming to the gym to work out or lose weight. When there is variety in your workouts, there is room for growth and development. Focusing only on the areas that are the weakest isn’t going to help the areas that are already strong continue to get stronger.

New School: Correcting trouble spots while also training strong areas.

Correcting a weakness and building on a strong point at the same time will enable you to improve your body as a whole. A way to correct those problem areas is to figure out exactly why they are causing you problems. The Functional Movement Screen captures fundamental movements, motor control within movement patterns, and competence of basic movements uncomplicated by specific skills. It will determine the greatest areas of movement deficiency, demonstrate asymmetries, and eventually correlate these with an outcome.

Cardio vs. Strength

Old School: Focusing only on cardio will increase weight loss.

While it’s important to incorporate cardio into your workout regimen to help build and keep your cardiovascular systems stronger, it is not the only type of exercise that is needed for weight loss. Focusing only on cardio will lessen your chances of building muscle.

New School: Getting a healthy dose of both cardio and strength training will improve overall health.

Much like how a car stays warm after it turns off, the same can be said about your body after you finish a workout. EPOC (excess post-exercise oxygen consumption) explains how your body’s metabolism can continue to burn more calories. Resistance training can provide a greater EPOC effect than running at a steady speed.

Out with the Old and in with the New

Training methods will come and go, and at some point the new-school methods will become old school. At NIFS we offer a wide variety of programs, assessments, and education to help turn those old habits into new routines. Stay positive, be willing to accept change, and explore to find what works best for you!

Like what you've just read? Click here to subscribe to our blog!

This blog was written by Ashley Duncan, Weight Loss Coordinator. To learn more about the NIFS bloggers, click here.
Topics: NIFS weight loss workouts calories resistance metabolism functional movement assessments programs wellness mindset assessment plateaus targeting workouts change oxygen

How the Half-Kneeling Workout Position Helps with Movement

For many years now, the half-kneeling position has been a favorite of mine and a workout program staple for the individuals I work with. As a “pattern–first” coach, the half-kneeling position not only provides another dimension to many exercises; it also helps in enhancing a few movement patterns at the same time.


Why It’s a Great Position

One of the reasons it’s such a great position is that it teaches us how we learned to move in the first place, from the ground up. Becoming proficient in the basic functional movement patterns carries over immensely into higher-order movements and exercises, as well as develops strength and stability in the trunk and core, which will be a benefit in many aspects of fitness and while we travel around this earth.

Getting the Most from the Movement

But the half-kneeling position is more than just putting one knee on the ground. There are a few intricacies you want to pay attention to in order to get the most out of the movement you’re performing in this position.

Let’s break down the half-kneeling position, shall we?


3:00


3:00


Wistia video thumbnail - Half-Kneel Position
 

Thanks for reporting a problem. We'll attach technical data about this session to help us figure out the issue. Which of these best describes the problem?

Any other details or context?

Cancel
message


As you can see, there is more to this position than simply placing one knee on the ground and performing a movement.

The Best Half-Kneeling Exercises

Now that we know the best way to set-up this position, here are a few of my favorite half-kneeling exercises for you to add into your workout program.


2:13


2:13


Thanks for reporting a problem. We'll attach technical data about this session to help us figure out the issue. Which of these best describes the problem?

Any other details or context?

Cancel
message


  • Hip flexor stretch
  • Windmills
  • Cable chop
  • Cable lift
  • AR press
  • Sandbag halo
  • MB hip toss
  • SA land mine OH press
  • SA chest press
  • KB seesaw press
  • Lat pulls

Getting the most out of every movement in exercise should be a priority when designing a program or individual workout session. Concepts like combination exercises, multi-joint movements, and pattern-specific exercises provide maximal benefits to your fitness and routine. Take a knee and improve multiple facets of your fitness at the same time.

Like what you've just read? Click here to subscribe to our blog!

This blog was written by Tony Maloney, ACSM Certified Exercise Physiologist and Fitness Center Manager. To find out more about the NIFS bloggers, click here.

Topics: exercise workouts core functional movement programs movement knee

The Benefits of the Hip Press Exercise in Developing Glutes

glutes.jpgThe benefits and importance of developing the glutes in sports performance, fitness, and physique is a popular topic these days and has been for quite some time. In fact, an entire industry is built around shaping the perfect backside for some, and developing the most powerful athlete for others.
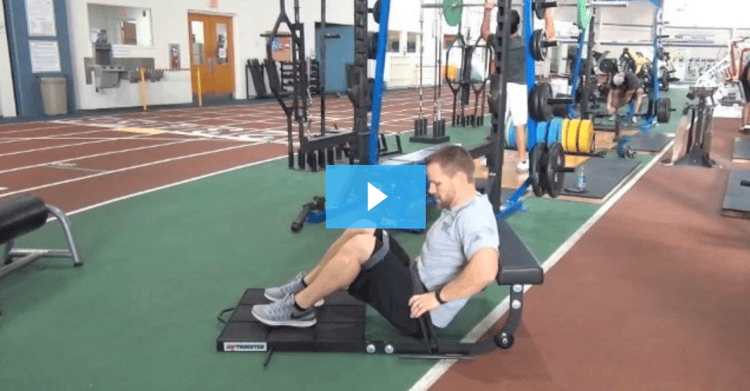
“The big house,” a term I have adopted from Mike Boyle, is a part of the body that has so many important duties in human movement (and yes, for filling out a swimsuit as well) that it should be a focus in everybody’s program. Until recently we targeted this area through back squats, lunges, kettlebell swings, clamshells, and the like, which are all very good options. The hip press, also known as the hip thruster, has been found to be possibly the most effective exercise for gluteal engagement, strength, and development. It has definitely become one of my go-to exercises personally and with the individuals I work with.

How to Perform the Exercise

So how effective is the hip press in developing this important area of our body? My buddy Alex Soller did some of the legwork already for me in his post Are You Glute-n Free? The Importance of Exercises for Glutes, where he covers the structural importance of the glutes and some exercises to enhance them. But we will focus on the hip press here and why it has quickly became one of the best ways to get the most out of the big house. In the video below, Kaci demonstrates some of the most popular ways to perform the hip press using our newly acquired hip press bench that will set you up for success when training the hips.

Screen Shot 2017-05-12 at 12.14.15 PM.png

Programming for Glute Development

In a 2014 post, Eric Cressey and Bret Contreras compared the “glute-building potential” of the back squat and hip press. Their ultimate belief, as well as mine, is that both are important movements for glute development and should be a part of your programming. This is partially due to the differences the two movements have in the activation of the glutes and the tension generated throughout both exercises. What I found significant in their findings is the massive difference in the activation of the glutes during the hip press leading to the burning pump that you will feel performing a challenging set of presses. This is a feeling you will just have to experience for yourself! I also believe that the hip press is a safer and easier option for the average gym-goer whereas the back squat can be a rather technical exercise, especially when dealing with heavier loads. 

The bottom line is (see what I did there?) that the hip press is a relatively easy movement to perform that can result in building that big house you have always wanted for fitness and physique. Need to learn more on how to implement the hip press into your program? Be sure to schedule your Assessment and Personal Program with an instructor today.

Like what you've just read? Click here to subscribe to our blog!

This blog was written by Tony Maloney, ACSM Certified Exercise Physiologist and Fitness Center Manager. To find out more about the NIFS bloggers, click here.

Topics: fitness exercises sports glutes programs

Bored of Your Workout Program? Try a “Wild-Card” Week

Screen Shot 2017-03-02 at 2.12.51 PM.pngWe’ve all done it. New lifters, old lifters—everyone has experienced that week where your normal training program just doesn’t have the same motivation for you that it did in the past. Monday is chest-tri day, Tuesday is squat, Wednesday is back-bi, so on and so forth. No one is immune to this feeling, especially if you are as religious about following your program as many of the NIFS members are.

Would You Eat the Same Food for Every Meal?

Think about it in terms of food. Do you eat the exact same thing for each meal every day of the week? Some might, but I can guarantee it’s not the most enjoyable thing in the world. However, most people approach planning meals for the week with a slight variation on the meals they prepared the week before: similar main ingredients, but maybe with a different spice or two, which will make a world of a difference. (Mmmmmm, food. I’m getting hungry, so let’s get back to training.)

But what causes this? Why do you all of a sudden just not feel like doing your program for that day or week? The most obvious answer is the fact that you may have been on this program for multiple weeks. Mentally, you are drained from the regimen, and your body is telling you that it might be time to change it up.

I think this is one of the most common training mistakes. Your body is ready for a new challenge or stimulus, but you tell yourself to suck it up and do the same program for another two months. You have seen progress that you’ve made (and recently stalled) with that program and have a hard time thinking you will find anything better. I think many individuals stick to the same program for way too long. This leads to other weeks where you just don’t feel like completing what is assigned for that day.

How to Overcome Workout Boredom

So what do you do, decide to take a week off of training? Not recommended. What I do recommend is to have what I call a wild-card week. In a wild-card week, you choose exercises that work similar movements/muscles to what your normal program targets, but with different (or more fun) exercises.

Here are four typical exercise choices with a “wild” variation to each.


Remember, your training program should be enjoyable. That is what keeps bringing you back each week. Listen to your body when it is time to switch it up and don’t be afraid to add in a wild-card week to your workouts every once in a while!

Like what you've just read? Click here to subscribe to our blog!

This blog was written by Alex Soller, Health Fitness Instructor and Athletic Performance Coach. Click here for more information about the NIFS bloggers.

Topics: NIFS fitness center motivation workouts attitude training focus programs

Periodization of Your Workouts for Maximal Strength Gains

deadlift-3.jpgPeriodization is a fancy word for timing out your strength training to avoid mishaps such as overtraining, undertraining, or psychological “burnout.” A correctly periodized training program allows for maximal strength gains within the time frame of the program.

There are several different subcategories within the realm of periodization. The two most popular forms are linear and undulating periodization, and they can be similar in effect, yet they are quite different in execution.

Linear Periodization

This is a great example of the KISS (Keep It Super Simple) method. This type of programming calls for simply adding weight to your lifts, week after week, and trying your very hardest to outwork your previous workout. This tried-and-true method has shown results in all levels of lifters and athletes, from novice to advanced competitors.

“Linear” refers to the line of progression when you look at the weights used from each workout to the next. This line will slowly and steadily increase until the end of your program, when it is time to show off how strong you have gotten. A typical linear periodization program will last anywhere from 8 to 16 weeks.

Undulating Periodization

Now that you are familiar with linear periodization, take that nice straight line and make it a chaotic zig-zag from the first week of the program to the last, and now you have undulating periodization. Basically, instead of increasing weight or reps linearly throughout your program, you will consistently be adding or dropping weight and/or reps from each workout to the next.

The idea behind undulating periodization is to allow optimal recovery time between ultra-intense workouts, eliminating physical or mental overtraining. This is a method often used by more advanced lifters and athletes because of the commonly intense nature of the training sessions. For example, if a competitive powerlifter trained three days a week, a sample week of their program might look something like this (percentages shown are those of the respective one-rep max for each individual lift):

  • Day 1: Squat—80% 5 sets/3 reps
  • Day 2: Bench Press—70% 6 sets/3 reps
  • Day 3: Deadlift—75% 3 sets/8 reps
Which Method Should You Choose?

Neither of these methods has been proven to be better than the other. Each person will have their own opinions on which is better and why. I would suggest starting with linear periodization for two reasons:

  1. It is a very easy method to follow. There is no reason why anybody should start a linear program and not be able to finish it.
  2. It is a very accommodating method for beginner lifters. It is effort based, and what you give is what you get.

Like I said previously, these methods might not be ideal for everyone. They are great templates for individuals who want to get stronger, but they must be tailored to best fit you and your goals. For more information regarding training programs, ask of the NIFS Health Fitness Specialists to create one for you. If this methodology intrigues you and you would like to try it out, specifically mention this blog and they will create a program based on one of these training strategies.

This blog was written by Aaron Combs, NSCA CSCS. To find out more about the NIFS bloggers, click here.

Topics: NIFS workouts NIFS programs weight lifting strength powerlifting strength training programs periodization

How to Build Training Programs for Competitive Athletes (Part 2)

In part 1 of this blog, I explained training periodization, and talked about the first two macrocycles: off-season and pre-season. Now I’ll talk about the remaining macrocycles: in-season and post-season.

In-Season

ThinkstockPhotos-100324402.jpgOnce the competitive season begins, scheduling time to get in to lift is a lot more difficult due to the practices, games, and travel that are happening. To me, in-season lifting is sometimes undervalued in the competitive/athletic world because of the fact that the primary focus is to win games or matches, not lift weights. However, I believe that this is one of the most important (if not the most important) times during the year because of what lifting can do for the athlete throughout the competitive season and into the off-season.
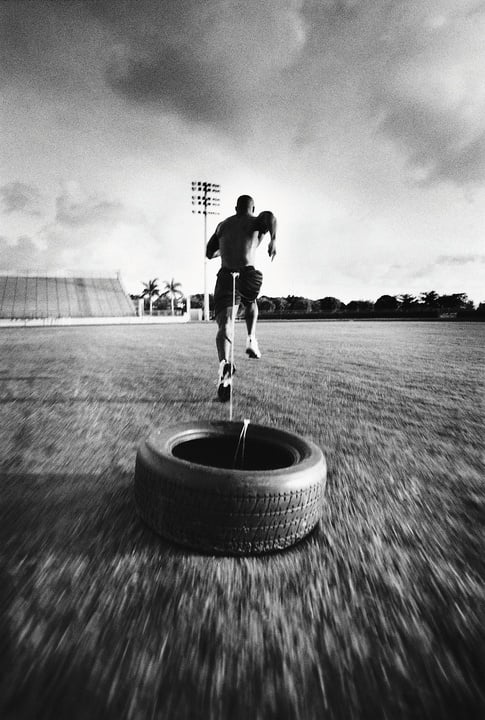
The goal of in-season lifting is simple: maintain what you have built in the off/pre-season and make sure that no muscular imbalances develop. This is not a time to try and increase your squat or bench by 50 pounds. It is a time to make sure that your body stays healthy and you are able to preserve the muscle, strength, and power that you have built throughout your season. Doing this will not only keep you healthier for your sport, but will also set you up for better long-term development during the subsequent off-season. Think about it: If you lose the vast majority of strength, power, and muscle mass you’ve built over the in-season, you are basically starting at square one when the season is over. If you are able to preserve 85% of that strength and power, you are starting further along than you were the year before, which allows you to make bigger gains.

Recommendation:

Training Frequency: 2 days per week
Mode: Medium Sport Specificity
Volume: Low

Post-Season

When your competitive season comes to a close, there should be some time to relax and recover from it. Take time and reflect on how you performed and what you could have done to be better in different aspects of your activity. Start creating a plan on how to improve those things once your training ramps up again.

As for training during this period, it should still happen. Your body is still recovering, but you want to make sure you do not totally fall off the map by not doing any type of exercise or physical activity. This is a perfect time to play or participate in some other sports or change up your weightlifting routine. You basically have free reign on your choices under one circumstance: get away from your actual sport/complete lifting routine.

This macrocycle does not last long, but it is an important one. You have been competing for months and want to avoid being burnt out on the sport you love, so getting away will be good. Do something different; just be active. After 3 to 4 weeks of light activity, you can begin your off-season program and start the quest to better yourself for the next competitive season.

Recommendation:

Training Frequency: 2 to 4 days per week (light activity)
Mode: Low Sport Specificity
Volume: Low-Medium

***

Overall, there is no exact science that is going to work perfectly every time when you are building your own training programs. You will always need to make tweaks, even to the best programs around. This blog provides the framework for developing a solid program, but the devil is in the details. You want to make sure that you have everything planned out as you progress through the competitive season. Some things may not go as planned, but that is okay. The ultimate goal is to make you the best athlete you can be in the sport or activity you are doing!

Like what you've just read? Click here to subscribe to our blog!

This blog was written by Alex Soller, NIFS Athletic Performance Coach. To find out more about the NIFS bloggers click here.

Topics: NIFS mini marathon training weightlifting competition post-season programs off-season athletes athletic performance

How to Build Training Programs for Competitive Athletes (Part 1)

ThinkstockPhotos-dv484081.jpgWhen putting together a program for anyone, client or athlete, you always want to have an idea when you would like to peak, or be at your best throughout that calendar year. For Mini-Marathon runners, May is the time to be at your best. For football players, you want to be firing on all cylinders when August rolls around. The structure of your training should be based around when your season is going to begin, to make sure your body is prepared to last the duration of the competitive months. Regardless of when you are competing, your training should never remain totally the same throughout the whole year.

This concept of training periodization has been around forever. It was developed by a physiologist named Leo Matveyev around the 1960s. By definition, periodization is a preplanned, systematic variation in training specificity, intensity, and volume organized in periods or cycles within an overall program (see Essentials of Strength Training and Conditioning). Periodization can build the general framework of how you might want to structure your workout programs through your training year.

For our sake, I am going to refer to these periods or cycles as macrocycles. Macrocycles are the biggest of the divisions of training timeframes throughout your competitive year. They can be filtered down to smaller variations (mesocycles—smaller, microcycles—smallest), but we will stick to the biggest ones for now. This will allow you to get a general idea about the main goals for each macrocycle.

There are four macrocycles that will be divided up throughout the year. These are the following:

  • Off-Season
  • Pre-Season
  • In-Season
  • Post-Season

In this blog, I talk about the first two macrocycles. In my next blog I will talk about the final two.

Off-Season

The off-season is always one of the best times of the year to train. This is a time when you can focus on building strength but also implement some training modes that you might not use during the other phases of development (for example, flipping tires, boxing, swimming, and so on). I also like to use this time to assess the success of the programs I have used over the past year to see what helped improve aspects of my teams and what did not (FMS testing, strength/power testing, energy system testing).

A lot of teams and individuals spend a fair amount of time in this macrocycle (12-16 weeks). Although your competitive season is a long time away, slacking during this phase could set you behind in the goals you want to achieve. Practices are usually very short or nonexistent, which leaves plenty of time for you to hit the weights to get your body ready.

Recommendation:

Training Frequency: 4 to 6 days per week
Mode: Moderate Sport Specificity
Volume: High

Pre-Season

The pre-season begins what is considered crunch time when it comes to preparedness in the weight room and on the playing field. The season is right around the corner, and the next 8 to 12 weeks will fly by. You will be competing before you know it.

During this macrocycle, training becomes a lot more sport specific than in the preceding cycle. The goal is to get the body ready for the exact situations and stressors that you will encounter during competition. As a strength and conditioning coach, I want to prepare the athletes’ bodies with exercises that will mimic and enhance their actions on the field. Examples include working on lower-body power with football players, increasing aerobic endurance with soccer athletes, or enhancing rotational power with golfers.

All in all, you just need to be on the field or court playing in order to get ready for the season. However, the smaller the learning curve the athlete has from off-season to pre-season conditioning, the better. Too much stress too soon (as for athletes who do no training over summer break) can lead to overuse injuries from ramping up the activity levels too fast. Remember to take into account the fact that you are training more for your sport at this time, so do not overdo it in the weight room. Make sure you have adequate recovery time in order to get the most out of your previous months of training.

Recommendation:

Training Frequency: 3 to 5 days per week (depending on practice time/schedule)
Mode: High Sport Specificity
Volume: Medium-High

In part 2 of this blog, I’ll go through the other two macrocycles: in-season and post-season.

Like what you've just read? Click here to subscribe to our blog!

This blog was written by Alex Soller, NIFS Athletic Performance Coach. To find out more about the NIFS bloggers click here.


Topics: mini marathon training weightlifting programs athletes