<img height="1" width="1" style="display:none" src="https://www.facebook.com/tr?id=424649934352787&amp;ev=PageView&amp;noscript=1">

NIFS Healthy Living Blog

DEKA Training Program: Steps to Success

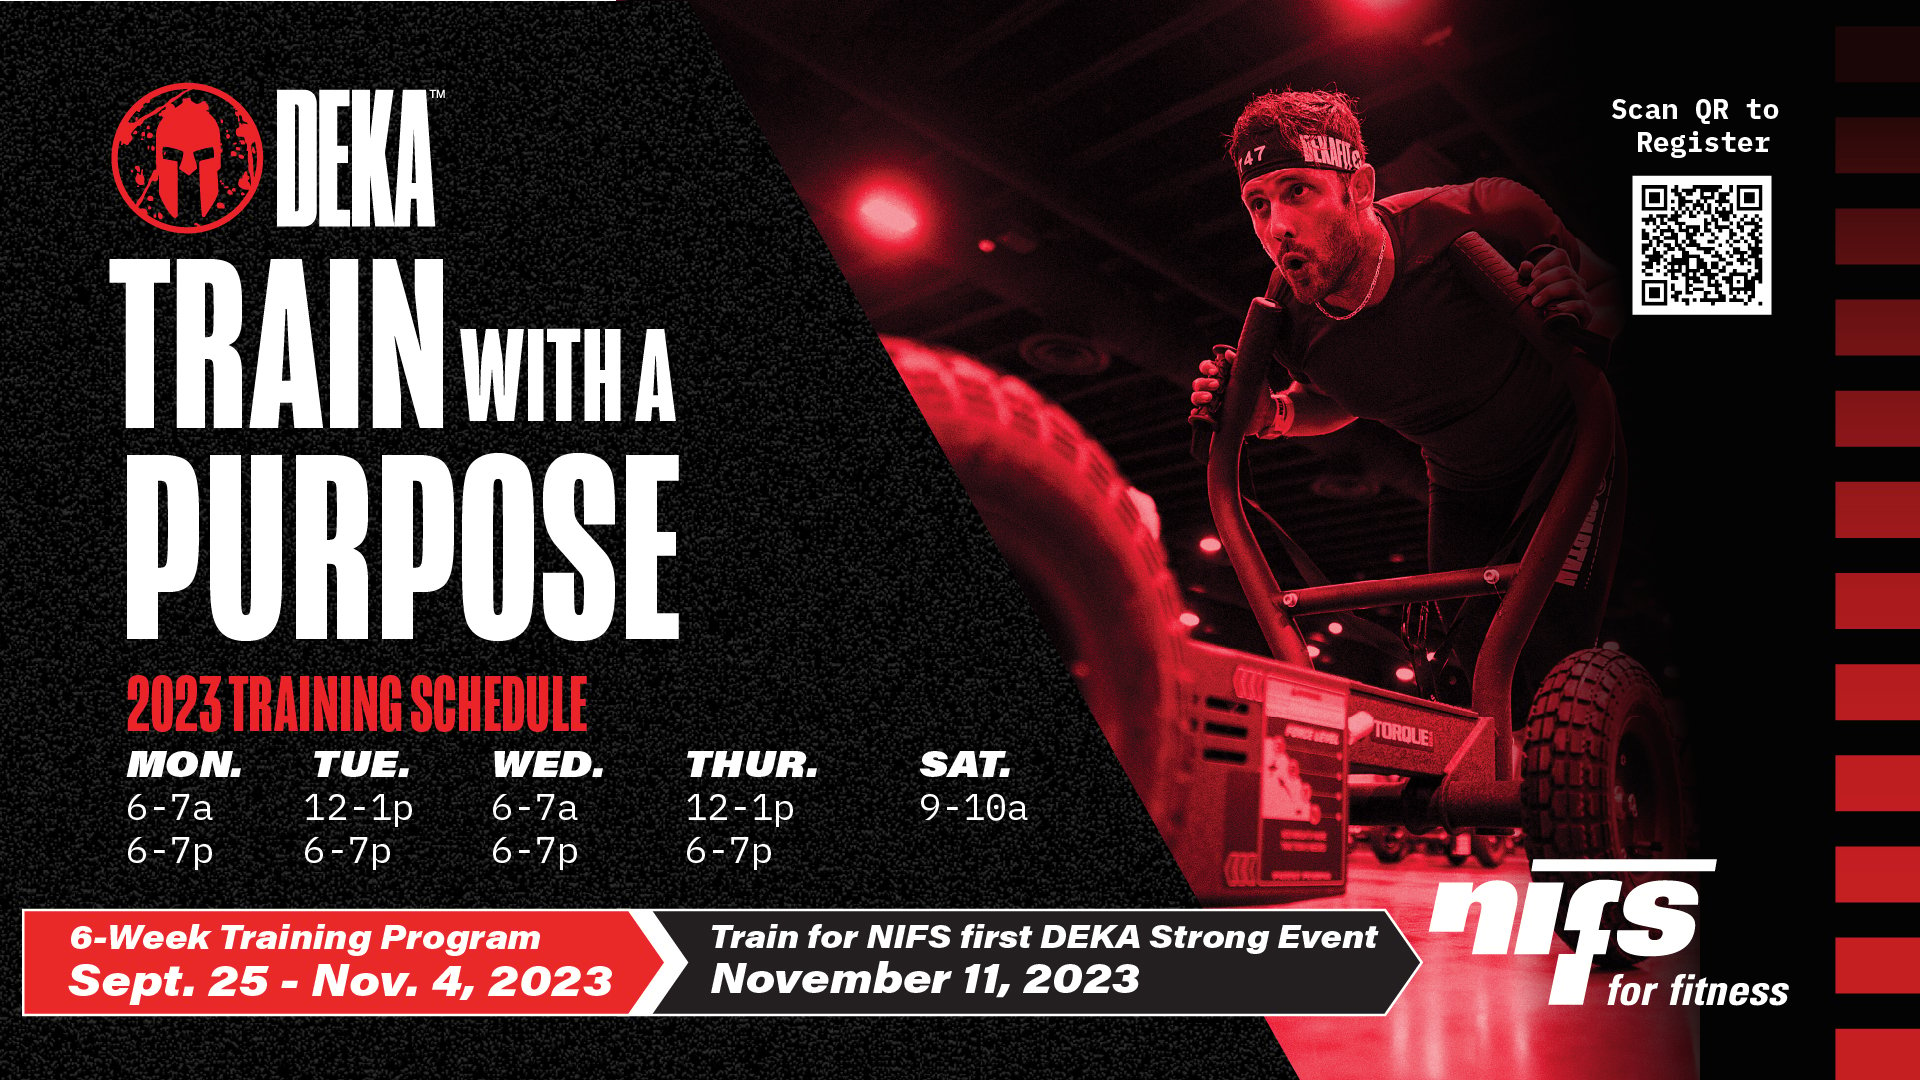
Starting a new DEKA training program requires careful planning and commitment. DEKA is a fitness competition that requires functional fitness to complete 10 Zones of activity. Here's a checklist to help you prepare for and embark on your DEKA training journey.

  1. 210916_Ball_BW-scaledSet Clear Goals: Define your specific DEKA goals, such as achieving a certain time, completing all the obstacles, or improving your overall fitness.
  2. Fitness Assessment: Evaluate your current fitness level by assessing your endurance, strength, and agility. This will help you gauge your starting point. Speak with one our Certified Personal Trainers to schedule your fitness assessment. 
  3. Join Our Facebook Group: Be sure to join NIFS DEKA Facebook group and be a part of our community of tips, tricks, and encouragement.  
  4. Hydration & Nutrition: Stay well-hydrated, especially during intense training sessions. Be sure to follow a well-balanced diet and look out for our nutritional tips in weekly newsletters.
  5. Gear and Equipment: Ensure you have the appropriate gear for DEKA, such as suitable running shoes, workout attire, and any necessary accessories for obstacle courses.
  6. Rest and Recovery: Schedule rest days and prioritize recovery methods like stretching, foam rolling, and adequate sleep.
  7. Track Progress: Keep a training journal to record your workouts, times, and any obstacles you encounter. Take progress photos! DO IT! It’s a wonderful way to track our progress. The scale does not always reflect our fitness gains. 
  8. Have Fun!! Remember to smile! Enjoy your journey – the highs and lows. Every step you take in the journey is one for the better 😊

DEKA training can be demanding, so it's essential to approach it with dedication, patience, and a commitment to improving gradually. As you work through our 6-week program, stay focused on your goals, maintain a positive mindset, and enjoy the journey of becoming a stronger and more capable athlete.

Ready to get started? Get registered for our 6-week DEKA training program! Training begins September 25, 2023. Prepare for NIFS first DEKA Strong event on November 11th!

DEKA Screenly
 

This blog was written by Tim Howard, NIFS Operations Manager, Ironman Triathlete, and hot dog connoisseur. To learn more about the NIFS bloggers, click here.

Topics: functional training training small group training high-intensity circuit training DEKA

The Why and How of Training Your Hip Adductors

GettyImages-1308568450Everyone needs strong hips. Athletes need them to perform a wide variety of movements within a given sport. Aging adults need them to help reduce the risk of falls. When we think about the hip, most people think about the glutes and abductors. You can look in any gym and see a handful of people with a band around their knees performing a plethora of movements working the glutes and abductors. However, the most neglected muscle is the one on the inside of the thigh: the adductor.

Anatomy and Function of the Adductor

The adductor muscle is situated in both the medial and posterior compartments of the upper leg. It attaches to the hip bone and to the linea aspera of the femur. The primary role of the adductor is to adduct and internally rotate the thigh at the hip joint. It also plays an important role in hip extension and stabilizing the pelvis along with the glutes and hamstrings.

Why You Should Be Training the Adductors

The adductors are a secondary muscle group that assists the larger muscle groups during compound exercises such as squats and deadlifts. However, there are important benefits to focusing accessory movements on the adductors. As I mentioned, the adductor plays a role in hip extension and stabilization of the pelvis. Hip extension is one of, if not the most powerful movements of the body. It is how we jump, stand, walk, run, and sprint. If we neglect the adductor muscles, we are missing out on added stabilization of the pelvis during all these movements.

Groin strains are the most common among athletes who are sprinting, cutting, and changing directions. Throughout these movements, the adductors take on a large load of eccentric forces. This means that just like the hamstrings during a heel strike, these muscles are force absorbers. A muscle is more likely to tear or strain if it is not strong enough to absorb an increasing amount of force. Strengthening the adductors can reduce the likelihood of a groin strain.

The adductors not only stabilize the pelvis, but they also control pelvic rotation. This is highly important for sports such as baseball, softball, golf, hockey, or tennis. All of these sports rely highly on the rotational power of your hips for swinging and throwing. Weak adductors will not help you hit farther or throw harder.

Movements for the Adductors

  • Adductor Machine: Not all gyms or facilities have one of these machines. However, if you do have access to one, it’s the simplest way to directly train the adductors.
  • Adductor Foam Roller Hold: Although you do not get the same overloading stimulus as the adductor machine, the foam roll hold could be a substitute for the machine. For this variation, all you need is a foam roller, or an object similar in width and it needs to be solid. In a seated or lying position, bend your knees to 90* and place the foam roller between your knees and squeeze. This is an isometric movement that you can make harder by holding for a longer duration. 
  • Banded Adduction: For this you will need a super band and a place to anchor the band close to the ground. To perform this movement, you will be in a standing position with your side to the band. Wrap the band around the inner foot and step out until you feel tension on the band. From your starting point, let the band pull your foot away. Stand tall and bring your foot back to the center.
  • Lateral Lunge: This is a great movement for any skill level because it can be progressed and regressed. To perform a body-weight lateral lunge, start with both legs together. Step one foot out and begin to bend that knee and start to sit your hips back. Push off that leg and bring both feet together. To progress this movement, simply add weight.
  • Copenhagen Plank: For this movement you will need a bench or a box. You will start in a side plank position with your top foot on the bench and your bottom leg either straight or bent. From this position, you will pick your hip up and hold.
  • Medicine Ball Scoop Pass: For the rotational action of the adductors, we will perform a rotational throw. With a medicine ball in both hands, shift your weight to the outside foot. From this position, push off the outside foot and rotate the hips, and then the shoulders, and throw the ball at the wall.

New call-to-action

This blog was written by Evan James, NIFS Exercise Physiologist EP-C, Health Fitness Instructor, and Personal Trainer. To learn more about the NIFS bloggers, click here.

Topics: injury prevention muscles senior fitness training exercises athletes hips hip mobility fall prevention

Movement Pattern Variations: The Squat

In this blog series, I have discussed the four movement patterns for building muscle and broken them down further with exercise examples you can add to your workouts. Then we discussed two upper-body movement pattens, the pull and the push. In this post I discuss the squat pattern, our first lower-body movement pattern.

GettyImages-1370779476newThe Squat Movement Pattern

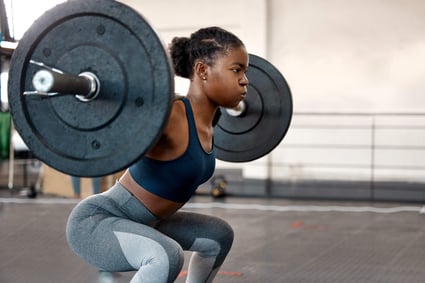
The squat movement pattern is a compound movement that works the muscles of the upper legs including the quadriceps and glutes. The squat pattern is an essential movement for your activities of daily living. We use this pattern to sit, to stand, to pick things up off the floor, to walk up the stairs, and for many other activities. It is essential to train this pattern to maintain your lower-body strength as you age to maintain muscle mass and prevent falls. 

Training the squat movement pattern to a full range of motion can also improve your flexibility and bone mineral density. Learning how to squat properly, and to a full range of motion, is essential in a well-rounded training program. Within your training plan you can break this movement into bilateral and unilateral patterns. Bilateral means both legs working at the same time, and unilateral means one leg at a time. Utilizing both bilateral and unilateral patterns will ensure you are not creating any imbalances between your legs.

Squatting Variations

Bilateral

  • Barbell Back Squat
  • Barbell Front Squat
  • Goblet Squat
  • Leg Press
  • Zercher Squat
  • Hack Squat Machine

Unilateral

  • Split Squat
  • Rear Foot Elevated Split Squat
  • Front Foot Elevated Split Squat
  • Walking Lunge
  • Step Back Lunge
  • Step-Ups

Quadricep Isolation Movements

  • Leg Extension
  • Banded Terminal Knee Extension

Get Training Help at NIFS

For more information on how to properly progress and structure a training program, visit our staff at the track desk to schedule a private session. We are more than happy to help at any time, and as part of your membership here at NIFS, you receive complimentary workout programs. Our Health Fitness professionals tailor all programs to your fitness goals.

New call-to-action

This blog was written by Evan James, NIFS Exercise Physiologist EP-C, Health Fitness Instructor, and Personal Trainer. To learn more about the NIFS bloggers, click here.

Topics: training exercises muscle building squat movement patterns isolation exercises

Push and Pull: The Ideal Workout Program for Restarting Training

GettyImages-1267535453Let’s face it: building your own workouts isn’t always the easiest thing to do. Sure, you probably strike gold a few times a year and the exercises you choose seem to be flawless, from the balance of muscle groups worked to the flow of the routine that you get into. There is nothing better than having that program that just seems to get the job done.


What Workout Program Should You Use When You’ve Taken Time Off from Training?

But let’s say that life happens and you took an extended time off from training due to school, work, or some other important reason (pandemic maybe?). So what now? Where do you go from here? The go-to for many individuals would be to jump right back into the same program they were doing before their long layoff. It worked great for them before their break, so it must be the best way to resume activity, right? More than likely, this might not be the most ideal situation to set yourself up for future success. When your body has become detrained from a long layoff, you run the risk of overtraining—which could possibly lead to those nagging injuries that linger throughout your rebuild process.

Find a Program That Balances Pushing and Pulling

To me, a GREAT training program is a delicate balance of “pushing” and “pulling” exercises. The general consensus of the “push-pull” method is that you alternate (or superset) upper-body push movements (for example, bench press, shoulder press) with upper-body pull movements (for example, bent-over rows, pull-ups). Even the great Arnold Schwarzenegger used this method to pack on loads of muscle when he was at the apex of bodybuilding. Now, are you Arnold? No. Are you trying to look like Arnold? Also no (more than likely). Below you will find another interpretation of the “Push-Pull” method that may better fit those who are restarting their exercise routine, or those who are looking to switch up their programming.

Benefits of Full-Body Workouts

As I mentioned before, the push-pull method often refers to two upper-body exercises from opposite muscle groups (for example, chest and back). The superior version (in my opinion) of this would be to couple either an upper-body push exercise with a lower-body pull exercise, or an upper-body pull exercise with a lower-body push exercise (see table below). This type of full-body workout allows for two main benefits:

  1. Ample rest time is allowed: While the upper body works, the lower body rests (and vice versa).
  2. There is potential for reduced soreness: Instead of hammering one muscle group for a ton of exercises, a more gradual stress is applied to the muscles over multiple workouts. It could also be a great option for returning to exercise or resistance training.

Movement Examples

If you think this type of workout might be what you are looking for, give it a shot. Choose one exercise from column 1 and one exercise from column 2. Alternate those two exercises for the desired number of reps and sets. When finished, either choose one exercise from the same two columns OR switch it up and choose one exercise from column 3 and one exercise from column 4. Remember, the ultimate goal is to match each push movement you perform with an opposite pulling motion.

Column 1 Column 2 Column 3 Column 4

Upper-body Push (chest/
shoulders)

Lower-body Pull (hips/
hamstrings)

Upper-body Pull (back)

Lower-body Push (quads)

Bench Press

Trap Bar Deadlift

Pull-Ups

Front Squat

Strict Shoulder Press

Slider Hamstring Curl

TRX Inverted Row

Step-ups

Half-kneeling Shoulder Press

Single-leg RDL

Band Face Pull

Lunges

Push-up Variations

Lateral Lunge

Seated Row

Split Squat

“Jammer” Press

Reverse Hyper

Dumbbell Reverse Fly

Wall Sit


Adjust Your Program Periodically

As with most workout structures, adding wrinkles into the program every so often will allow you to continue the muscular adaptations that are occurring and keep you engaged. That could mean an adjustment to the number of reps, sets, or rest periods you are currently using, or simply choosing different exercises. The ways that you can tweak this kind of program are endless, and I believe that with great effort, you will see positive changes in whatever physical adaptation or change you are after.

Like what you've just read? Click here to subscribe to our blog!

This blog was written by Alex Soller, Athletic Performance Coach and NIFS trainer. To find out more about the NIFS bloggers, click here.

Topics: injury prevention muscles training lower body upper body workout programs adaptations pandemic full-body pull push restarting workouts

Build a Bigger Engine with Aerobic Training (Part 2 of 2)

GettyImages-1217027916-1Last time, I covered a few of the benefits of building your aerobic base:

  • Ability to recover more quickly between bouts of high-intensity exercise
  • Ability to sustain higher-threshold movements for longer (think being able to hit more heavy singles on bench or deadlift with the same rest)
  • Ability to handle more acute rises in training volume
  • More efficiency, as you’re able to remain in an aerobic state for energy for longer periods (before resorting to another system like anaerobic/glycolytic)

Cool, Lauren! Now, how the heck do I train my aerobic system? How do I start to build that base? Here are a few examples of ways to incorporate aerobic training into your fitness plan.

Contralateral Circuits

As the name implies, a contralateral circuit involves working opposite sides of the body while performing a two-part, compound movement—for example, a step-up with the right leg followed by an overhead press with the left arm. Each movement is performed for time, typically 20–30 seconds, followed by a short period of rest while you switch to the opposite side to perform the movement.

By cycling between exercises that work opposite limbs and opposite sides of the body (think diagonally across), we are taxing the cardiovascular system in a relatively novel way. Specifically, as blood is pumped and pools in working limbs for 20–30 seconds (right leg/left arm), the heart has to work slightly harder to then switch to pumping blood to ensure that the next group of contralateral limbs is adequately supplied (left leg/right arm). Heavy weights aren’t involved; typically it’s a combination of bodyweight exercises, bands, or light weights. But after 20–30 minutes of near continuous movement, chances are you’ll see that some sweat has appeared!

Here’s a quick example of exercises that can be linked together for a contralateral circuit:

  • Reverse Lunge Right + Band Row Left x 0:25/0:30 rest and transition
  • Reverse Lunge Left + Band Row Right x 0:25/0:30 rest and transition
  • Step-Up Right + DB Overhead Press Left x 0:25/0:30 rest and transition
  • Step-Up Left + DB Overhead Press Right x 0:25/0:30 rest and transition
  • Single-leg RDL Left + DB Row Left (Right stance leg) x 0:25/0:30 rest and transition
  • Single-leg RDL Right + DB Row Right (Left stance leg) x 0:25/0:30 rest and start over

Escalating Density Training (EDT)

This type of training not only trains your aerobic system, but also allows you to gradually build up volume on particular lifts. So if you in any way resemble me and aren’t the number-one fan of running, this might be for you! Escalating Density Training involves working for 5-minute blocks continuously. You alternate between two lifts, usually opposite in nature (upper vs. lower body), and complete only 1–2 reps of each before returning to the other movement.

For example, you can pair a Kettlebell Goblet Squat with a DB Bench Press. So, for 5 minutes you complete one rep of a Goblet Squat, followed by one rep of DB Bench Press. You can keep a tally of how many rounds you complete in 5 minutes and compare for future sessions to see whether you’re able to do more work in the same period of time. Typically, you can complete three blocks of EDT in one training session, separated by 3–4 minutes of rest. All in all, you’re completing 15 minutes of high-quality work.

Here’s an example of an EDT session:

  • Block 1: KB RDL/DB Overhead Press x 5:00 --> 3:00 rest post round
  • Block 2: Sandbag Clean & Squat/TRX Row x 5:00 --> 3:00 rest post round
  • Block 3: DB Incline Press/Goblet Reverse Lunge x 5:00 --> cooldown

A Long Walk or Hike, Focusing on Nasal Breathing

This one is pretty simple, but surprisingly effective. Getting used to nasal breathing, as opposed to mouth breathing, has more than a few benefits. One of them is that it allows our body to become better adapted to handling CO2 as we produce it during exercise and movement in general. Why does this matter? This has been shown to lower resting heart rate, improve pH regulation, and improve our body’s ability to cycle and filter out metabolites.

So, the next time you head out for a hike at a state park or a stroll through your neighborhood, see if you can maintain a moderate pace while only nasal breathing. If you feel the need to breathe out of your mouth, that’s fine! Each time you go out, simply see how much you can do with nasal breathing, trying to push that time or distance bit by bit each session. Bonus? You get to enjoy the great outdoors.

Low-intensity Modalities + Breath Holds

I came across this method after listening to Cal Dietz, Strength & Conditioning Coach at the University of Minnesota, at multiple conferences and clinics. He’s worked with numerous Big Ten Champions, NCAA National Champions, and Olympians throughout his career. When working with athletes as they return from a hiatus in training (i.e. post summer semester), he has employed a 2-week period focusing primarily on aerobic training.

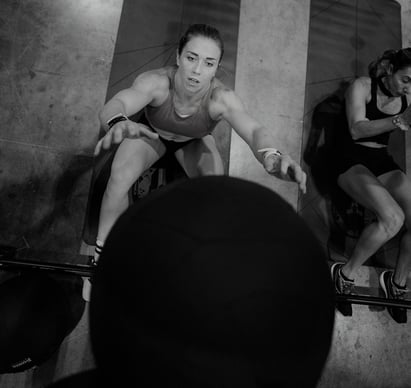
One method he’s used is 10-second exhalation and breath holds while performing light aerobic exercise. For example, while on a Concept2 Rower, he’ll have his athletes find an easy, maintainable pace for 1–2 minutes. For the next 10–15 minutes while maintaining that pace, athletes will exhale at the beginning of every minute and hold their breath following that exhale. They will attempt to hold their breath until the 10-second mark of that minute. So, if it takes 4 seconds to exhale, they’ll then try to hold their breath for 6 more seconds. Once you start breathing again, the goal is to stabilize the breath as quickly as possible.

After trying this myself, it was surprisingly difficult. There was a sense of being uncomfortable, obviously the urge to breathe, some slight tinging, followed by immense relief after the 10-second mark. I’m listing this last because it’s something I would work up to. Can you try it right off the bat? Absolutely. But don’t feel that you need to continue the breath hold for the full 10 seconds. Maybe its only for 5–6 seconds while you acclimate to the training.

***

All in all, there are various ways to train the aerobic system, and there isn’t one that fits all. But if you’re looking to sprinkle some variety into your routine, one of these modalities might be for you. As always, the goal with these workouts isn’t to leave you running for the trash can. If it does, take it down a notch.

Like what you've just read? Click here to subscribe to our blog!

This blog was written by Lauren Zakrajsek, NIFS Health Fitness Instructor, Personal Trainer, and Internship Coordinator. To learn more about the NIFS bloggers, click here.
Topics: walking workouts training weight lifting high intensity aerobic breathing

Train Like an Athlete with Help from NIFS

GettyImages-969284736I am often asked what kind of workout program I follow, and my response is always, “I follow a program that gets me faster, stronger, and more athletic.” When people hear this, they assume that I am some kind of athlete and that they won’t be able to work out the way I do since they are not “athletes.” This is a huge misconception that I have noticed throughout the years that I have been working out. What people do not understand is that we are all athletes in our own way, and can actually train like one in order to get faster, stronger, and more athletic.

Find Out Where You’re Starting From

For me the key is to understand where you are at in terms of movement. Many programs out there assume that you move perfectly, so starting them might not necessarily be the best if you have not had the training experience needed to actually perform those movements. A good assessment to determine whether you have any compensatory patterns or movement deficiency is the Functional Movement Screen (FMS). With the FMS, we can narrow down exactly which corrective exercises are needed to get a person ready for the complex movements that might be programmed.

Start with Exercises That You’re Ready For

Once you have determined where you are at movement wise, it’s important to start with exercises that your body is ready to handle at that time. Possibly regressing a complex exercise like the Barbell Back Squat to a simpler exercise like the KB Goblet Squat or 2KB Squat will allow you to own that movement better and in turn will prepare you to progress back to the complex movement faster while performing it better.

Perform Athletic Movements

Training like an athlete does not necessarily mean you have to match their intensity or lift the same amount of weight as they do. But it can mean performing the same movements, such as these:

  • Warm-up routine
  • Power exercises
  • Squat variation
  • Horizontal upper-body push variation
  • Split squat or half-kneeling variation
  • Vertical/horizontal upper-body pull variation
  • Supine/prone abdominal exercise variation
  • Accessory exercise

These are exact movements that I program for my athletes. The cool thing is that anyone can do these movements as long as the right exercise is prescribed. No two athletes that I have trained move the same, and there are many that actually need to start with the most basic forms of movement (body squat, hands elevated push-ups, etc.). I am sure many of you have performed these “basic” exercises in the past. These exercises are often considered “too easy” at times, but if they are performed correctly, it can be a challenge even to athletes.

You Can Get Help from NIFS Trainers

I get it, it can be very intimidating for a beginner or even an experienced lifter to train like an athlete if they don’t know exactly how to go about starting a program like that. Luckily, here at NIFS, our trainers are well equipped with the materials and knowledge to get anyone who is looking for a new challenge started toward being faster, stronger, and—most importantly—more athletic.

Like what you've just read? Click here to subscribe to our blog!

This blog was written by Pedro Mendez, CSCS, FMS, Health/Fitness Instructor and Strength Coach at NIFS. To learn more about the NIFS bloggers, click here.

Topics: NIFS training athletes personal trainer functional movement screen fitness assessment

Rest for the Wicked: Recovery from High-Intensity Training

GettyImages-701140898The peripheral pollution surrounding what fitness and wellness should look like and how you get there is near epidemic status. The topic of high-intensity training receives the majority of the attention, with using Olympic lifts for conditioning a close second. And oh, what is “Insta-worthy” is atop the pollution charts as well. Okay, so that last one was a personal gripe more than based on empirical data. No matter; there are so many messages out there, many of them incorrect and downright unsafe, that it is hard to wade through the muck to get to the clear and beneficial information.
The peripheral pollution surrounding what fitness and wellness should look like and how you get there is near epidemic status."

What I have come to appreciate more and more these days both professionally and personally is the concept of rest and recovery both during a training session and on subsequent days of the week. In my previous post, “This is 40”, I touched on how recovery is so important to get right as we age, but it is just as important for any age and fitness level. Rest and recovery do so much to help you reach your results, but they so often get forgotten due to the misguided messages out there saying that it has to be hard all the time no matter what. Here’s the thing: your immune system does not know the difference between disease and overtraining, which could leave you susceptible to a whole slew of infections. Not only are rest and recovery good for you physiologically, they can do wonders for your emotional self.

Here are three Rs to live by that will allow for the greatest training effect from the high-intensity work you are putting in at the gym, decrease the chance for injury and or illness, and hopefully increase the amount of SMILES you give to the world each day because you feel great!

Your immune system does not know the difference between disease and overtraining.”

Recover

Let’s look at recovery both during a training session as well as outside of a training day, shall we?

Training session: For higher-intensity training sessions, mind your work-to-rest ratio and aim for 1:2 or 1:1. Be wary about a laundry list of exercises to be performed for :45 work and :15 rest for multiple sets. There is not sufficient recovery time at the higher intensity loads, and before long most movements are not executed well, leading to poor results and maybe even injury. Physiologically, not allowing the system to return to a more normal state (or closer to it) can play havoc on the systems needed for the results you are seeking as well as keeping you alive. If you are not using time, heart rates or a simple talk test can be used to determine when it is appropriate to take on the next bout. A good rule of thumb is 110 to 120 beats per minute for your heart rate, or you can complete a couple of sentences in a row. Hard work pays off, but you have to be able to work hard each round and set. Ample time to recover will allow for that.

Off day: What do I do on my days off for recovery? See below. But, let us talk training schedule for maximum recovery results. As always, fitness IQ and fitness level will determine both the training schedule and loads; and there are many very thick books on that topic, which I am not trying to cover here. My hope is to provide a few basic, typical, rules of thumb. Again, for higher-intensity training sessions, here are a few sample weekly schedules:

  • Beginner: 1 On, 1 Off
  • Intermediate: 2 On, 1 Off
  • Advanced: 3 On, 1 Off

These are very general ideas of what a training schedule could look like, and I would highly suggest that you let your body be your guide. Resting heart rate can be a key indicator of proper recovery and being training ready. If you wake up and you’re at 80bpm, you might want to recover that day. Build in those recovery days to help maximize your results.

“Hard work pays off, but you have to be able to work hard each round or set.”

Regenerate

Once again, let’s look at both training days and off days and what regeneration looks like for each.

Training session: Regeneration for a training session is made up of some drills that aid in elasticity of the soft tissues and prep the body for movement. This is typically completed before a training session but should also be done afterward as well to help aid in recovery and be ready for the next session. Elements found in regeneration are the following:

  • Breathing techniques
  • Foam rolling and trigger point drills
  • Active mobility and range-of-motion drills
  • Stability drills

Off day: Here is where we step away from the training stimulus and dig deeply into the regeneration of tissues and resetting energy levels through activities that encourage rehabilitation from training and focus on recentering yourself. The place to start is to get ample SLEEP! Enough said! If you are not getting 7 to 8 hours of restful sleep a night, consistently, reaching your goals will be an even tougher road.

Some other activities that will promote regeneration include the following:

  • Massage
  • Ice (my product of choice is HyperIce)
  • Yoga
  • Meditation
  • Hot tubs
  • Cryo-bath

Reflect

The third R should be reserved for reflecting on the week of training and life as a whole and should be an enjoyable training session. The session should emphasize play and nature. It should be an active session, but not nearly as intense as a training session (unless, of course, you play a sport for leisure). Mainly, take the time to be happy to be alive, spend time with the people you love, and do something you enjoy doing. Just as important to your health and well-being as the other two Rs, treat it as a mental-health day where you are being active. I don’t have a list here for you because you should do what moves you; but I highly recommend that it emphasize play, and that you connect with nature somehow.

I say again, hard work pays off, but you have to be able to work hard, and treat recovery as a training priority if you hope to get the most results from that hard work. These activities and days should be built into your training schedule, because it is still training, and a super-important aspect to the overall training plan. So there is rest for the wicked!

Like what you've just read? Click here to subscribe to our blog!

This blog was written by Tony Maloney, ACSM Certified Exercise Physiologist and Fitness Center Manager. To find out more about the NIFS bloggers, click here.

Topics: workouts training recovery high intensity results

Bar Crawl: Specialty Bar Training for Powerlifting at NIFS

Screen Shot 2018-07-12 at 10.42.59 AMAs a fitness professional I approach training and helping people from the direction that principles guide methods. The reason for this is that methods and fads will always change, but principles never do. It’s beneficial that the methods and variations of movements change from time to time, as long as the decision to change them is based on solid principles and reasoning. Variations are great, such as a change in foot position in a squat, adding load to a plank position, or varying the implement you are using during the exercise. One implement change that can pay heavy dividends (pun very much intended) is using a specialty lifting bar.
Specialty bars are not new by any means, but due to new waves of “strongman” training and the resurgence of powerlifting, the popularity of the specialty bar is constantly growing. Each different bar is designed to elicit a specific stimulus that will result in an increase in strength, stability, or performance. In fact, many bars were originally designed for the specificity of training certain sports. And although most are still widely used specifically for generating a particular training response for sports, the everyday fitness enthusiast can enjoy the benefits without having to be a pro athlete.

Bars with Benefits

Come with me as we journey through NIFS’s Bar Crawl and check out all the specialty bars that are at your disposal and some or our favorite exercises associated with each. Before we do, here’s a reminder that you need to master the basics with basic equipment before moving on to an advanced movement or piece of equipment.

Fat bar: A barbell that is thicker than a general-use bar. The typical bar has a thickness of approximately one inch, whereas a thick bar can be twice that or even more.

Benefits:

  • More muscle activation in the hands, forearms, and upper arms.
  • Harder contraction (experiment: flex your bicep without making a fist, then flex with a fist; notice the difference).
  • Grip training no matter what.
  • Greater focus on the lift/exercise.


  • Bench Press
  • Overhead Press
  • Deadlift

Safety bar: Also referred to as a “yoke” bar, it looks like what they put on oxen back in the day. There is a three-way pad that rests on your shoulders with handles, with a curved bar shape at both ends.

Benefits:

  • Great for lower-body and low-back strength and transfers nicely to the straight-bar variations.
  • Loads the anterior core.
  • Minimizes stress on the wrists and elbows.
  • Helps in maintaining proper spinal alignment.


  • Front Squat
  • Back Squat
  • Lunges

Log bar: Straight from the strongmen themselves, this bar simulates using a log for different movements. It looks like a log with bars on the end to add plate weight load.

Benefits:

  • Cumbersome and unusual shape increases the stability need in the trunk and entire body.
  • Neutral grip is safer on the wrists and shoulders and allows for a more natural movement.
  • Abbreviated range of motion due to its size is safer for the joints and allows for greater load.


  • Clean and Press
  • Overhead Press
  • Bent-over Row

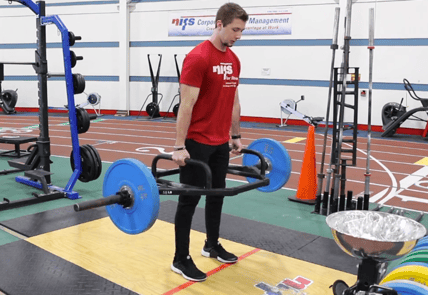
Trap bar: Hexagonal in shape, this is a bar you stand in, and it is used mainly for deadlifts or floor-loaded squat motions. Top coaches like Mike Robertson and Mike Boyle almost exclusively use the trap bar for athletes for these benefits.

Benefits:

  • Combines the benefits of the deadlift and the squat.
  • Loaded closer to your center of gravity, making it great for beginners as well as seasoned athletes.
  • More natural body position for the deadlift.
  • High handles decrease the range of motion, minimizing the chance for lumbar flexion typically seen in the traditional deadlift due to the weight being out in front of the body.


  • Deadlift
  • Bent-over Rows
  • Farmer Carry

Swiss bar: A multi-grip bar ranging from neutral to wide-grip and mixed-grip options.

Benefits:

  • Lighter than a typical bar; great for beginners.
  • Easy on the shoulders.
  • Specific training for sports such as football.
  • Range of motion similar to using dumbbells but with more load capabilities.


  • Bench Press
  • Overhead Press
  • Bicep Curls
  • Makeshift pull-up bar

Get Help from NIFS

Be sure to stop by the track desk and ask one of your highly trained instructors how a specialty bar can be used in your programming. Train smart, and train safe!

Like what you've just read? Click here to subscribe to our blog!

This blog was written by Tony Maloney, ACSM Certified Exercise Physiologist and Fitness Center Manager. To find out more about the NIFS bloggers, click here.

Topics: NIFS equipment training powerlifting programs

TRI a New Challenge This Summer—NIFS Tri-Training!

tri-1.jpgThere are so many different types of races out there to challenge yourself with this summer. Maybe you are signed up for a Spartan Race, a trail run, or a half marathon; but have you ever considered giving a triathlon a shot? If you haven’t done one before, I can say from first-hand experience: they are challenging, but very fun.

Triathlon is the combination of swimming, biking, and running. Now most of us would say, “Okay the last two don’t sound too bad…but no way, I am not a good swimmer.” One of the biggest deterrents keeping people from going out for a tri is the swim aspect. It is true that for most this is the most intimidating part, but just like the other two events, you just have to practice and get comfortable with it! Let’s take a quick look at the three events.

Swim

The length of the tri you sign up for will determine the distance you have to swim. The swim portion is done in open water (Tri Indy does theirs in the downtown canal, and Go Girl has their swim at Eagle Creek Park). Most people are not able to train in open water, but get into the pool as much as you can before the race. Find a training plan to follow, making sure that you are getting both distance and speed work, as well as drills, in your swimming sessions. Also, if you do not have any experience in swimming, I would suggest getting a lesson or two to learn proper breathing, strokes, and efficiency in the water.

Bike

The bike portion of the triathlon is done on the road. And like the swim, the distance will depend on what race you sign up for. A common misconception is that you have to go out and spend $2,000 on a great road bike. When race day comes, you will see every shape and size of bikes! The important thing to remember is, before getting out on your bike, to make sure it’s tuned up and in good shape to ride. Then practice running with it for the transitions, ride different distances and speeds, practice shifting gears, and just get comfortable using it.

Run

For many, next to swimming this may be one of the most challenging elements of the race. Just think you have already swum and biked, and now you have to get off and run! In the beginning your legs feel like jello and your body is telling you that you can’t possibly put one foot in front of the other and keep going. But you can do it! During your training, get in some longer runs and be sure to practice some bike-then-run days as well.

***

Seems like it could be a lot, but thousands of people finish triathlons every year around the world. Make this the year you scratch that off the list. There are training programs out there: get one, follow it, and finish that race!

2024 Tri Training_FB  
ATTENTION WOMEN: If you are interested in completing the 2024
Sprint Triathlon at Eagle Creek, we have a triathlon training program at NIFS!

Registration is happening now! Training starts June 25, 2024!

This blog was written by Amanda Bireline. To find out more about the NIFS bloggers, click here.

Topics: NIFS running group training swimming triathlon NIFS programs summer training biking women

Bored of Your Workout Program? Try a “Wild-Card” Week

Screen Shot 2017-03-02 at 2.12.51 PM.pngWe’ve all done it. New lifters, old lifters—everyone has experienced that week where your normal training program just doesn’t have the same motivation for you that it did in the past. Monday is chest-tri day, Tuesday is squat, Wednesday is back-bi, so on and so forth. No one is immune to this feeling, especially if you are as religious about following your program as many of the NIFS members are.


Would You Eat the Same Food for Every Meal?

Think about it in terms of food. Do you eat the exact same thing for each meal every day of the week? Some might, but I can guarantee it’s not the most enjoyable thing in the world. However, most people approach planning meals for the week with a slight variation on the meals they prepared the week before: similar main ingredients, but maybe with a different spice or two, which will make a world of a difference. (Mmmmmm, food. I’m getting hungry, so let’s get back to training.)

But what causes this? Why do you all of a sudden just not feel like doing your program for that day or week? The most obvious answer is the fact that you may have been on this program for multiple weeks. Mentally, you are drained from the regimen, and your body is telling you that it might be time to change it up.

I think this is one of the most common training mistakes. Your body is ready for a new challenge or stimulus, but you tell yourself to suck it up and do the same program for another two months. You have seen progress that you’ve made (and recently stalled) with that program and have a hard time thinking you will find anything better. I think many individuals stick to the same program for way too long. This leads to other weeks where you just don’t feel like completing what is assigned for that day.

How to Overcome Workout Boredom

So what do you do, decide to take a week off of training? Not recommended. What I do recommend is to have what I call a wild-card week. In a wild-card week, you choose exercises that work similar movements/muscles to what your normal program targets, but with different (or more fun) exercises.

Here are four typical exercise choices with a “wild” variation to each.


Remember, your training program should be enjoyable. That is what keeps bringing you back each week. Listen to your body when it is time to switch it up and don’t be afraid to add in a wild-card week to your workouts every once in a while!

Like what you've just read? Click here to subscribe to our blog!

This blog was written by Alex Soller, Health Fitness Instructor and Athletic Performance Coach. Click here for more information about the NIFS bloggers.

Topics: NIFS fitness center motivation workouts attitude training focus programs