<img height="1" width="1" style="display:none" src="https://www.facebook.com/tr?id=424649934352787&amp;ev=PageView&amp;noscript=1">

NIFS Healthy Living Blog

Plyometric Push-up Variations to Spice Up Your Workout

Hello NIFS Friends! With a show of hands, who loves push-ups? Well if you are one of those people who just isn't into push-ups (or if you are someone who just wants to spice up your workout routine), there is a wide array of push-up variations that can not only make you better at push-ups, but will also keep your workouts fresh and exciting. For these exercises, we are using a plyometric theme throughout.

Plyometrics are generally done with the lower body (think box jumps) to develop power through rapid stretching and contracting of a muscle group. Developing this type of power is great for athletes looking to gain a little quickness for their sport, as well as older athletes looking to maintain strength and muscle functionality. 

Give these exercises a try in your next workout and let us know what you think! Enjoy. 

  • Standard Push-up on boxes
  • Bias Push-up
  • Depth Push-up
  • Incline Push-ups


Like what you've just read? Click here to subscribe to our blog!

This blog was written by Thomas Livengood, NIFS Health Fitness Instructor and Personal Trainer. To learn more about the NIFS bloggers, click here.

Topics: Thomas' Corner workouts exercises videos plyometric push-ups

“Be My Valentine” HIIT Workout

_68R1966-1Love to workout and need a date idea for Valentine’s Day? We have just the workout for you!

  • AMRAP in 30 seconds followed by a 1-minute rest after each exercise
  • Equipment: 2 “heavy” dumbbells, 2 “light” dumbbells, and a yoga mat
  • Total Time: ~ 20 min

Circuit #1

  • Dumbbell Thruster (squat with an overhead press)
  • Glute Bridge (option for dumbbell on hips)
  • Russian Twist (option to add dumbbell)
  • Alternating Side Lunge with Forward Shoulder Raise

Repeat circuit twice

 Circuit #2

  • Renegade Row (push-up on dumbbells with alternating single-arm row)
  • Dumbbell Floor Press
  • Burpee
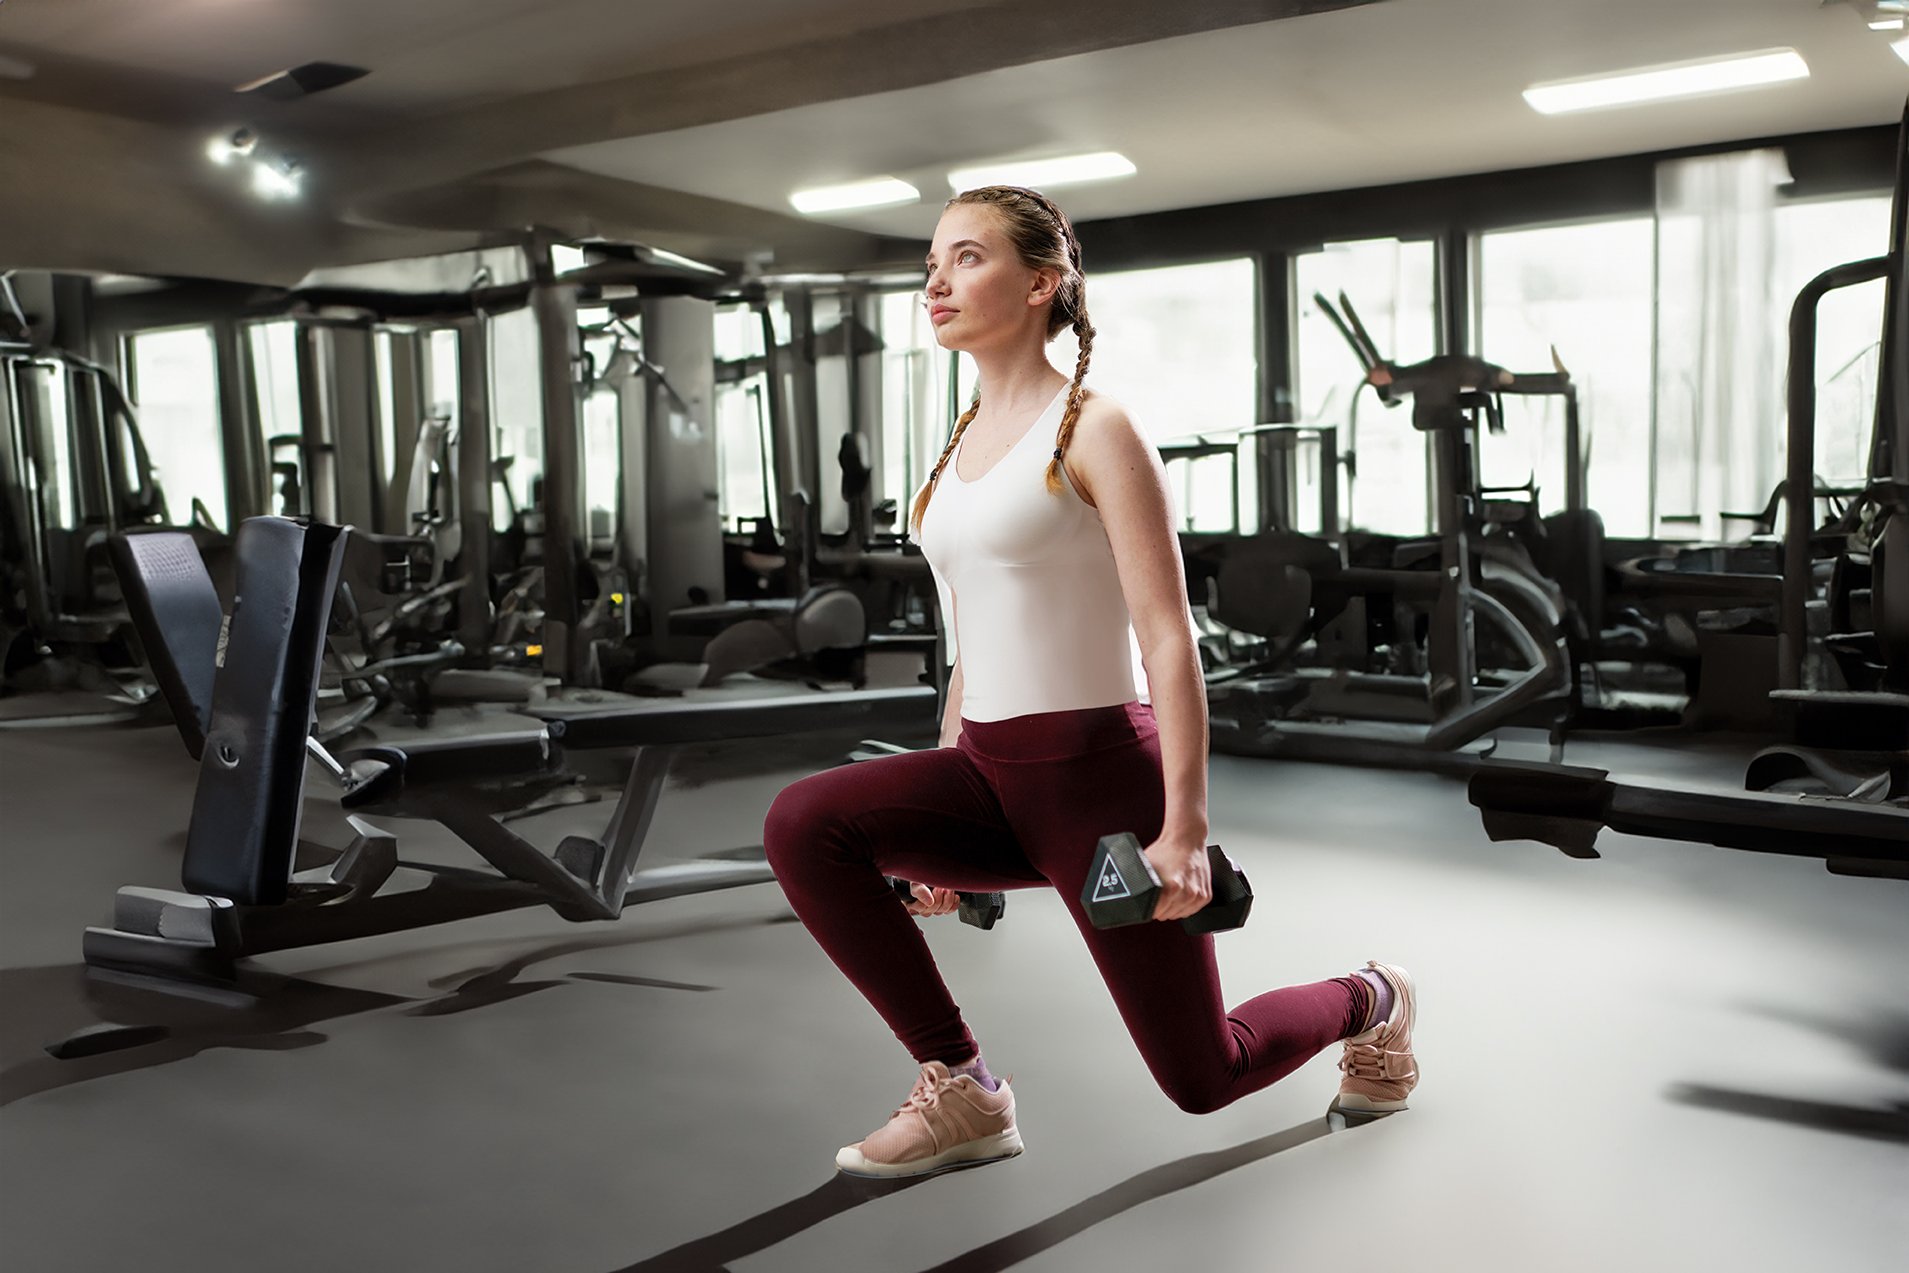
  • Forward Lunge (option to add dumbbell)

Repeat circuit twice

Spread the love and share this workout with your Valentine!

Like what you've just read? Click here to subscribe to our blog!

This blog was written by Payton Gross, Group Fitness Coordinator and Barre Above Instructor. Learn more about the NIFS bloggers here.

Topics: workouts holidays circuit workout HIT exercises programs HIIT workout buddy circuit training valentine's day

The Culture of Group Fitness

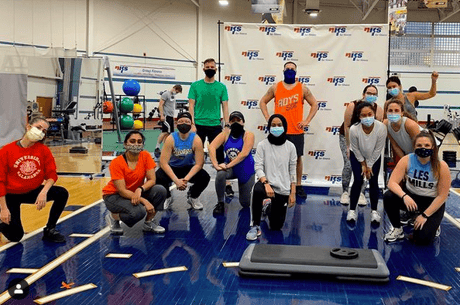
Screen Shot 2021-02-02 at 11.47.30 AMGroup fitness is so much more than doing the same workout as everyone in a group of others. Research on people who participate in group fitness classes has shown that participants work harder in a group setting than they do in solo workouts because of their subconscious thoughts.

Find Motivation and Accountability

There is a driving force within group fitness that makes you think that if the person next to you can push through something such as the challenging 45-second plank, you can too. Group fitness classes are a safe space where participants can push themselves to complete a workout alongside others who are right there with them. When a participant completes the challenging metcon of the workout alongside others, they inevitably feel a sense of community or connectedness because they did that together.

If I were to describe the type of culture present within group fitness, I would say group fitness classes are comprised of motivated individuals who use positive social stimulation to make their workouts better.

Meet Likeminded People and Work Together

Group fitness for many is a crucial aspect of their daily socialization. Friendships made in the gym are strong because of the shared fitness. Sharing a hobby with someone can be the foundation of a great friendship outside of the group fitness atmosphere. Friendships within the world of group fitness can be a healthy motivator to work harder in every workout. No matter your strength or fitness, there is a place for your within group fitness. Everyone there has the same goal as you: to complete the workout and have a good time doing it. Don’t be afraid to share your goals with the group because, in the end, you'll have more friendships and workout buddies to conquer challenges with.

Your Workouts Are Already Planned for You

Another pro of attending group fitness classes is that you do not have to think or plan your workout. Just show up and allow our certified instructors to lead you through a structured warm-up, killer workout, and dynamic cool-down. In addition to a planned workout, the instructors are also there to cue you into the correct form to prevent injuries and push you to get the most from your workout. What more could you ask for? You get a free workout plan, motivation, and a group of like-minded individuals to do it with you!

Check out our monthly group fitness schedule and try a new class today either online or at NIFS!

Group Fitness Schedule

This blog was written by Payton Gross, NIFS Group Fitness Coordinator. To learn more about the NIFS bloggers, click here.

Topics: motivation group fitness workouts group training accountability group fitness culture social aspects

Plank Progression Series

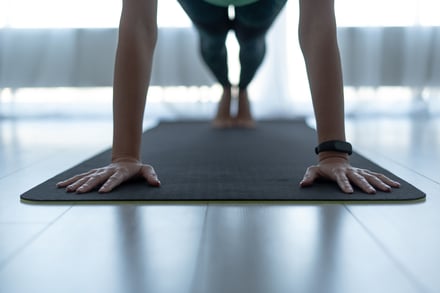
GettyImages-1168143615The plank series needs no equipment, only a wall (if you make it that far). Attempt to complete the plank series in order. Complete the plank progressive series on the days you work out at the end of your workout. If you are x2 days in a row successful and have perfect technique with the exercise, move on to the next progressive variation. You will see that the traditional plank is repeated multiple times and we will add time as you progress along over break. You do not need to do more than what is asked of you. It will be easy at first, but trust me: it gets harder by the end.

Step 1: Build Awareness

The dowel is placed along the spine and is kept in contact with three points: back of the head (not the top), thoracic region (between shoulder blades), and the sacrum (tailbone). This forces you to understand and become aware of proper alignment. Essentially, the dowel serves as your coach. If it rolls off or wobbles, you aren’t in good alignment.

Additionally, the quadruped position is great to begin to develop awareness of optimal alignment because it takes most of the load off the system while still keeping the torso in a very similar position to the abs plank. 

Once you can hold optimal position for 30 seconds, move on to step 2. 

Step 2: Lengthen the Lever Arm

The straight-arm plank is essentially a static hold in push-up position. This takes what we learned in step 1 and adds in some load due to the increased length in the lever arm. The load on the abs here is not as great as on the elbows.

If you cannot hold optimal alignment for 30 seconds, keep working here until you can. If you can maintain optimal alignment without disturbing the dowel, you are ready to move on to step 3.

As I stated above, the elbow plank with dowel increases the load on the torso even further over the straight-arm variation. In other words, it demands more strength and control of optimal alignment.

Step 3: Elbow Plank

Once you can hold this position for at least 30 seconds without much fatigue, you are ready to move on to the advanced progressions that I’ve laid out below.

If you cannot, remain here at level three until you can achieve a 30-second hold without too much fatigue.

Keep in mind that just because you are doing planks, it doesn’t mean that you can do them correctly. The dowel is a simple method of telling you how good your planks really are.

Once you’ve mastered the basic plank with the dowel, you no longer need to use the dowel.

Plank Progressions

Now that you understand what is required to perform an optimal fundamental plank, I can show you the complete progression spectrum from beginner to advanced planks. Once you can maintain optimal alignment here for required times, move on to the next level.

Screen Shot 2021-01-28 at 2.10.59 PM

Level

Plank Progression Exercise

Sets & Time

Notes

1

Half-Kneeling Elbow Plank

2x1min

On knees & elbows

2

Traditional Plank

2x :45 sec

On elbows & toes

3

Push-up Plank

2x :45 sec

Push-up position

4

Plank w/ Leg Lift

2x :20 sec

Push-up position

5

Plank w/ Arm Lift

2x :20 sec

Push-up position

6

Half-Kneeling Side Elbow Plank

2x1min (R/L)

On knee & elbow, hip up, x1 min—R/L

7

Elbow Side Plank

2x :45 sec

On elbow & foot

8

Up/Down Plank

2x :30 sec

Alternating elbow plank to push-up plank continuously

9

Decline Plank

2x :45 sec

On elbows & toes with feet elevated

10

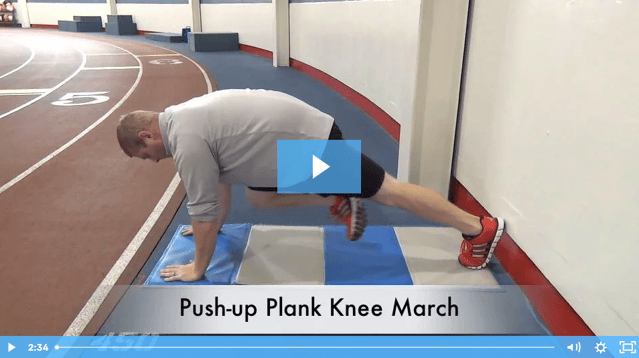
Plank w/Knee to Chest (March)

2x1 min total

Pull knee up to chest & alt R/L every 10-15 secs

11

Side Plank w/ Knee to Chest (March)

2x1 min total

Pull knee up to chest & alt R/L side after 30 secs

12

Side Plank w/ Leg Abduction

2x1 min total

Leg straight and extended upward & alt R/L side after 30 secs

13

Bird-Dog Static Plank

2x:30 sec

Push-up position, bring opposite elbow to knee touching underneath hips and hold (R/L)

14

Bird-Dog Active Plank

2x:30 sec

Push-up position, bring opposite elbow to knee touching underneath hips and then actively extend same arm/leg out and back to touching (R/L) & repeat

15

1-Arm Rotating Plank to Side Plank

2x:30 sec

Starting a traditional plank, take one arm/hand and reach for opposite armpit. Then actively rotate to a side plank and extend the arm to the sky & rotate back to plank (R/L) & repeat

16

Wall Plank


On elbows & toes—feet against the wall & elevated

17

Wall Plank w/ Knee to Chest (March)

2x 1 min total

Feet on wall—pull knee up to chest & Alt R/L every 10-15 secs

18

Wall Plank w/ Bird-Dog Static Plank

2x :30sec

Feet on wall—push-up position, bring opposite elbow to knee touching underneath hips and hold (R/L)


Like what you've just read? Click here to subscribe to our blog!

This blog was written by Michael Blume, MS, SCCC; Athletic Performance Coach. To learn more about the NIFS bloggers, click here.


Topics: workouts plank workout programs

Finding Motivation to Beat the Holiday Workout Blues

Finding Motivation_2I don’t know about you, but often during the holidays it just seems easy to blow off your daily workout. You have done well up to this point, staying committed and getting yourself into the gym or out for a run. But with the dark evenings, busy work schedule, and possibly some travel, it tends to be the first thing to take off the list. It’s important for your body to take a break, but if you need some tips on how to keep yourself going, keep reading!

Here are some tips I have come up with to beat the holiday workout blues:

  • Keep it on the schedule. One of the best ways to make sure that you are getting your workout in is to keep it on your schedule. If you have it set in place, it’s not as easy to skip it and head home for some Monday Night Football instead!
  • Meet your workout buddy. If you don’t have one, now is a great time to find one. Find someone that you can be accountable to and make sure you’re getting yourself to the gym.
  • Try a home workout. It’s okay to stay in if you can’t seem to get yourself to the gym; there are plenty of things you can do at home to keep yourself fit. Some ideas are pushups, lunges, squats, planks, and going for a run.
  • Get up early to get it done. If you get your workout done in the morning, you won’t have to think about it the rest of the day! Then once you get out of work and it’s dark, you can just go home and relax.
  • Try something new. This is a great time to try a class or something that you haven’t done before. Try new group fitness class or meet with a health fitness instructor to get a fresh and new personal workout plan.
  • Keep yourself accountable. Check it off in your calendar, put your plan on the fridge, or track your workout in the NIFS app to keep yourself focused on what you need to be doing and create your own accountability.

Whatever it may be for you, find that one thing that keeps you clicking along. You will have to indulge at some point over the next month and half in something that you may have not normally ingested, and if you keep up the workouts, it’s okay! It’s all about discipline during these holiday months, but do your best to keep yourself on track in your exercise to limit the workout blues!

*****

MM5K Logo_2023_name and tagIf your looking for a new challenge in the new year consider registering for the NIFS Mini-Marathon & 5k Training Program that starts in February. We can help you train for any race you want to accomplish in the spring! Click below to fine out more information!

REGISTER TODAY!


This blog was written by Amanda Bireline, Health Fitness Specialist. To find out more about the NIFS bloggers, click here.

Topics: exercise at home motivation workouts holidays accountability new year's

My 4 Takeaways from the Squatober Weightlifting Challenge

GettyImages-1148247238Fall is hands-down one of my favorite times of the year. There’s a crispness in the air, the leaves begin to change, there’s pumpkin-flavored everything, football season is in full swing, and there’s the return of a little phenomenon known as Squatober!

Yes, you read that correctly: SQUATober. Squatober is known as “the world’s largest knee-bending party,” and consists of squatting 5–6 times per week for the entirety of the month of October. Crazy, right? Crazy awesome! The program is written and was originally created by Aaron Ausmus, NCAA D1 shot put champion and strength and conditioning coach. It culminates in a PR party sometime around Halloween (“personal record” for those of you playing at home), and all proceeds from shirts and merchandise are ultimately donated to outfitting a high school weight room in need of some upgrades.

I can almost hear the confusion, apprehension, or flat-out scoffs through the screen. Squatting, and squatting heavy no less, five days a week, every week for a month—why would anyone want to embark on something so outlandish? Well, a lot of strength coaches, fitness professionals, and gym junkies have taken the plunge into Squatober since its inception.

And while I understand that it’s not for everyone, there’s something about stepping up to the plate (or under the bar, I should say) that really appealed to me. It was a "challenge accepted” moment that took me back to the days of being a competitive athlete. Plus, I wanted to be a part of a larger, worldwide phenomenon that ultimately ended in giving back to communities and those in need. There have also been numerous stories of other coaches citing Squatober as the reason they overcame personal struggles such as addiction, mental health struggles, and much more.

After completing the sometimes grueling squat party for the first time last year, I came away with a little more than soreness. Here are my four biggest takeaways after completing Squatober.   

Our bodies are capable of some incredible feats.

Now, I’m not saying I broke the female world record for the back squat. But after squatting for 27 days, my estimated 1-rep max increased by over 10 percent! This definitely exceeded my expectations (seeing as all I wanted to do was make it to the end). And I understand that picking up things and putting them down might not be everyone’s favorite pastime. But if you’ve been debating signing up for that triathlon, or that Spartan race, or picking up trail running, or training to hike to the top of Pike’s Peak, my advice? Just start! It’s never too late, and our bodies are able to do some pretty cool stuff; you may surprise yourself with what you’re able to handle.

Coaches need coaches, too.

I’ve always been more of a nerd when it comes to training. I want to know the ins and outs when it comes to physiology, how certain periodization schemes affect the body’s ability to adapt. I view programming as a puzzle: trying to piece together the optimal exercises, at the correct dose, in the right order, in order to achieve the desired result. But when you do that for numerous clients, athletes, and friends, for hours at a time, week after week, I’ll be honest: I feel a little brain-dead when it comes to my own programming. Having another coach be in charge of the plan, so all I had to do was open my phone, see the workout, and get down to business? That was a huge weight lifted (pun intended). Since completing Squatober, I’ve reached out to colleagues multiple times to get not only their advice but also their take on my programming. I’ve found that this leaves me fresh, more motivated, and honestly more accountable.

If you want to improve a skill, do it every day (or close to it).

I’ll be honest, the first 6–7 days were a little rough. I was waddling around like I was learning to walk for the first time (hello soreness!). But once I progressed into week two and beyond, I noticed a few things. My depth was consistently better. I wasn’t compensating as much (toes turning out, trunk lean). And my bar path remained more constant (not moving forward or back). By addressing my ankle mobility each day, and my hip stability before each lift, the pieces started to come together. This premise holds true for any habit you want to start or any skill you want to learn. Even if you address it for only a minute a day, making your mission constant improvement, even if it’s only 1 percent each session, it can lead to profound results over time.

Get comfortable with being uncomfortable.

This message was echoed from many of my coaches growing up. Similar sentiments float around the fitness industry fairly regularly. “Comfort is the enemy of achievement,” for example. And Squatober was a nice reminder of that. Again, going into week two, knowing that I had another heavy load that would literally be placed on my back, I started to shift my mentality. I began to look forward to the challenge. I wasn’t worried about any soreness that might ensue. I had begun to become comfortable with being uncomfortable. Now, I’m not saying we have to be uncomfortable 24/7, 365 in order to achieve results. But rather, what was once uncomfortable became the new normal. We adapt, we overcome. And we ultimately change for the better!

I admittedly was only able to complete some of the workouts this year due to scheduling. And I do want to reiterate that I understand this is not for everyone. Would I program this way for athletes? No. Is this the end-all be-all in terms of workout plans? No. Was it fun? For me it absolutely was. I loved the camaraderie it offered. I loved checking in with former colleagues and coaches as we all progressed from week to week. I loved that I could look back and say, “Yeah, I did that. I made it.”

So, if you are interested in hopping into Squatober next year, you can check out @sorinex or @penandpaperstrengthapp on Instagram for workouts. Don’t be afraid to modify when you need to, either. And at the end of the day? Just have some fun with it while accepting the challenge! Happy lifting!

Like what you've just read? Click here to subscribe to our blog!

This blog was written by Lauren Zakrajsek, NIFS Assistant Fitness Center Manager, Health Fitness Instructor, and Personal Trainer. To learn more about the NIFS bloggers, click here.

Topics: workouts challenge weightlifting coaching squat

CON-ISO-ECC: Muscle Contractions for Weightlifting Variations

GettyImages-1401137761_edited low res

If you have taken an extended break from your workout routine, your return to the gym will likely mean a return to the program that you were originally doing before your hiatus. Exercise selection, reps, and rest periods may be altered slightly after time off; however, eventually you will be back to your pre-break strength and power, among other athletic traits. When you think about that program and how it got you to the point you are at or will be in the near future, do you also think about the steps you will take to further advance your abilities? I’m here to break down a few ways specifically within the muscle that may help give you the variety to your program you are looking for.

There are three main types of muscular contractions that can happen, each of which serves a specific purpose for muscular growth, strength, and power. They are

  • Concentric
  • Isometric
  • Eccentric

Concentric

Concentric muscular contractions are generally the most common type that individuals focus on during their training sessions. Concentric contractions involve the shortening of the muscle during an exercise. If you imagine a lift, say the bench press, the act of pushing the weight up from your chest actively shortens the muscle. The pulling of a bent-over row or the ascent of the barbell back squat all utilize this contraction. An uncommon variation would be to slow down the movement, for example slowing the pulling movement of the bar during a Lat Pulldown. If it normally takes you 1–2 seconds to pull down the bar, try a 5-count with the same weight. The intensity will greatly increase.

Isometric

Isometric contractions are an underrated variation that people most often forget about during workout planning. Instead of a shortening movement like the concentric contraction, the isometric contraction actually involves the muscle staying at the same length during the work period. A simple variation of this contraction is a wall sit. The muscle never changes length, but the tension and effort build over time.GettyImages-1219375851 

But the quality of this contraction is found in much more than just wall sits. Almost any exercise can utilize this method. Here are a few of my favorite variations using isometric contractions. The intensity of the holds in these lifts can be dictated by either the amount of weight or the time you hold it for.

  • Split Squat Holds (hold split squat in down position with knee off the ground)
  • Push-Up Holds (hold push-up in the “down” position; try at different heights!)
  • Pull-Up Holds (either chin over bar or with arms hanging straight)

Eccentric

The last contraction variation in this trio is the eccentric contraction. This is commonly thought of as the lowering or lengthening of the muscle during an exercise. Going back to the bench press example earlier, the bar lowering to the chest would be the eccentric contraction. Where this method is most useful is during time-under-tension exercises where you increase the amount of time that you lengthen the muscle during the lift. These are all about control and can get quite intense.

Similar to the isometric contractions, time is everything. For example, when you do a step-up and are coming down off of the box, try to control for 3–5 seconds before your foot hits the ground instead of coming down right away. Here are a few of my favorite variations on eccentric contraction exercises:

  • Incline Dumbbell Press (lowering the weight slowly and raising it at a normal pace)
  • Slider Leg Curls (pushing feet out in a slow and controlled motion)
  • Glute Ham Raises (slow on the way down)

***

The variations are not limited to this list. Feel free to get creative with any of your favorite exercises when trying out the different muscular contractions. Remember, time is your friend with any method you choose and can match any intensity you are trying to achieve.

This blog was written by Alex Soller, Athletic Performance Coach and NIFS trainer. To find out more about the NIFS bloggers, click here.

Topics: workouts muscles weight lifting weightlifting exercises power muscle building strength training variety workout programs

Make Training Less Complex with More Complexes

Screen Shot 2020-10-13 at 12.56.26 PMIf you are like me, with a busy, on-the-go lifestyle, you probably don't have more than an hour to get inside the gym and train. Lucky for you, that’s okay!

By training with a full-body routine utilizing complexes, you can spend less time in the gym and still see the results. This not only saves you time in the gym, but it also allows for more time with family and friends, all while seeing the results you want. One way to accomplish this is through a barbell or kettlebell complex.

What Is a Complex?

A complex is a series of movements that are performed back to back in which the set number of reps is done for a movement before moving to the next. A complex can be performed with a barbell or one or two kettlebells/dumbbells. Each movement within the complex should flow into the next one. A good way to achieve this is to start from the ground and work your way up.

How to Build a Complex

Any number of reps can be done for each movement. The more movements within the complex, the fewer reps you will want to complete for each one. A complex consisting of four to six movements should be kept at one to five reps per movement. If your complex is only two to three movements, you can use higher reps. Some examples of complexes include the following:

Barbell 1

  • Row x 1–5 reps
  • Deadlift x 1–5 reps
  • Hang Power Clean x 1–5 reps
  • Front Squat x 1–5 reps
  • Push Press 1–5 reps

Barbell 2

  • Deadlift x 3–6 reps
  • Clean x 3–6 reps
  • Press x 3–6 reps

Kettlebell or Dumbbell 1

  • Pushup x 1–5 reps
  • Row x 1–5 reps
  • DL x 1–5 reps
  • Clean or Snatch x 1–5 reps
  • Squat x 1–5 reps
  • Press x 1–5 reps

Kettlebell or Dumbbell 2

  • Pushup x 3–10 reps
  • Row x 3–10 reps
  • Swing x 3–10 reps
  • Squat x 3–10 reps

I recommend completing two to three rounds, but you can also work up to as many rounds as possible with good technique. Within each complex there will be a movement that limits the weight for the entire complex, and it is better to start the first round with a weight you think will be too light.

For example, the movement that will decide your weight in Barbell 1 above is the push press. The deadlift might feel easy, but that is okay. By the end of the complex you will be happy you did not go as heavy as possible. Try to do the entire complex without setting down the weight to rest, and remember to complete all of the reps for one movement before moving on to the next movement.


Why Should I Implement Complexes?

These complexes are an amazing full-body tool that you can use if you are running low on time for your session, or if you have limited days per week you can come in and train. They are also a great way to add additional volume to your workouts, or can even be used as a finisher at the end to build resilience and touch up your conditioning. If your goal is to be better conditioned, adding a sprint or jog component at the end using pieces such as the echo bike, rower, ski-erg, or SPARC trainer can provide a nice cherry on top of an already stellar total-body workout.

Give these complexes a try to get your blood pumping, and let us know how they go! If you need any technique tips or complete workout programs, come visit us at the track desk for more information on what we offer and how to get that set up!

Like what you've just read? Click here to subscribe to our blog!

This blog was written by Evan James, NIFS Exercise Physiologist EP-C, Health Fitness Instructor, and Personal Trainer. To learn more about the NIFS bloggers, click here.

Topics: workouts weight lifting weightlifting kettlebell weights strength and conditioning workout programs full-body complexes efficiency

Build a Bigger Engine with Aerobic Training (Part 2 of 2)

GettyImages-1217027916-1Last time, I covered a few of the benefits of building your aerobic base:

  • Ability to recover more quickly between bouts of high-intensity exercise
  • Ability to sustain higher-threshold movements for longer (think being able to hit more heavy singles on bench or deadlift with the same rest)
  • Ability to handle more acute rises in training volume
  • More efficiency, as you’re able to remain in an aerobic state for energy for longer periods (before resorting to another system like anaerobic/glycolytic)

Cool, Lauren! Now, how the heck do I train my aerobic system? How do I start to build that base? Here are a few examples of ways to incorporate aerobic training into your fitness plan.

Contralateral Circuits

As the name implies, a contralateral circuit involves working opposite sides of the body while performing a two-part, compound movement—for example, a step-up with the right leg followed by an overhead press with the left arm. Each movement is performed for time, typically 20–30 seconds, followed by a short period of rest while you switch to the opposite side to perform the movement.

By cycling between exercises that work opposite limbs and opposite sides of the body (think diagonally across), we are taxing the cardiovascular system in a relatively novel way. Specifically, as blood is pumped and pools in working limbs for 20–30 seconds (right leg/left arm), the heart has to work slightly harder to then switch to pumping blood to ensure that the next group of contralateral limbs is adequately supplied (left leg/right arm). Heavy weights aren’t involved; typically it’s a combination of bodyweight exercises, bands, or light weights. But after 20–30 minutes of near continuous movement, chances are you’ll see that some sweat has appeared!

Here’s a quick example of exercises that can be linked together for a contralateral circuit:

  • Reverse Lunge Right + Band Row Left x 0:25/0:30 rest and transition
  • Reverse Lunge Left + Band Row Right x 0:25/0:30 rest and transition
  • Step-Up Right + DB Overhead Press Left x 0:25/0:30 rest and transition
  • Step-Up Left + DB Overhead Press Right x 0:25/0:30 rest and transition
  • Single-leg RDL Left + DB Row Left (Right stance leg) x 0:25/0:30 rest and transition
  • Single-leg RDL Right + DB Row Right (Left stance leg) x 0:25/0:30 rest and start over

Escalating Density Training (EDT)

This type of training not only trains your aerobic system, but also allows you to gradually build up volume on particular lifts. So if you in any way resemble me and aren’t the number-one fan of running, this might be for you! Escalating Density Training involves working for 5-minute blocks continuously. You alternate between two lifts, usually opposite in nature (upper vs. lower body), and complete only 1–2 reps of each before returning to the other movement.

For example, you can pair a Kettlebell Goblet Squat with a DB Bench Press. So, for 5 minutes you complete one rep of a Goblet Squat, followed by one rep of DB Bench Press. You can keep a tally of how many rounds you complete in 5 minutes and compare for future sessions to see whether you’re able to do more work in the same period of time. Typically, you can complete three blocks of EDT in one training session, separated by 3–4 minutes of rest. All in all, you’re completing 15 minutes of high-quality work.

Here’s an example of an EDT session:

  • Block 1: KB RDL/DB Overhead Press x 5:00 --> 3:00 rest post round
  • Block 2: Sandbag Clean & Squat/TRX Row x 5:00 --> 3:00 rest post round
  • Block 3: DB Incline Press/Goblet Reverse Lunge x 5:00 --> cooldown

A Long Walk or Hike, Focusing on Nasal Breathing

This one is pretty simple, but surprisingly effective. Getting used to nasal breathing, as opposed to mouth breathing, has more than a few benefits. One of them is that it allows our body to become better adapted to handling CO2 as we produce it during exercise and movement in general. Why does this matter? This has been shown to lower resting heart rate, improve pH regulation, and improve our body’s ability to cycle and filter out metabolites.

So, the next time you head out for a hike at a state park or a stroll through your neighborhood, see if you can maintain a moderate pace while only nasal breathing. If you feel the need to breathe out of your mouth, that’s fine! Each time you go out, simply see how much you can do with nasal breathing, trying to push that time or distance bit by bit each session. Bonus? You get to enjoy the great outdoors.

Low-intensity Modalities + Breath Holds

I came across this method after listening to Cal Dietz, Strength & Conditioning Coach at the University of Minnesota, at multiple conferences and clinics. He’s worked with numerous Big Ten Champions, NCAA National Champions, and Olympians throughout his career. When working with athletes as they return from a hiatus in training (i.e. post summer semester), he has employed a 2-week period focusing primarily on aerobic training.

One method he’s used is 10-second exhalation and breath holds while performing light aerobic exercise. For example, while on a Concept2 Rower, he’ll have his athletes find an easy, maintainable pace for 1–2 minutes. For the next 10–15 minutes while maintaining that pace, athletes will exhale at the beginning of every minute and hold their breath following that exhale. They will attempt to hold their breath until the 10-second mark of that minute. So, if it takes 4 seconds to exhale, they’ll then try to hold their breath for 6 more seconds. Once you start breathing again, the goal is to stabilize the breath as quickly as possible.

After trying this myself, it was surprisingly difficult. There was a sense of being uncomfortable, obviously the urge to breathe, some slight tinging, followed by immense relief after the 10-second mark. I’m listing this last because it’s something I would work up to. Can you try it right off the bat? Absolutely. But don’t feel that you need to continue the breath hold for the full 10 seconds. Maybe its only for 5–6 seconds while you acclimate to the training.

***

All in all, there are various ways to train the aerobic system, and there isn’t one that fits all. But if you’re looking to sprinkle some variety into your routine, one of these modalities might be for you. As always, the goal with these workouts isn’t to leave you running for the trash can. If it does, take it down a notch.

Like what you've just read? Click here to subscribe to our blog!

This blog was written by Lauren Zakrajsek, NIFS Health Fitness Instructor, Personal Trainer, and Internship Coordinator. To learn more about the NIFS bloggers, click here.
Topics: walking workouts training weight lifting high intensity aerobic breathing

Work Capacity Training with Kettlebells

GettyImages-1001563404The Russian kettlebell is unique among exercise tools. It is an offset-handle weight that travels easily between the legs in a pendulum movement that can be easily seen in the kettlebell swing (two-hand and one-hand swings). If done correctly, the hips hinge straight backward as if you were trying to push a swinging door open while holding a tray. If you squat, even a little bit, there is little rearward movement and the door doesn’t open. Hip power is lost.

The Swing

When I teach future kettlebell instructors, I spend 2 and a half hours on teaching the swing. It is that complicated, and as you will see, that important. Hopefully, a future instructor can take that information and skills and teach a client how to do a reasonable swing in 10 to 20 minutes, reasonable enough to get through a workout. Regardless of how long someone has been lifting kettlebells, their swing skills can always be improved.

That hip hinge swing movement is used for kettlebell cleans and for the glamour lift, the kettlebell snatch. Without proper swing skills, it is impossible to progress very far into the art of kettlebell lifting and to truly get the unique rewards of kettlebell lifting.

Weight Exercises

Kettlebells are a weight and can be used for typical weight exercises—sometimes successfully, sometimes passable, and many times just plain head-shaking stupid. What most people miss is what the Russians discovered a long time ago. In one-on-one athletics, the first athlete to fatigue is likely to lose. In military hand-to-hand combat, the first soldier to fatigue is likely to die. The repeatable hip hinge–based movements (swings, cleans, snatches, clean and press, clean and push press, and clean and jerks) are tremendously effective in building strength/endurance, and work capacity. The variables are time of lifting, reps per minute, and of course the amount of weight used.

Tasha Nichols, a group fitness instructor here at NIFS, won her 58Kg weight class in Dublin, Ireland 2015, doing the one-arm snatch for 10:00 (hand switch at the 5:00 mark) with a 16kg KB with a total of 203 repetitions. The time was 10:00, averaging just over 20 reps per minute, and the weight was 16kg (35.3 pounds). That is work capacity!

Work Capacity Kettlebell Workout

Here is a little workout to give you an idea what work capacity training feels like.

Maxwell Circuit

  • Swings: 15 
  • Goblet Squats: 5
  • Push-up: 5
  • One-arm row: 5/5

That is 1 round and the workout is a minimum of 8 rounds and a maximum of 15. Rest long enough to complete the next round but no longer. Swings can be done with a dumbbell if a kettlebell is not available. Be careful when holding a dumbbell by the bell end. It can slip.

Block off the space you’re using to swing anything. Children and pets can walk in when they are least expected

Goblet Squat is done with the weight held at chest level. If this bothers your shoulders, hold the weight at arm’s length between your legs but be sure to actually squat. Do not allow it to become a sloppy deadlift.

Kettlebell Training

Training with kettlebells properly, anyone can seriously improve their strength and endurance. Like most activities, you must put in the time to practice and get better to see real results. Interested in learning more about kettlebell lifting and how you can increase your work capacity? Contact Rick Huse for more information. 

Enjoy the pain!

Like what you've just read? Click here to subscribe to our blog!

This blog was written by Rick Huse, CSCS, NIFS Health Fitness Specialist. To find out more about the NIFS bloggers, click here.

Topics: fitness center workouts nifs staff endurance weightlifting strength kettlebell work capacity