<img height="1" width="1" style="display:none" src="https://www.facebook.com/tr?id=424649934352787&amp;ev=PageView&amp;noscript=1">

NIFS Healthy Living Blog

Max Results with Minimal Equipment, Part 1: Sliders

Screen_Shot_2016-08-10_at_11.21.07_AM.pngIn my eight years at NIFS, one major thing I am so lucky to have is a world-class fitness facility right outside my office door. Some of the greatest fitness equipment surrounded by some of the greatest fitness minds are at my fingertips every day. I love to move, and I love to move here, but many times I need to move outside of these walls, and of course I will have to leave the awesome gear where it lies.

But have no fear; there are some options that can maximize results with minimal gear. My first choice is my NIFS’ fitness floor, but in this four-part series, I will highlight my favorite tools to use when you can use only one.

Favorite Portable Exercise Equipment: The Slider

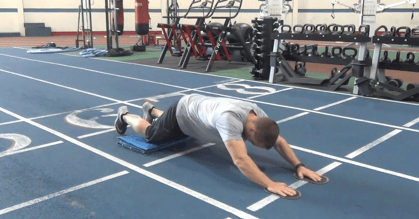
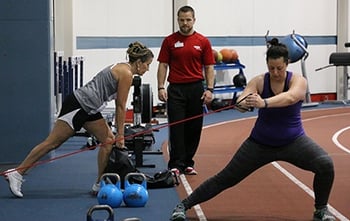
Today we take a look at the innocent-looking but brutal tool the slider, also known as a Valslide. You may have seen them used to move heavy furniture. This simple and versatile tool can challenge most movement patterns as well as create balance and stability needs. With movements ranging from beginner to advanced, there is really something for everybody when using sliders. They can act as a focal point of a metabolically driven circuit, or in a core-targeting segment, as well as super-setting with a heavy strength movement.

And one of the most appealing attributes of the slider is that you can take it anywhere without taking up any space. You will find that the four implements I will be highlighting all have this in common. The other thing these have in common is that they take away your excuses for not training while you are away.

Best Slider Exercises and Workouts

Here are 10 of my favorite slider exercises and some workouts that you can try out.

VIDEO WORKOUTS:

Circuit—:40/:20—3–5 rounds

  • Reverse lunges
  • Burpees
  • Hamstring curls
  • Pushup reaches

Strength

  • A1 barbell deadlift5x2

  •  A2 slider slideouts—3x10

  •  B1 DB flat bench press—3x8-10

  •  B2 slider eccentric hamstring curls —3x8-10

  •  C1 lat pull-downs—3x8

  •  C2 slider lateral lunges—3x8

M & M Sliders Final

There are far more movements and ways to use the versatile slider. For more ideas, flag down a NIFS instructor and they will be happy to help. Until next time when I cover the superband, add a few of these movements into your workout and start reaping the benefits of this simple tool.

Like what you've just read? Click here to subscribe to our blog!

This blog was written by Tony Maloney, ACSM Certified Exercise Physiologist and Fitness Center Manager. To find out more about the NIFS bloggers, click here.

Topics: NIFS cardio fitness center equipment workouts balance core exercises traveling

Posture and Fitness (Part 1): Kyphosis (Rounded Shoulders)

One thing I have really begun to pay special attention to within my exercise program lately is correcting my postural deficiencies. About a month ago as I was staring in the mirror (in awe of my handsome looks) waiting to begin my next set of shoulder presses, I noticed that both of my shoulders were comfortably rounded forward as I stood straight up. I made a conscious effort to pull them back in line with my ear, knee, and ankle (correct posture); however, this was very uncomfortable for me to maintain for a short period of time.

ThinkstockPhotos-148154696.jpgIt then dawned on me that if it was uncomfortable for me to maintain good posture for a few seconds, imagine the effect these deficiencies will eventually have on my muscularity, the efficiency of my resistance training in regard to compensation for the targeted muscles, as well as the greater postural deficiencies that naturally occur as we get into our later years.

Many people find themselves hunched over a keyboard or office desk for many hours throughout the day. This can have a huge effect on your posture over time. Hunchback, or rounded shoulders, occurs because we often do not have the muscular endurance in our upper back and shoulder muscles to resist and fight against gravity. When we allow our shoulders to round forward (known as kyphosis), our anterior muscles (pectoralis major and minor) become tight due to always being in a shortened state while our posterior shoulder muscles (trapezius, rhomboids, and rotator cuff muscles) become lengthened and weak.

The best way to find out if you might have this problem is to have someone take a photo of you from the side in your natural, relaxed, standing position. If your ears, shoulder, knees, and ankles are not aligned with each other, you could have a moderate to severe case of kyphosis. No worries, however, as this is very common now, especially with the prevalent use of computers in the workplace and at home. Here are some quick solutions you can implement into your warmup to help your alignment.

Solution One: Maintain Correct Positioning When Sitting at the Computer

Maintain correct positioning (shoulder blades back, chest open wide) when sitting at a computer desk. This may seem obvious, but if it was as obvious as it seems, we wouldn’t be having this conversation in the first place. The more time you spend in this position, the quicker your body will adapt to being in proper alignment.

Also try to avoid excessive use of laptops. Laptops naturally put your body in a rounded-shoulder positioning because of how low the computer screen is when placed in the lap. Instead, try stacking the laptop on top of a box or a stack of books so that the upper edge of the monitor is just below eye level. This will help you maintain a natural, “unrounded,” or upright shoulder position because you no longer have to be hunched over looking down at the computer monitor.

Solution Two: Foam Rolling

Foam roll the thoracic spine to improve thoracic extension range of motion. Myofascial release (foam rolling) will help you regain full extension in your thoracic spine that might have been lost due to weak upper-back muscles and constant downward pull on the anterior pectoral and shoulder muscles.

Solution Three: Static Stretching

Statically stretch the pectoralis major and minor muscles to free up any tightness in the chest. Hold each stretch for about 30 seconds and repeat two to three times before your resistance or cardio training workout. This will help eliminate some pulling of the anterior shoulder muscles, which will make it easier for you to maintain proper postural alignment. Here’s a video of some static chest stretches you can try.

Solution Four: Upper Posterior Chain Muscle Exercises

Increase muscular strength and endurance of the posterior shoulder muscles by performing various upper posterior chain muscle exercises. By strengthening these muscles, maintaining proper alignment of the shoulders will become much more natural and manageable for an individual over long periods of time. When our posterior shoulder muscles lack strength, they have little chance of winning the fight against gravity when hunched over a computer keyboard.

One example of an exercise you can implement is the floor cobra. This will help with thoracic extension (as stated above) as well as retraction of the shoulder blades and opening of the chest muscles.

***

Remember, it took a great deal of time for your body to eventually adapt to the poor postural alignment, so you can expect the same with the correction process. Even though these tips will help you regain postural alignment, you cannot expect to see a great deal of change overnight. These tips have to be implemented into your daily life in order to see long-term changes.

Stay tuned for my next blog, where I will be covering another common postural problem: Anterior pelvic tilt.

Like what you've just read? Click here to subscribe to our blog!

This blog was written by Darius Felix, Health Fitness Instructor. To find out more about the NIFS bloggers, click here. 

Topics: fitness muscles stretching exercises workplace wellness core strength posture

Caddy Smack Deuce: More Fitness Tips to Improve Your Golf Game

It is finally time! If you are like me, that “itch” to get back out onto the golf course may be starting to emerge. You check your weather app at least four or five times a day to see if the conditions for the upcoming weekend are going to be suitable playing (no wind/rain = good for me).
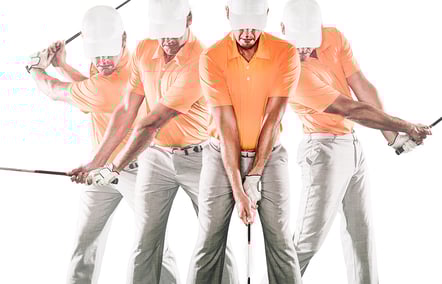
GettyImages-497545811_webMost of us might have been lucky to get out and play a handful of times over the winter, but some might be picking up a club for the first time in almost five months or more when that first tee time rolls around. Regardless of how many times you have played in recent months, everyone can benefit from improving golf-specific fitness areas before the full-fledged season begins.

About a year or so ago, I wrote a blog called “Caddy Smack” (hence “Caddy Smack Deuce”). Caddy Smack was designed to give you a few starting points on how you can increase one very important aspect of the golf swing, rotational power. Rotational power is a very important force-generating factor and may help you gain a few extra yards off of the tee. But as most of you probably know, there is MUCH more to the golf swing than just power. Follow along as I go over five of the most important fitness areas to improve that can have a direct impact on your swing.

Ankle Mobility

All great golf swings start from the ground up. How the feet are positioned and the movement (or lack thereof) can change a smooth swing into one that looks like a rusted teeter-totter. Lack of mobility throughout the ankles can constrict your range of motion and can also prevent you from using the ground as a force-generating tool.

What can you do to improve it? Do Wall Ankle Mobility Drills: 2 to 3 sets of 10 repetitions per leg

Hip Mobility

As Chubbs from the movie Happy Gilmore once said, “It’s all in the hips.” Well, I’m here to tell you that Chubbs wasn’t lying. A solid portion of the movement that occurs in the swing can be attributed to your ability to achieve a full range of motion within your hips. If you have been around the game long enough, you know the term “hip turn.” This does not happen with poor mobility.

What can you do to improve it? Do Supine Bridge Leg Circles: 2 sets of 5 reps (clockwise and counterclockwise) per leg

Rotational Power

If you have read this blog’s big brother, you know that rotational power plays an important role in your swing. My belief is that if you become more powerful, you will not have to swing as hard in order for the ball to fly the same distance, thus minimizing mis-hits due to being out of control. Essentially, you are generating the same amount of force (or possibly greater) without feeling like you are doing anything different. Seems like a win-win to me.

What (else) can you do to improve it? Perform Standing Rotational Shot Put: 2 to 3 sets of 5 to 8 reps per side

Shoulder Mobility

I know you have done it, watching the slow-mo of one of the tour players’ swings, being enamored by their ability to draw the club back so far (Phil Mickelson goes way past parallel to the shoulders). The next time you hit the driving range, you try to mimic that exact takeaway and the shot is a proverbial dumpster fire. I’ve done it too. You wonder to yourself, “How do they do that”?

Well, for most of them, their swings have been forged since they exited the womb. That feeling is natural to them. But one factor in which they may have a slight advantage over you may be shoulder mobility, or the ability for the shoulder to move freely and under control throughout the range of motion without the sense of constriction. There is no way that you will be able to recreate a backswing of such length if you cannot perform similar tasks without the golf club in your hands.

What can you do to improve it? Standing (or seated) Wall Slides: 2 sets of 10 reps

Single-Leg Stability

My final important aspect to aim to improve for your golf swing is single-leg (SL) stability. SL stability combines other factors that I mentioned previously (such as ankle/hip mobility), but for some individuals, it’s just something that needs to be practiced. After you make contact with the ball in your swing, there is a transfer of weight to your lead foot, which causes that hip turn and allows you to hold the finish pose. Although both feet are still in contact with the ground, the lead leg is providing the majority of the support.

When is the last time you balanced on one leg for 30 seconds? What about balancing for 30 seconds with your eyes closed? What about balancing with your eyes closed, juggling flaming bowling pins, while eating sushi (okay, maybe I’m kidding). That is a good place to start. Feel what it is like to stand without using anything but that plant foot. Do it on both sides. After you have mastered the balance, you can add more elements.

What can you do to improve it? Do Single Leg Balance with Tennis Ball Bounce (against wall): 3 sets of 20 per leg

The golf swing is as unique and complex as any movement that I have ever analyzed. There are so many factors that could make or break your success; however, many of those factors are modifiable. I hope that this spring, summer, and fall golfing seasons are the best you’ve ever had!

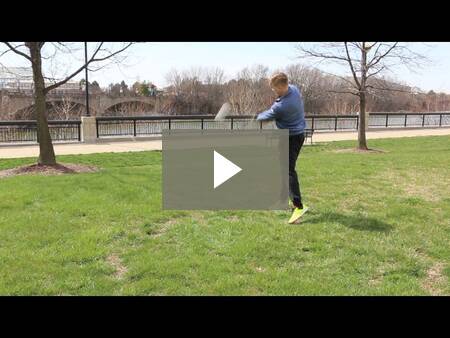
Now, watch me hit a ball over the White River bridge!
Golf blog 2

This blog was written by Alex Soller, NIFS Athletic Performance Coach. To find out more about the NIFS bloggers click here.


Like what you've just read? Click here to subscribe to our blog!

Topics: fitness nifs staff balance flexibility exercises golf golf swing mobility functional movement

Are You Glute-n Free? The Importance of Exercises for Glutes

Gluten intolerance and celiac recently has become a very popular nutritional topic. Gluten is a protein found in grains, including wheat and rye. Digestive issues, joint pain, and headaches are a few of the health issues that may occur if you have this intolerance and eat foods that contain gluten. Many individuals adopt a gluten-free lifestyle, which could lead to positive changes when paired with exercise and overall health.

But what if I told you there was a certain lifestyle that would have an opposite effect on your life? This is also characterized as gluten-free, but has nothing to do with food. This “Glute-n Free” lifestyle may be holding you back from achieving many exercise or physical activity goals, or could lead to simple lifestyle issues, such as dealing with nagging lower back pain.

Gluten = Bad, Glutes = Good!ThinkstockPhotos-200069245-001new-1.jpg

This Glute-n free trend I’m referring to is minimal or absence of gluteal exercises during your workout programs. The gluteus maximus is the largest muscle in the body. It is essential in just about every physical activity and is the central core muscle. You could consider this muscle to be the body’s powerhouse. Along with glute max, you have other gluteal muscles with various responsibilities, like hip stability. You will use these muscles in just about every activity that you do. From swinging a golf club to picking up a box off the ground, the glutes are vital.

Glute strength is important no matter what at point you are in your life. You could be an elite athlete looking to improve your broad jump, or a grandparent wanting to be able to pick up your grandchild while playing. Regardless of your goal, the strength of these muscles should be a main focus in your training program. One of the main movement patterns that these muscles help produce is known as the “hip hinge” movement pattern. Some fitness examples of this movement include the kettlebell swing, deadlift, and RDL.

Success in these exercises, or this movement pattern in general, relies heavily on your body’s ability to maintain good form under load, which is much easier when the muscles are up for the task. If muscles do not have the capabilities to withstand these forces, many issues could arise, commonly in the form of lower back pain.

The Functional Importance of the Glutes

This example does not stop in the gym, either. If you are at home and try to pick up a couch while rearranging furniture, the same rules apply. If your body (a big part of which being the glutes) is not strong enough to deadlift the couch, how did you get it up in the air? The simplest answer is that you were able to compensate from some other area (lower back) to hoist the couch up and move it. If strength levels were adequate to lift it, my guess would be you would not be feeling any pain.

On the opposite end of the spectrum, you could be a Division I linebacker who is looking to become more powerful while tackling. Tackling requires an enormous amount of power from the hip hinge position that allows one to deliver the biggest strike possible to the ball carrier. If I told you I would make you a stronger tackle with a few modifications to a training program, would you do it? I’d hope so. 

Top 5 Glute ExercisesGlute-n Free

So now that I’ve given my spiel about why training the glutes is important, here are my top 5 glute exercises that will help you develop a backside that Sir Mix-a-Lot would be proud of. These exercises start with the most basic and end with the most advanced.

  • Single-Leg Glute Bridge
  • Lateral Band Walks
  • Cable Pull-Through
  • Barbell Hip Press
  • Deadlift


This blog was written by Alex Soller, NIFS Athletic Performance Coach. To find out more about the NIFS bloggers click here.


Like what you've just read? Click here to subscribe to our blog!.

Topics: functional training muscles weightlifting stretching exercises glutes

Effective Grip Strength Training Solutions

ThinkstockPhotos-472123412.jpgGrip strength is quite a conundrum in the fitness industry. It is so often called upon during training, yet grip-strength training itself can be overlooked.
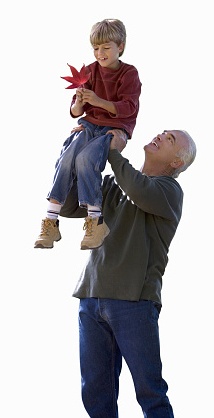
Many people don’t even think to train grip strength, or they don’t think that grip training will benefit them. Have you ever had trouble opening a jar or a can? Have you ever dropped a bag of groceries while trying to carry in every single bag from your car (like I do every Saturday)? Now do you think grip training might benefit you?

How Can a Better Grip Help You?

Any activity that involves holding something is going to require grip strength to some degree. Here are a few activities that may or may not come to mind when you think grip strength.

  • Golfing: When playing golf, every shot you take requires you to hold a club. When holding the club, it pays to have a tight grip. Why? When you hit the ball, there is a transfer of energy from your hands to the club, and from the club to the ball. To get all of the energy from your hands to the club and the ball, you need to allow for as little movement of the club as possible when striking the ball. Grip strength is required to minimize the movement of the club upon striking the ball.
  • Carrying a suitcase: Whenever you carry anything, you need grip strength. This usually isn’t a concern when the item you are carrying is light, such as a book or a cup. However, an item like a jam-packed suitcase can really test your grip when you are running through the airport to catch your plane. And if you work grip strength exercises into your workout routine, you can catch that plane and make it to family Christmas on time!
  • Picking up a heavy object: This one seems like common sense, right? That’s because it is. When lifting a heavy object, such as a piece of furniture, grip strength is what keeps that object from crashing to the ground. You may have very strong legs, arms, and back, but if your grip is too weak to hold the object, you can’t move it!
Training Your Grip

So how can you train your grip to be stronger and have more endurance? There are many different ways, and here are a few (for more exercises, see this article):

  • Using a thicker bar: A larger object is harder to hold onto than a smaller object. Therefore, a thicker barbell will be harder to hold onto than a thinner barbell. You can incorporate a thicker bar into your normal weightlifting routine by substituting it into every exercise you would normally do with a regular bar. Don’t have access to a thick bar? You can create a thicker bar. All you need is a couple of towels. Just wrap them around the bar to the thickness you desire, and you’re ready to go! (CAUTION: Be careful and use a spotter when weightlifting. A new technique means you will need to take time to get used to it.)
  • Plate pinches and flips: If you’re lucky, your gym will have bumper weight plates (and yes, we have plenty here at the NIFS Fitness Center!). These work great for either plate pinches or flips. In a plate pinch, you pick up a bumper plate between your thumb and your other four fingers, and you either stand still to go for time, or you can walk with them and try to go for distance. In a plate flip, you grip the plate in the same way as you would for a pinch, and you do a half flip, catching the side of the plate that was just facing the ground. (Again, use caution when doing these exercises. These plates can be heavy, and if the exercise is done incorrectly, somebody could get hurt.)
  • Dead hangs: For this, all you need is a pull-up bar. From a pull-up position, just hang freely from the bar for as long as you can. This will test your grip strength endurance, which is very functional for things like carries and holds.
Grip strength has been a crucial part of my recent training. I like lifting heavy weights, so it was frustrating for me when my grip strength was my limiting factor on lifts such as the deadlift. I have incorporated a few of these techniques, and after a couple months I saw progress. Weights that used to slip from my hands felt much more manageable in several different lifts that involved gripping and pulling. If you don’t believe me, try these for yourself! Give it a little bit of time; soon enough, your grip will be stronger and your days of struggling to open that pickle jar will be over.

***

This blog was written by Aaron Combs, NSCA CSCS and Health/Fitness Instructor. To find out more about the NIFS bloggers, click here.

Topics: NIFS fitness center weightlifting exercises golf grip strength grip

Training the Active Aging Adult (Part 3 of 4)

ThinkstockPhotos-523032469-1In earlier installments, I’ve talked about health concerns for active people over 40, as well as the importance of strength and functional training for people in this age group. As promised, I will now focus in on strength training, and we’ll start with your butt.
The glute complex (your hips) has the greatest potential for strength and power in the human body, and is the foundation for all ground-based movement. If used properly, it lifts things up (like the grandkids) and spares the low back. Let’s call this the “lifting things up” or the dead-lift pattern.

The Lost Glutes

Because of the enormous amount of sitting done in our modern lifestyle, many adults can’t find their glutes (through muscle activation) with a map, hand mirror, and a flashlight. When you place people on their backs on the floor with their knees up and feet planted on the ground, then have them try to raise their hips off the floor by contracting just their glutes, many will fire their hamstrings while their glutes remain totally quiet. This situation has been referred to as glute amnesia; more accurate would be to say it’s a disconnect between brain and muscle. The body will find a way to accomplish the desired task by resorting to Plan B (in this case, the hamstrings) if the primary movers, the glutes, are offline. The hips will move off the ground but at a cost: inefficient movement, lower performance potential, and higher risk of injury to the Plan B muscles—and also to surrounding tissue and joints.

Foundational Movement: The Hip Hinge

Learning to properly hinge the hips and to activate the glutes is critical for skilled and graceful movement and injury prevention as you age. This is life quality for now and into your future. So let’s try the foundational movement, the hip hinge:

  1. Stand with your feet about hip width apart and hands resting on the front of your thighs. You can also hold a light barbell or a pair of light dumbbells to provide a little resistance.
  2. With your lower legs perpendicular to the ground, push your hips backward while bending forward at the hips. Your upper body will fold over with your back in a straight line from the tailbone to the back of your head.
  3. Do not squat and do not bend forward at the waist (lumbar spine).
  4. Once your hands reach your knees, pause, focus on your glutes, and tighten them as you try to push the ground away with your feet. Return to standing with a straight line from the heels to the back of your head.
  5. Rinse and repeat until the movement feels natural.
  6. If in doubt, keep your hips higher while you bend forward and sense your upper body closing the distance with the ground.
  7. If you have health issues, balance problems, or serious muscle weakness, seek proper medical assistance. Watch this video as a guide.

Your body is programmed to avoid falling on your face by trying to stay more upright and bending your knees more into a squat pattern if it doesn’t sense proper muscle activation. If you learn to position your skeleton into the correct architecture for the movement you are attempting and recruit the target muscles for that movement (in this case, the glutes and core), you will not face-dive. If you do splat, see #6 above (and please post the video on YouTube).

Every day, at some point, you will need to bend over (hinge) and pick something up. Conventional wisdom dictates that we lift with our legs from a squat position, but our greatest power for this movement comes from the hinge pattern and the glutes. That’s why we call it the Big House. Heed the immortal words from Sir Mix-A-Lot: “You can do side bends or sit-ups, but please don’t lose that butt.”

Like what you've just read? Click here to subscribe to our blog!

This blog was written by Rick Huse, CSCS, WKC Competition Coach. To find out more about the NIFS bloggers, click here.

Topics: staying active injury prevention muscles senior fitness strength exercises

Personal Trainer Lingo 101: What Are These Exercises?

Not long ago, we posted a blog entitled “Where Do ‘They’ Come Up with These Exercise Names?” in which I discussed some of the more bizarrely named exercises and provided a little background for each. Here I’d like to extend that process and discuss Personal Trainer Lingo 101 (aka “Where Do ‘They’ Come Up with These Exercise Names? Part 2). We have all heard fitness center lingo for workouts such as Pyramid Sets, AMRAPS, Supersets, and so on, but what do they mean? Some of them make sense; others, not so much. Enjoy!

Pyramid Settraninig

A pyramid set has absolutely nothing to do with building a stone structure in Egypt, but the method’s format does look similar to that of a pyramid when diagramed out. The pyramid set is a routine that is made of several rounds in which the reps decrease and weight increases each round until you reach the fewest reps you are attempting. Typically you would perform 10, 9, 8, 7, etc. until you reach one repetition. This is common practice for someone who wants a good workout without too much thinking. 

When you have completed your pyramid set, you can complete the workout by doing a “reverse pyramid set” by increasing reps per set and decreasing weight until you reach the original starting point. 

AMRAP

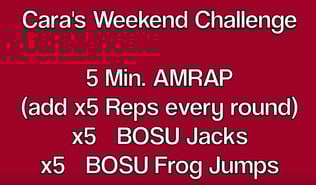
AMRAP is an acronym for “As Many Reps/Rounds as Possible.” This is meant to be a one-set-only bout in which maximal effort is given until exhaustion. Once your AMRAP is over (whether you are using time or effort as your end point), you will need to rest before attempting the same lift again. Many people like to do an AMRAP at the end of a workout to squeeze the last drops of energy out of their workout. 

Screen_Shot_2015-08-20_at_12.19.35_PMAs a funny side note, I like to think that if I were to give all my “might” on any particular exercise, I would therefore no longer have any “might” left and would need to take a nap to recover. The point is, even if you give all your effort, your body and mind probably won’t let you get that far before they shut down and you need to recover. As a challenge, Cara Hartman from NIFS shows a perfect example of this in her NIFS video blog series called Cara’s Weekend Challenge

Supersets

A superset sounds pretty fantastic! It is quite a handy technique that involves two complementary exercises working back to back in order to decrease rest time, promote calorie burning, and help keep your workout flowing smoothly. NIFS Intern Morgan Richardson adds, “For an awesome leg workout, I like to perform deadlifts followed by a round of plyometric box jumps.” Another example would be following your triceps extensions with biceps curls (or vice versa). You could say that would be “two tickets to the gun show,” but we will have to save that for the next installment of Personal Trainer Lingo 101.

***

There are so many terms, phrases, and gym lingo that we hear every day. Some are pretty obvious; others make us wonder what the trainers were thinking when they came up with the names and concepts. One thing we do know for sure is that it is a lot of fun to talk about them and sometimes poke a little fun. Fitness is a serious matter, but that doesn’t mean we can’t have fun doing it!

If you have any Personal Training Lingo 101 questions, please post them in the comments section below. We would love to discuss them (maybe you can even stump the trainer!). 

Until next time, Rejoice and Evolve,

Like what you've just read? Click here to subscribe to our blog!

This blog was written by Thomas Livengood, Health Fitness Instructor at NIFS. To find out more about the NIFS bloggers click here.

Topics: NIFS fitness fitness center Thomas' Corner workouts exercises

Where Do “They” Come Up with These Exercise Names?

Salutations, NIFS friends. Whether you have been working out for 30 years or are brand new to fitness, one mystery that normally goes unsolved is “Where did they come up with the name for that exercise?” Sometimes it’s pretty self-explanatory (such as biceps curl), but other times it can be quite misleading (for example, Burpee). Then when you have met several different trainers, maybe they call the same thing something different (such as torso rotations versus Russian twists). It can be downright confusing.

Here we will explore a few of my favorite mystery exercises and dig a little deeper into their backstories.

Jumping Jacksjumping-jack

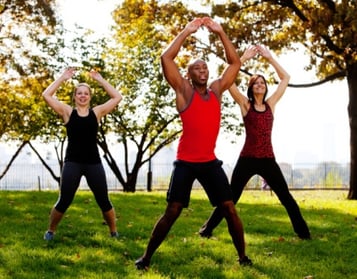
So, who invented the jumping jack, and where did it originate? I should preface that by saying that it is really hard to invent exercises, at least classic, iconic ones like “the pushup,” “the sit-up,” and “the jumping jack.” That being said, we really want to credit the jumping jack to the great Jack LaLanne. Although LaLanne made the exercise popular, it was already in use by the U.S. military and gets its name from a traditional toy in which a string is pulled and the arms and legs spread into a star or jumping-jack position. 

Burpees

Another exercise that carries some notoriety for name confusion is the Burpee. To a lot of people, the Burpee sounds like a made-up name for this brutal exercise. Prior to doing Burpees for the first time, you might snicker at the idea of doing some crazy Dr. Seuss-like movement, but then you do them and your opinion changes quickly. 

So, where do Burpees come from? Apparently, in the 1930s, Dr. Royal H. Burpee (sounds made up, right?) at Columbia University invented the Burpee as part of a PhD thesis. His Burpee test was meant to simplify fitness assessments and was used by the U.S. military. Nowadays, the Burpee is mostly associated with cruel and unusual personal trainers.

Turkish Getups

The Turkish Getup is in a category all by itself when it comes to mysteries. To some, it closely resembles a strongman wearing a leopardskin Onesie and handlebar mustache performing for a traveling-circus sideshow. 

As deep as that sounds, finding the exact origins of the Turkish Getup was even more challenging. It is thought to have originated in Turkey hundreds of years ago and to have been passed down from generation to generation to modern times, where it is primarily done with a kettlebell in either a kettlebell class or a during a CrossFit session. One thing that hasn’t changed, though, is the Turkish Getup’s reputation as one of the most intricate movements in all of fitness.

***

What are some names that have perplexed you or even made you laugh out loud? Share in the comments below for an open discussion and maybe you can “stump the trainer.”

Whether you call it a squat press or a thruster, one thing we always want to make sure of is safety. Your NIFS health fitness professional will ensure you’re getting a great, safe workout regardless of what you call it. Schedule a free assessment today!

Free Fitness Assessment

This blog was written by Thomas Livengood, Health Fitness Specialist at NIFS. To find out more about the NIFS bloggers, click here.


Topics: exercise cardio fitness center injury prevention kettlebell personal training exercises core strength CrossFit

Big Bang Theory: Are You Getting the Most Out of Your Training?

GT-newWhen you think of the term “economy,” what is the first thing that comes to mind? Money would probably be number one, and maybe government and the idea of debt would more than likely come to mind next. There is another economy that should be as well known, and that is your training economy. Simply put, your training economy is the rate of return that you get from the methods and practices of your current training program.

How much time do you spend in the gym or working out? Are you getting the results you set out to achieve? Are you getting the best ROI (return on investment, as they say in business)? Time is one of our most valued commodities, and how you spend your time working toward your health and fitness can determine whether you are on your way to bankruptcy (injury, lack of results, etc.) or getting the most out of your biggest investment.

First and foremost, in my opinion, if you are spending more than two hours in the gym, you are making friends, not gains. If that is your thing, that’s great, but you can never say “I don’t have the time to get the results I want.” Save the Instagram photos and tweets for vacation, and WORK when you are in the gym. Most importantly, you will want to get the most out of the time (there’s that word again) you have committed to training and being the best you that you can be. There are two surefire ways to get the biggest return on your investment while in the gym: 

1. Have a plan of attack.

Needless to say, the plan (or program) is a very important step in ensuring that the time you are working toward the goals you defined is purposeful and bringing you closer and closer to that outcome. This plan should be specific to the goal you are striving to achieve, and should adhere to sound principles. This plan should be progressive. A great coach told me once that you can’t put your tie on before your shirt. Master the basics before moving on to more advanced movements. Read more about this investment step in my previous posts, Do You Even Lift Bro? Weightlifting for Beginners and Alice and Chains.

2. Emphasize “big bang” movements in your program.

Performing what are widely known as “big bang” movements is the second way to get the biggest return on your investment of time. Big bang movements are categorized by including multiple joints, including multiple planes of motion, and incorporating variable loads during the movement. Here are five of my favorite biggest “bang for your buck” movements.

  • Squat and press: Combining both upper and lower body, squat and pressing patterns, and loading the anterior core; the Squat and Press exercise provides a whole lot of BANG! 
  • Ultimate Sandbag Rotational Lunge: As your body moves in one plane of motion, the load of the sandbag will be moving in another. This awesome big bang movement will not only challenge your stability, but it also hits both the lunge and hinge patterns at one time. What a bargain! 
  • Turkish Get-ups: One of the most all-encompassing movements on the planet. The Get-up combines mobility, stability, and strength all in one package. This movement takes some practice before loading it, so take the time to master it to get the most out of it.
  • Crawling patterns: You have to crawl before you can run, right? Crawling patterns are a great way to target the entire system while performing something that is innate to us humans. Try out different variations to continue to stress the body in different ways.
  • Dead lift: Considered by some to be the “beast” of all movements, the dead lift is a huge, multi-joint-pulling motion of awesomeness. We all at one time in our day must bend over to pick something up. The dead lift prepares us for that. 

Getting the most out of your most precious gift, TIME, should be a priority in your fitness programming. Utilizing big bang movements can help you get the results you are looking for without burning the clock.

Like what you've just read? Click here to subscribe to our blog!

This blog was written by Tony Maloney, Exercise Physiologist and Fitness Center Manager. To find out more about the NIFS bloggers, click here. 


Topics: fitness center training weightlifting strength exercises

What Elephant? Getting Past Bad Fitness and Nutrition Advice

My version of a famous Indian parable.

elephantThree blind men, who had been blind for life and who had never experienced an elephant, were brought into an area where an elephant was standing. They were placed within arm’s reach of the animal and were allowed to explore the elephant by just touching what was within their reach. They were not allowed to step closer or move side to side.

One subject was placed at the tail, the second along the side, and the third subject at the front. From what they were able to touch, their task was to describe what kind of an animal they were experiencing.

The parable has been used to show with humor how humans are quite willing to reach conclusions based on very limited information, and this is where my version takes a fitness twist.

The subject at the rear of the elephant reached out into the space in front of him. His arms moved cautiously like someone entering a dark room, groping for a light switch. Then it happened: the back of his hand bumped into what seemed to be a heavy, flesh-covered rope. He was able to grab this rope and realized it was hanging down from somewhere above his head. His head snapped back and he quickly jerked his hands away as if he had just touched a hot stove.

Excitedly, he blurted out, “This is a big snake! I just touched the tail! He must be resting on a tree limb. Big snake. Big snake.” His nostrils flared as a very strong odor raced into his head. Something had just pooped, and he hoped that he wasn’t responsible.

The subject along the elephant’s side reached forward as directed and found a massive flesh wall, and from where he stood, it seemed endless. And when he pushed against it with all of his might, it didn’t move.

He pulled his hands away, and with a confused look on his face he pronounced, “I don’t know what this is. All I know is that it’s big, and from where I stand I don’t know how big. Without knowing the height and length and the structure of the head and tail, I would be just guessing. I’m sorry, I can’t help you.”

The last subject standing at the front of the elephant had a similar experience. His searching hands found a large tube that was too big to be a tail. What could it be? As his hand moved sideways from his new find, he hit a very hard object that had a soft point and seemed to recede backward toward the animal. He cocked his head like a dog searching for meaning in his master’s words as he reached out again to touch the tube and then the soft-pointed hard bone.

He dropped his head in deep thought. After several seconds he calmly stated, “I have no idea. The large tube and pointy bone are certainly very interesting, but I need a lot more information before I can even guess.” He, too, apologized for not being of more help.

What’s the Point?

The subjects at the front and side of the elephant would have made good scientists. They clearly understood that from their very limited data, there was no basis for them to predict the totality of the animal before them, and any attempt to do so would be irresponsible.

However, the subject at the tail of the elephant represents bad science and those willing to use bad science to promote their own agenda. With more investigation, the large snake’s tail hanging from a tree limb becomes something quite different: an elephant.

Much of what we in the fitness and nutrition world think we know today is a result of bad science. Ideas are promoted as truth with the intent to profit from a motivated and yet ill-informed public. So question the diet or workout program you’re about to embark upon. Is it a real elephant or just an imaginary snake? Hint: until proven otherwise, it is closer to snake than elephant.

Research Your Workouts and Diets Before Starting

It is appropriate that the subject at the rear of the elephant is standing in elephant poop. What they are promoting is worth just that. By doing a little more research regarding the workout or diet you’re considering, asking probing questions and reading opposing views, you can avoid missing the elephant and finding yourself holding just an imaginary snake tail while standing in the smelly outcome of following bad science.

No one wants to waste time, set themselves up for injury, or follow a diet that is detrimental to their health, but in the fitness world it happens all the time, albeit with good intentions. Scientific research is slowly chipping away at the knowledge of what we are and how we function. We have come a long way in the last 50 years and we’ll certainly discover more of the elephant as time goes by.

So I advise my clients that the value of any fitness/nutrition idea depends on who you are, the nature of your goals, and the strength of the research behind the ideas that are attracting them. I also want them to be open-minded to and aware of opposing views so that their fitness/health knowledge continues to grow. Why? Because in the end, they are truly responsible for their own health and fitness, and quality information will determine the outcome.

What elephant? It's what you are seeking.

You can get started researching healthy eating here on the NIFS blog. Learn more about fitness and workouts here.

This blog was written by Rick Huse, NIFS Health Fitness Specialist. To find out more about Rick and the other NIFS bloggers, click here.

Ready to get started the right way? Start with a free fitness assessment by a NIFS Fitness Specialist.

Free Fitness Assessment

Topics: fitness nutrition injury prevention exercises fitness trends